
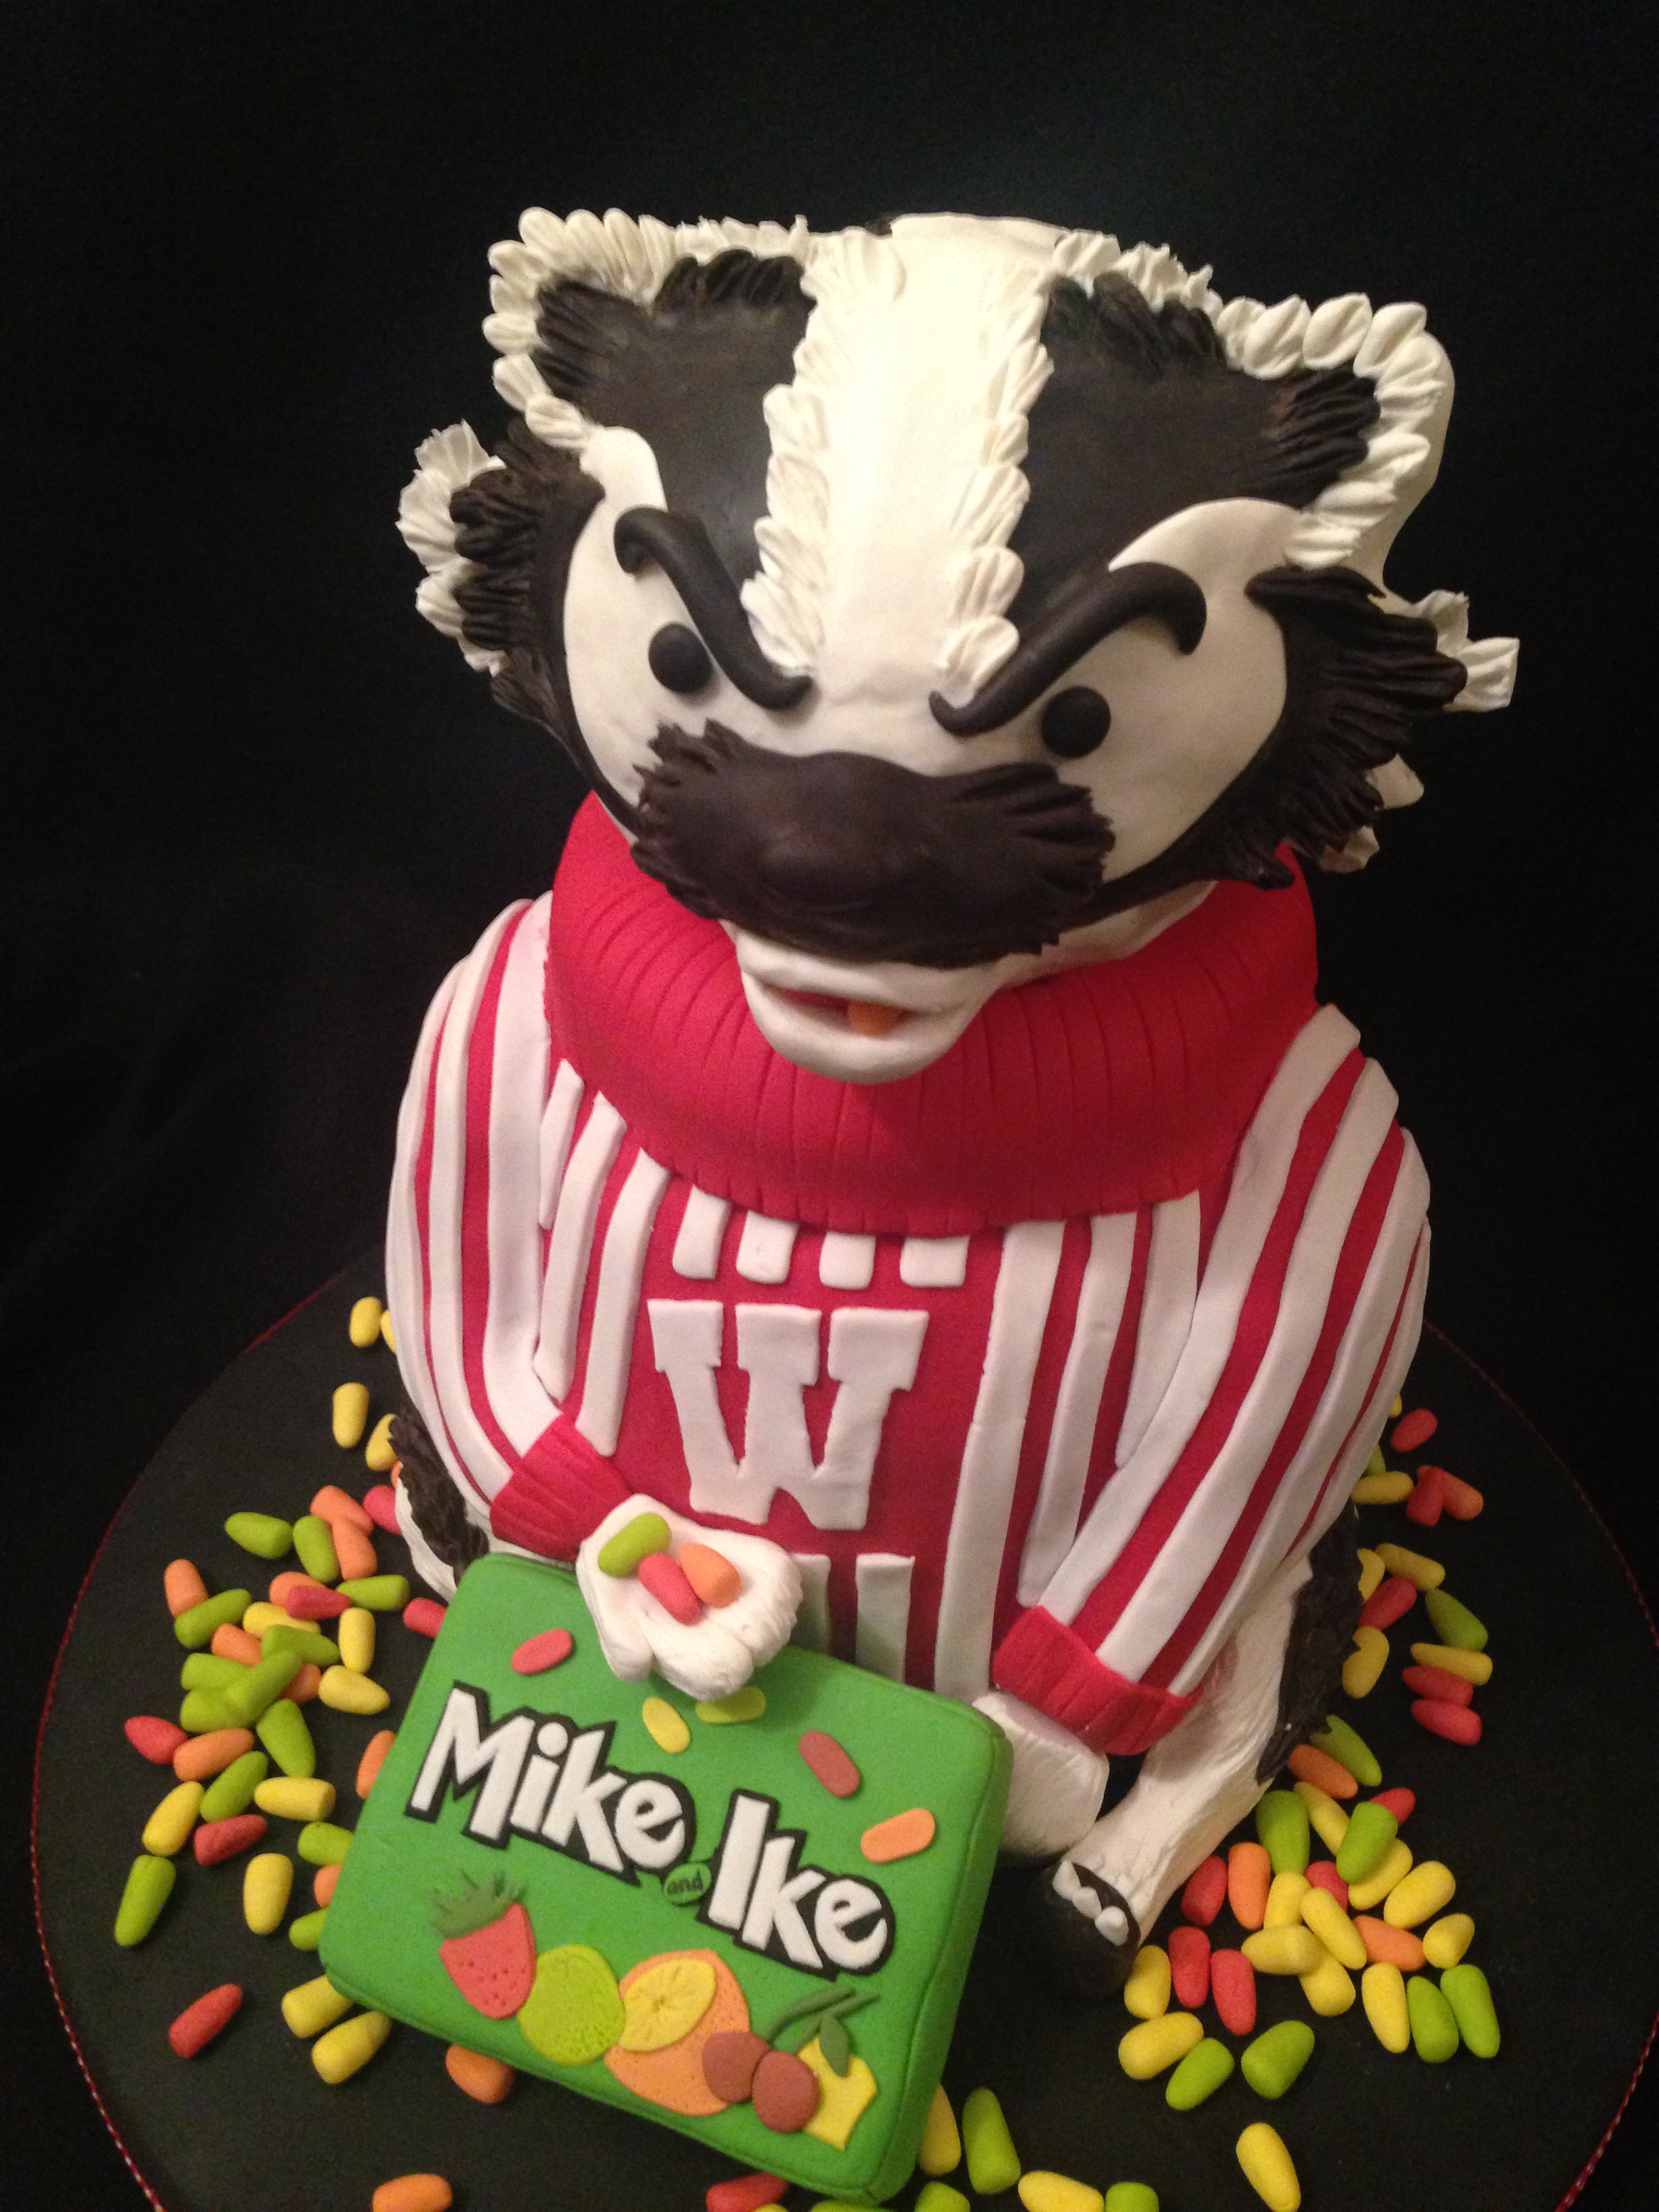
Several months ago, a friend asked me to do a groom’s cake for her daughter’s wedding. “You can do a 3D Bucky holding some Mike and Ikes, right? Great. Thanks!” She promised to send more info and then waved and went on her way.
And I stood there, frozen, with my mouth gaping. No, I do not know how to carve cakes. No, I’ve never had a cake at a public event. And no, I do not like to disappoint people, especially on their wedding day!
But then there’s that little spark inside that pushes me to try something new. “If she thinks I can do it, maybe I can,” the little spark told me. So with much trepidation (and a pep talk from friends), I nervously assented to her request.
So began the research necessary for a carved cake. What type of cake works the best? And frosting? Fondant? How do you transport it? Does it need to be kept cold? How do you attach the head? What’s the best material for making the head? How about my head? Will I lose it during this process?
Armed with google and a determined spirit, I created the following calendar:
- Two months before: answer the above questions
- One month before: sketch cake design and figure out dimensions
- Three weeks before: finalize cake design and purchase materials

- Two weeks before: begin working on the head
- One week before: bake and freeze the cake
- 3-5 days before: create gum paste extras
- 2 days before: make the cake board, thaw the cake
- 1 day before: assemble (and pray. Lots.)
Here’s how everything went down:
STEP 1: THE HEAD
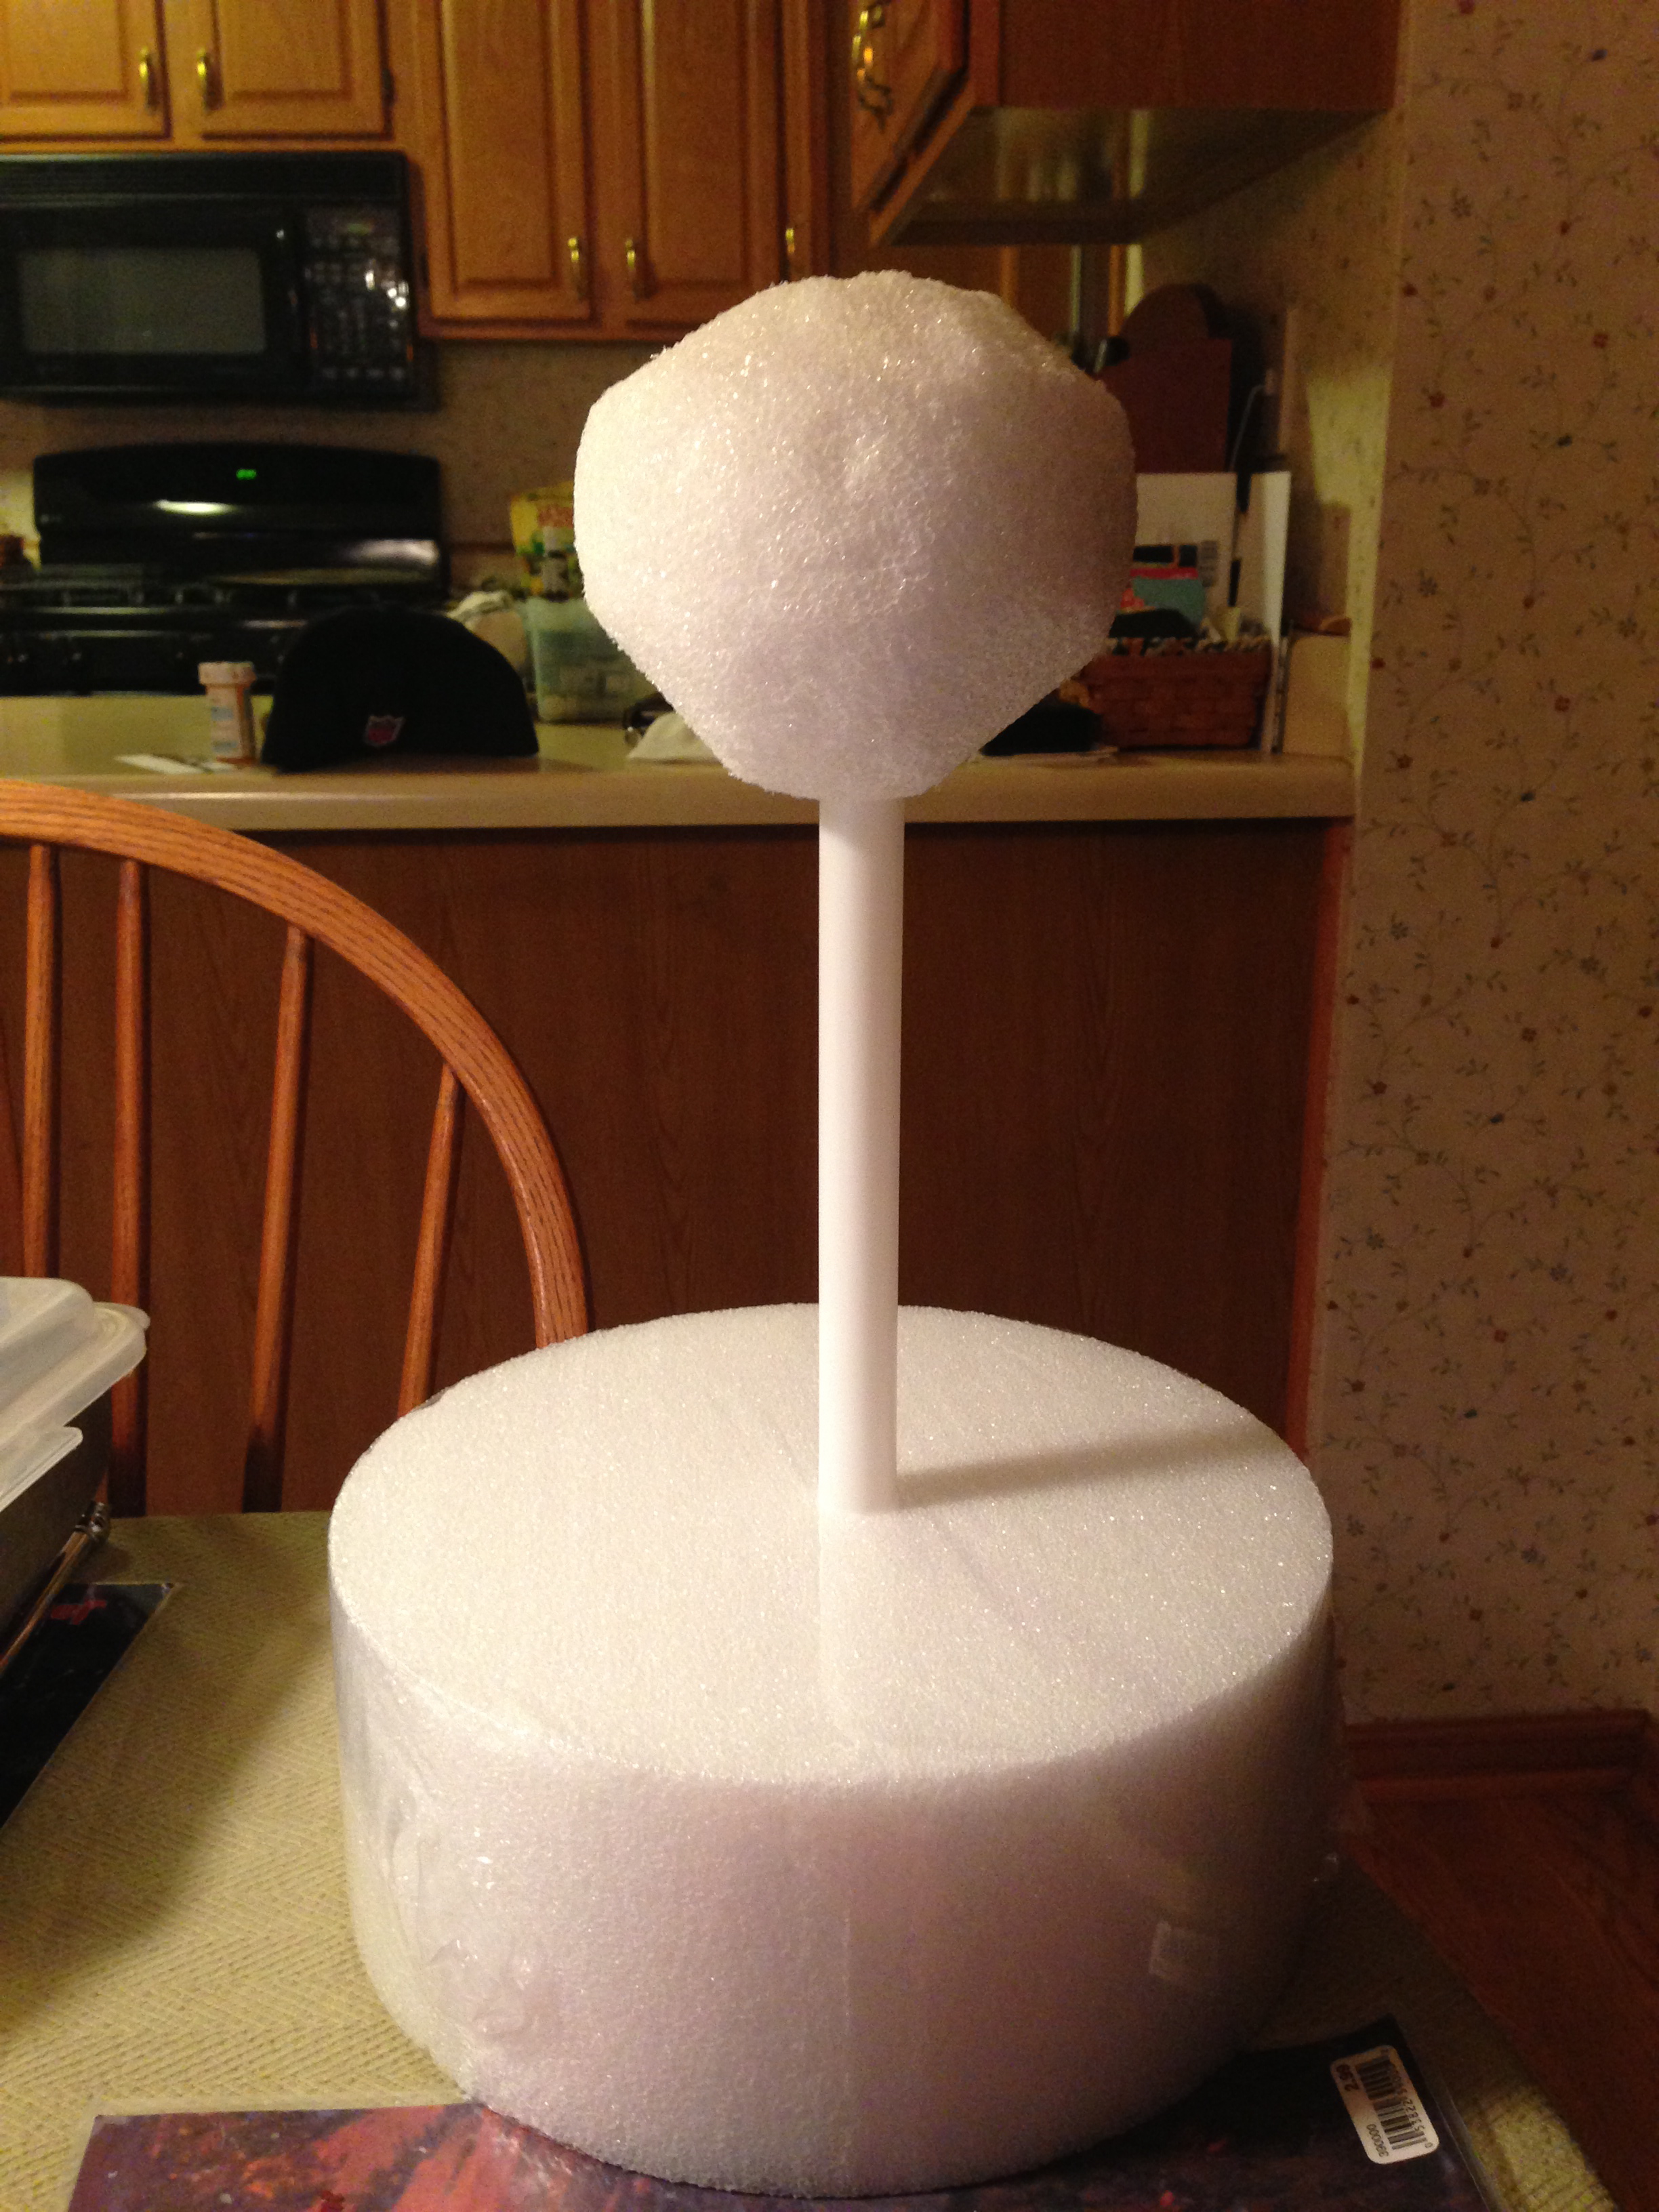
I decided to use a styrofoam base to carve the head. (Are you supposed to do that? I have no idea!) I purchased some cake pillars from a local craft store that I think are meant to help stabilize cake layers, and I shoved one of the pillars into the head and stuck the other in a large styrofoam dummy cake as the base.
After the base was formed, I began to coat the styrofoam with modeling chocolate. I’ve used modeling chocolate twice before and, let me tell you, something went awry this time. It still made a beautiful finish and was easy to work with once it was kneaded, but I think I can safely say that I gave myself tendinitis just from this one afternoon. I “knead” to learn how to do this better. Haha. 🙂 After approximately 3 hours of kneading (I wish I were joking), most of the modeling chocolate was ready to go.
The photo below shows the modeling chocolate before and after. (The “before” is the crumbly-looking block and the “after” are warm and malleable logs:)  With a pile of ready-to-use modeling chocolate by my side, I commenced Head Construction. The photos below show the progress:
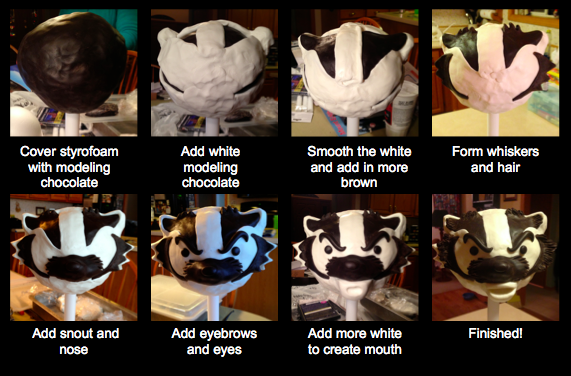
STEP 2: MIKE AND IKE BOXES
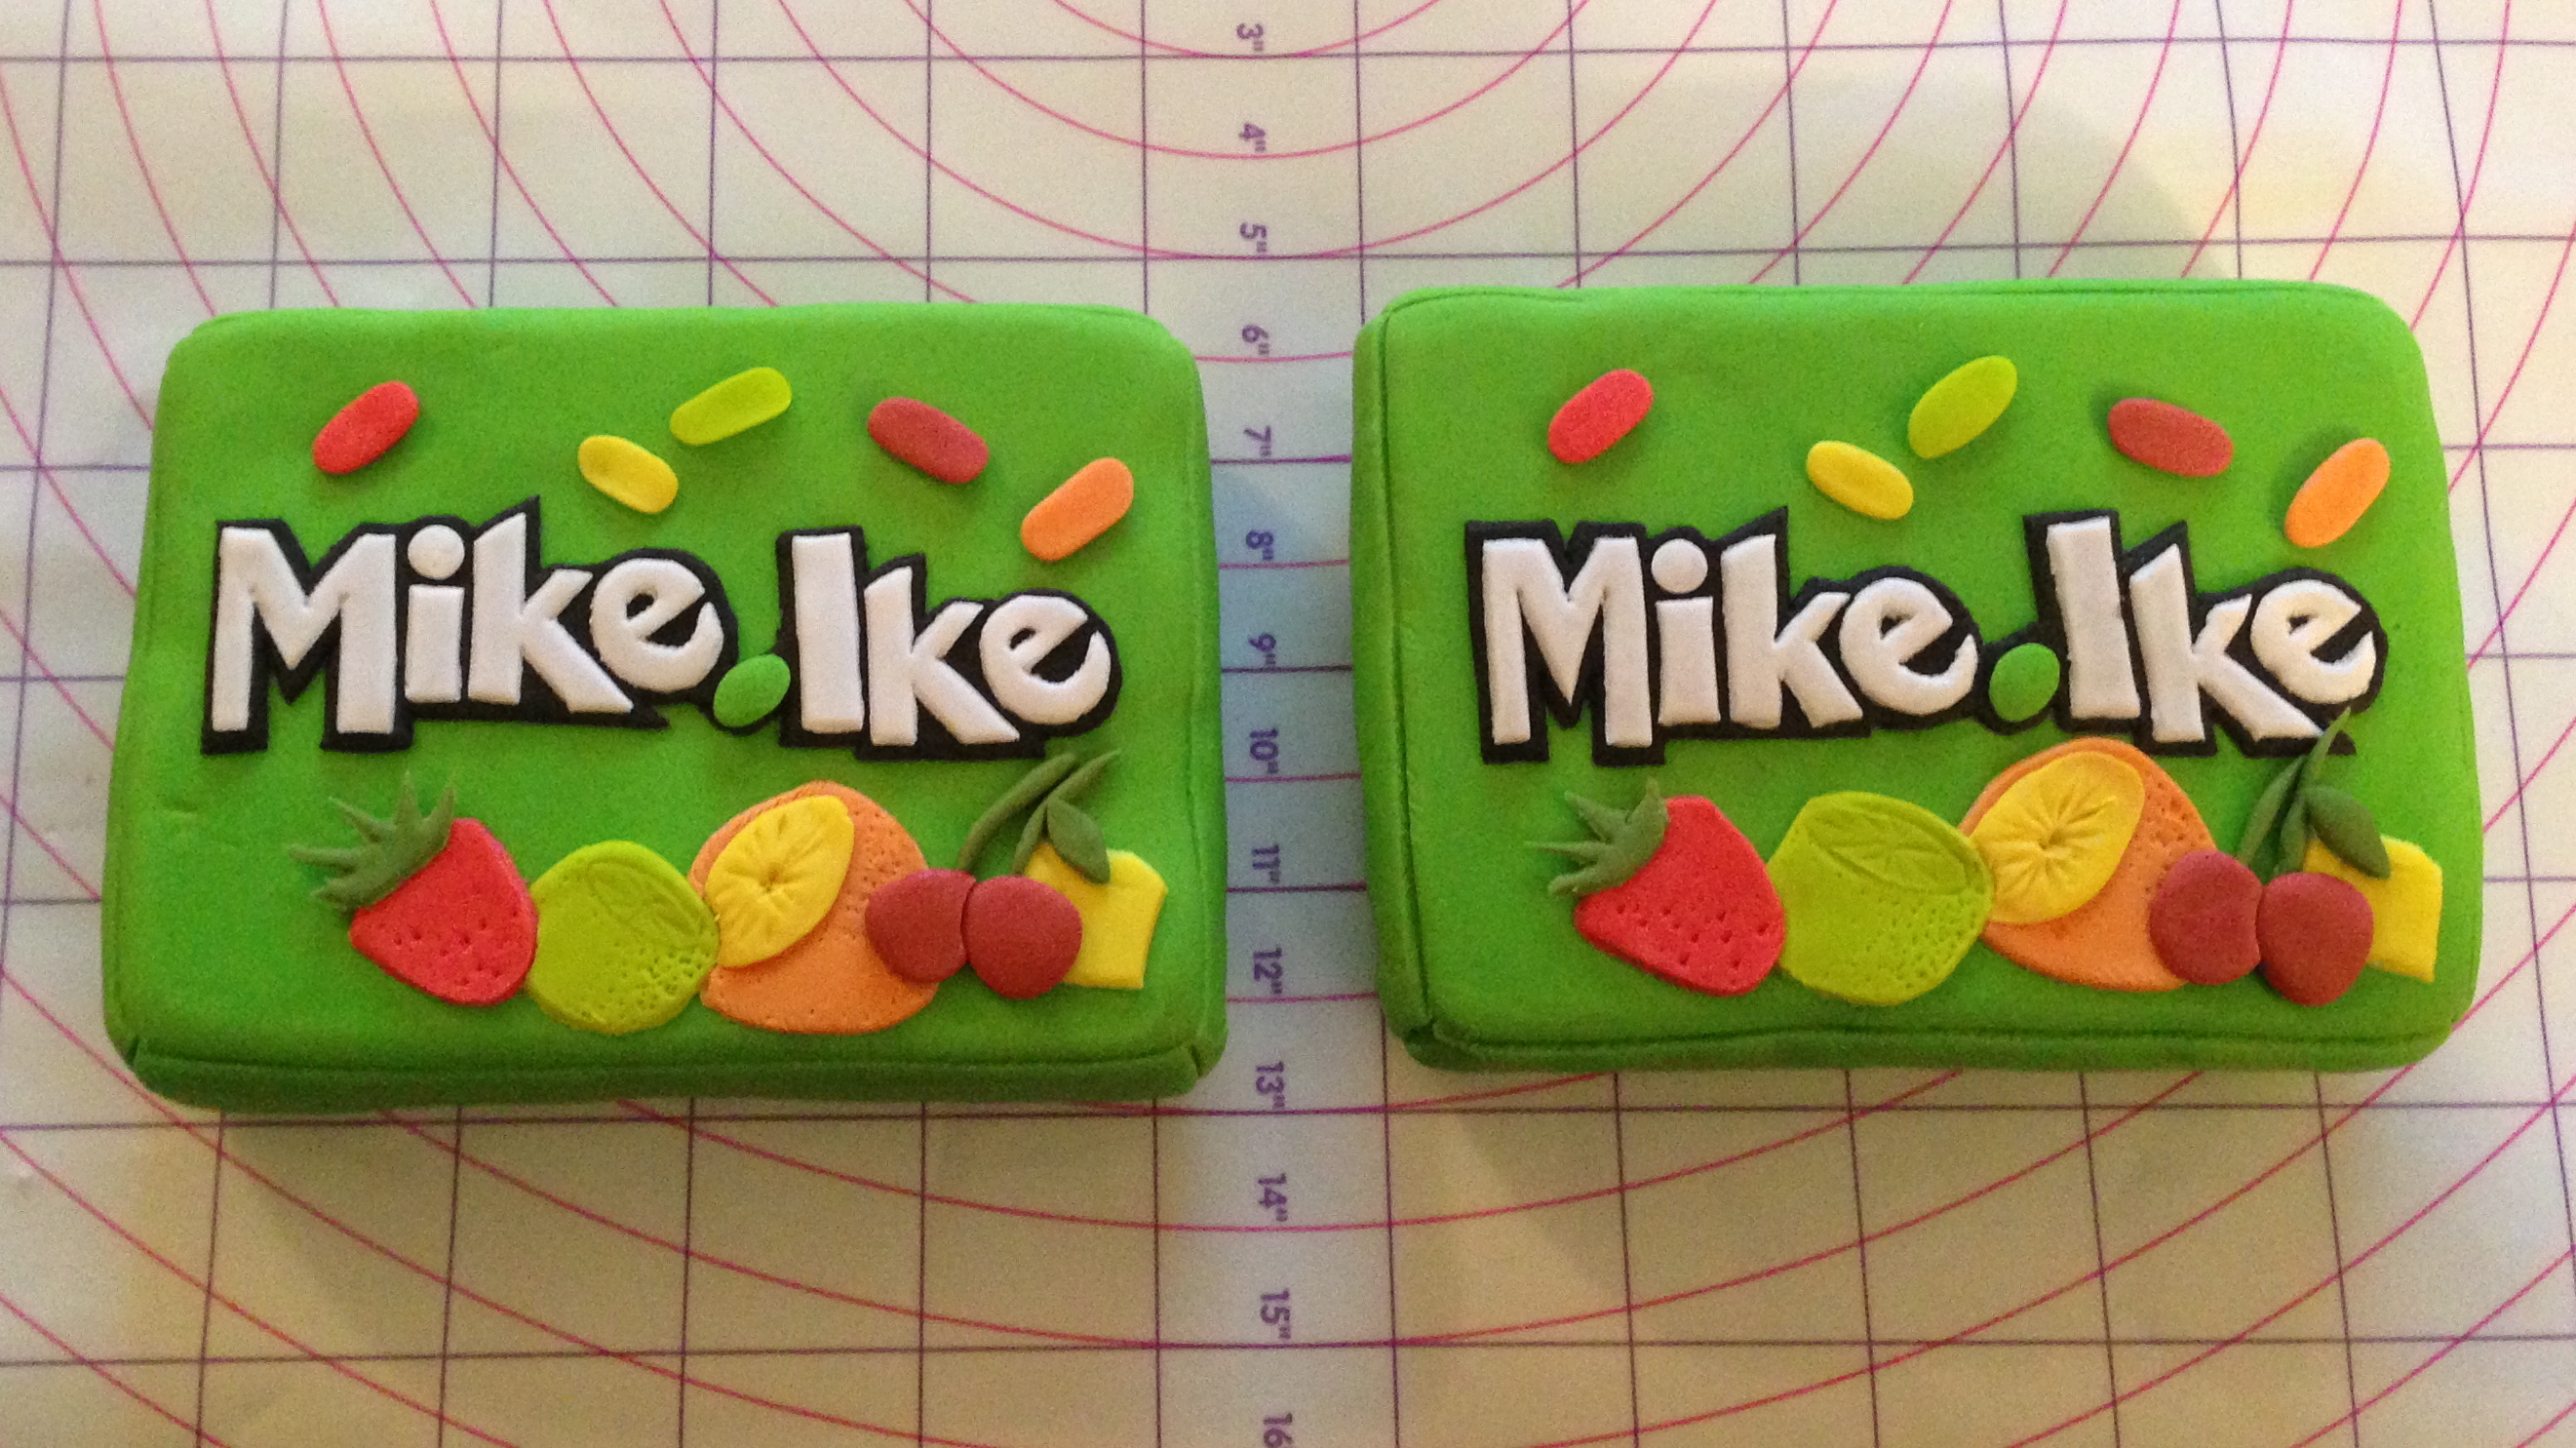
For the candy boxes, I used a piece of styrofoam and covered it in fondant. That didn’t work one bit. So I coated it in frosting, then fondant, which worked a little- but the box was lumpy and weird. So I left it as is, waited a day, and then covered the fondant with a thick-ish layer of gum paste, which I managed to sort-of flatten with the rolling pin so it was a smooth surface. That seemed to work okay, but I am certainly not that happy with the result. I cut out little pieces of colored gum paste to form the fruits, candies, and words on the box (I cut the white letters out first, and then laid them on the black and carved around them) and stuck them on with some gum glue adhesive. Next step: let the whole thing dry for a few days, and voila!
(Oh- I only wanted one box for the final cake, but I made two, just in case. Believe me- make an extra copy of all your embellishments.)
STEP 3: THE BODY
I have no idea what I’m doing! I don’t even know what a badger is, really! And how do you carve arms on an animal- it’s not like cake can just withstand the powers of gravity without something supporting it, right?! So I decided to just make his arms close to his body and hope for the best. What follows is a series of in-progress photos. My badger ended up short and morbidly obese. ![]()
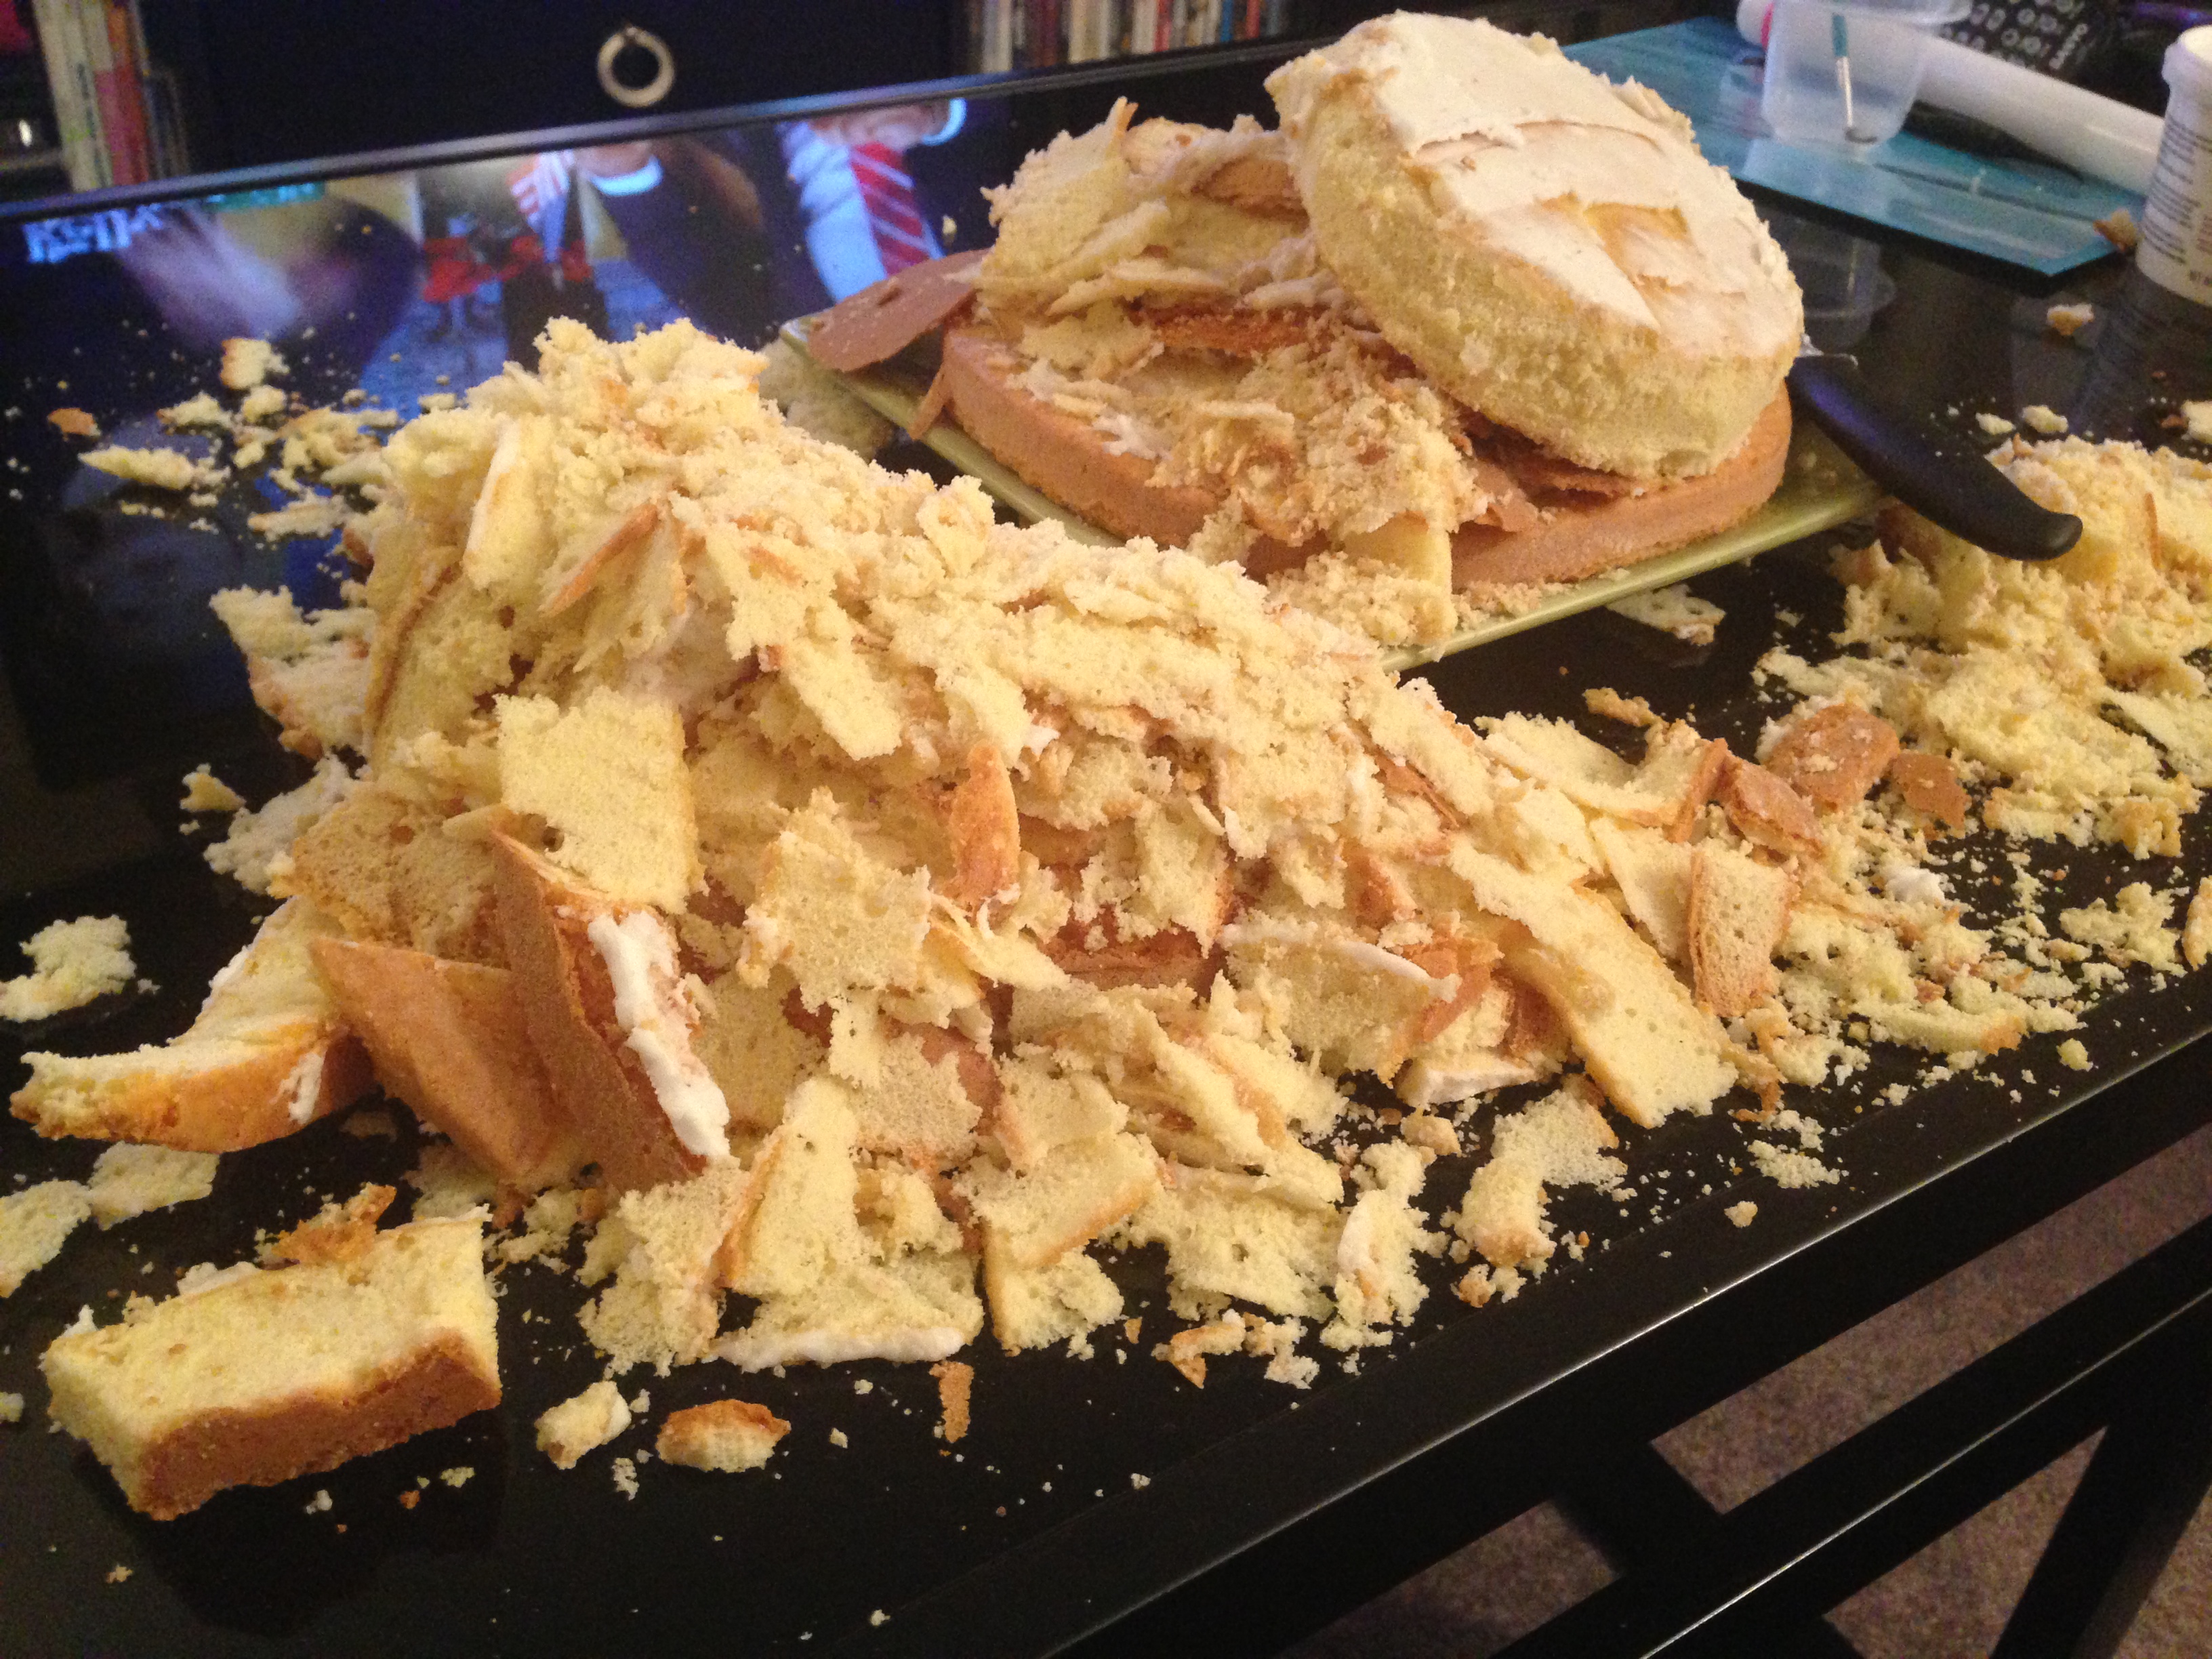
 When carving the body, repeat after me: “Little cuts. Little cuts. Little cuts.” Once you cut out the cake, it cannot be put back. Carving this body took me two hours, but I’m not sorry! The result was a coffee table that looks like this:
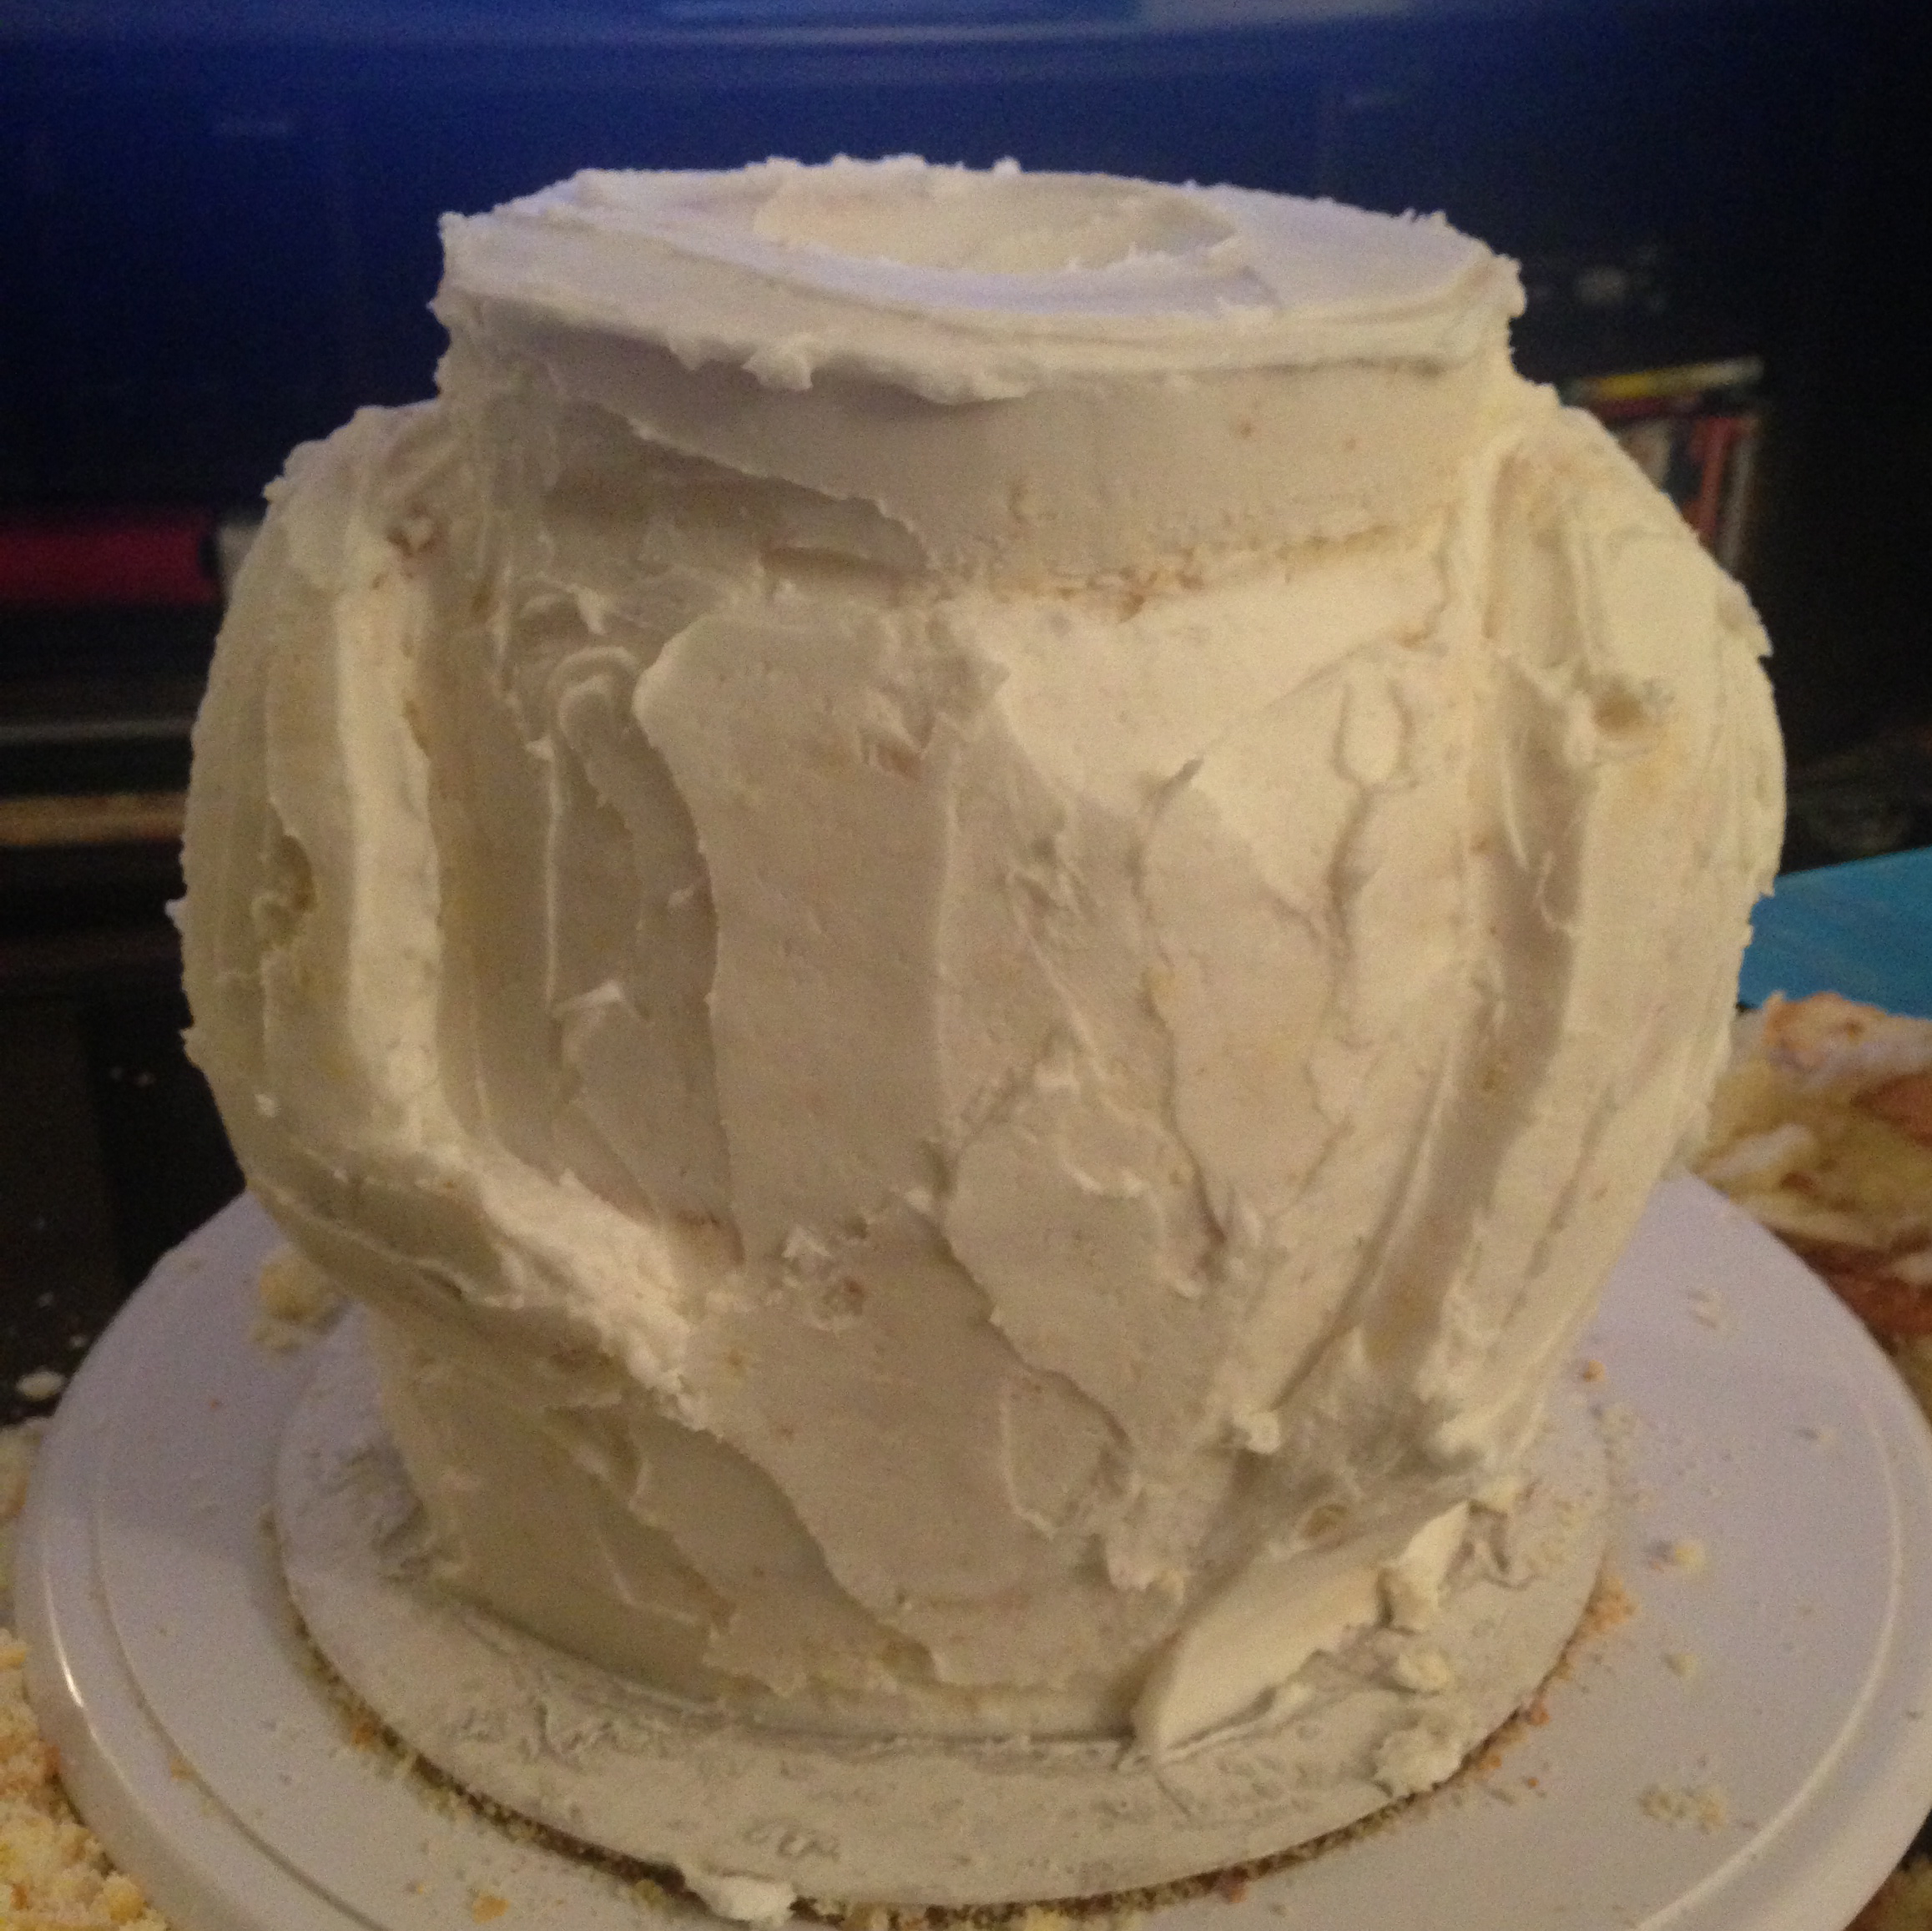
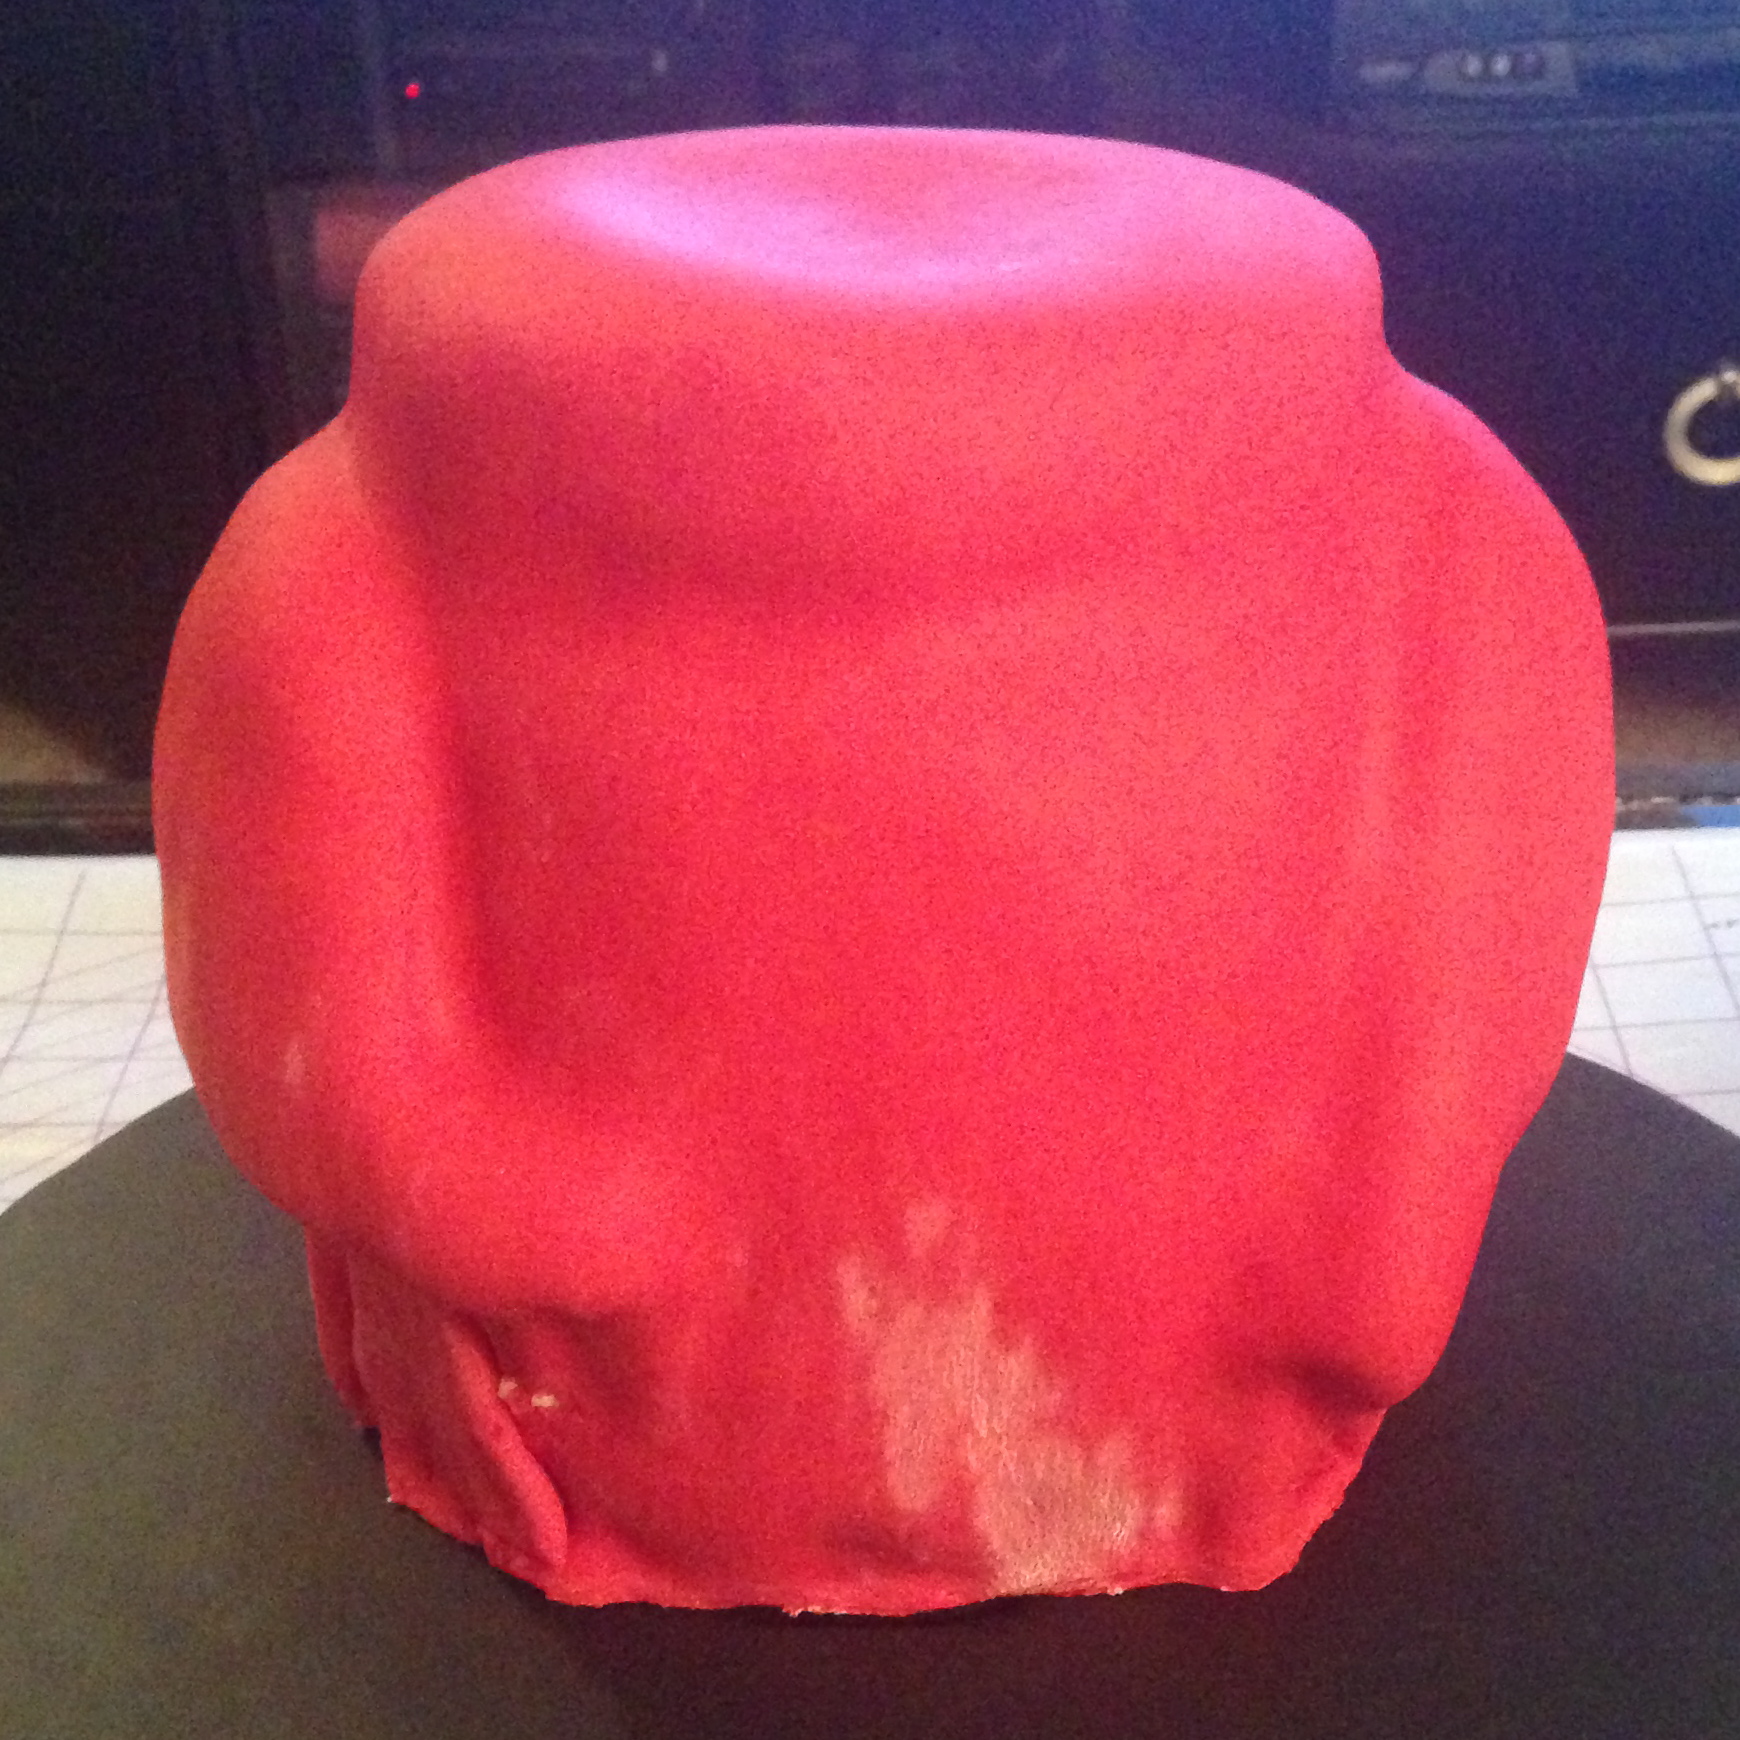
STEP 4: COVERING THE BODY
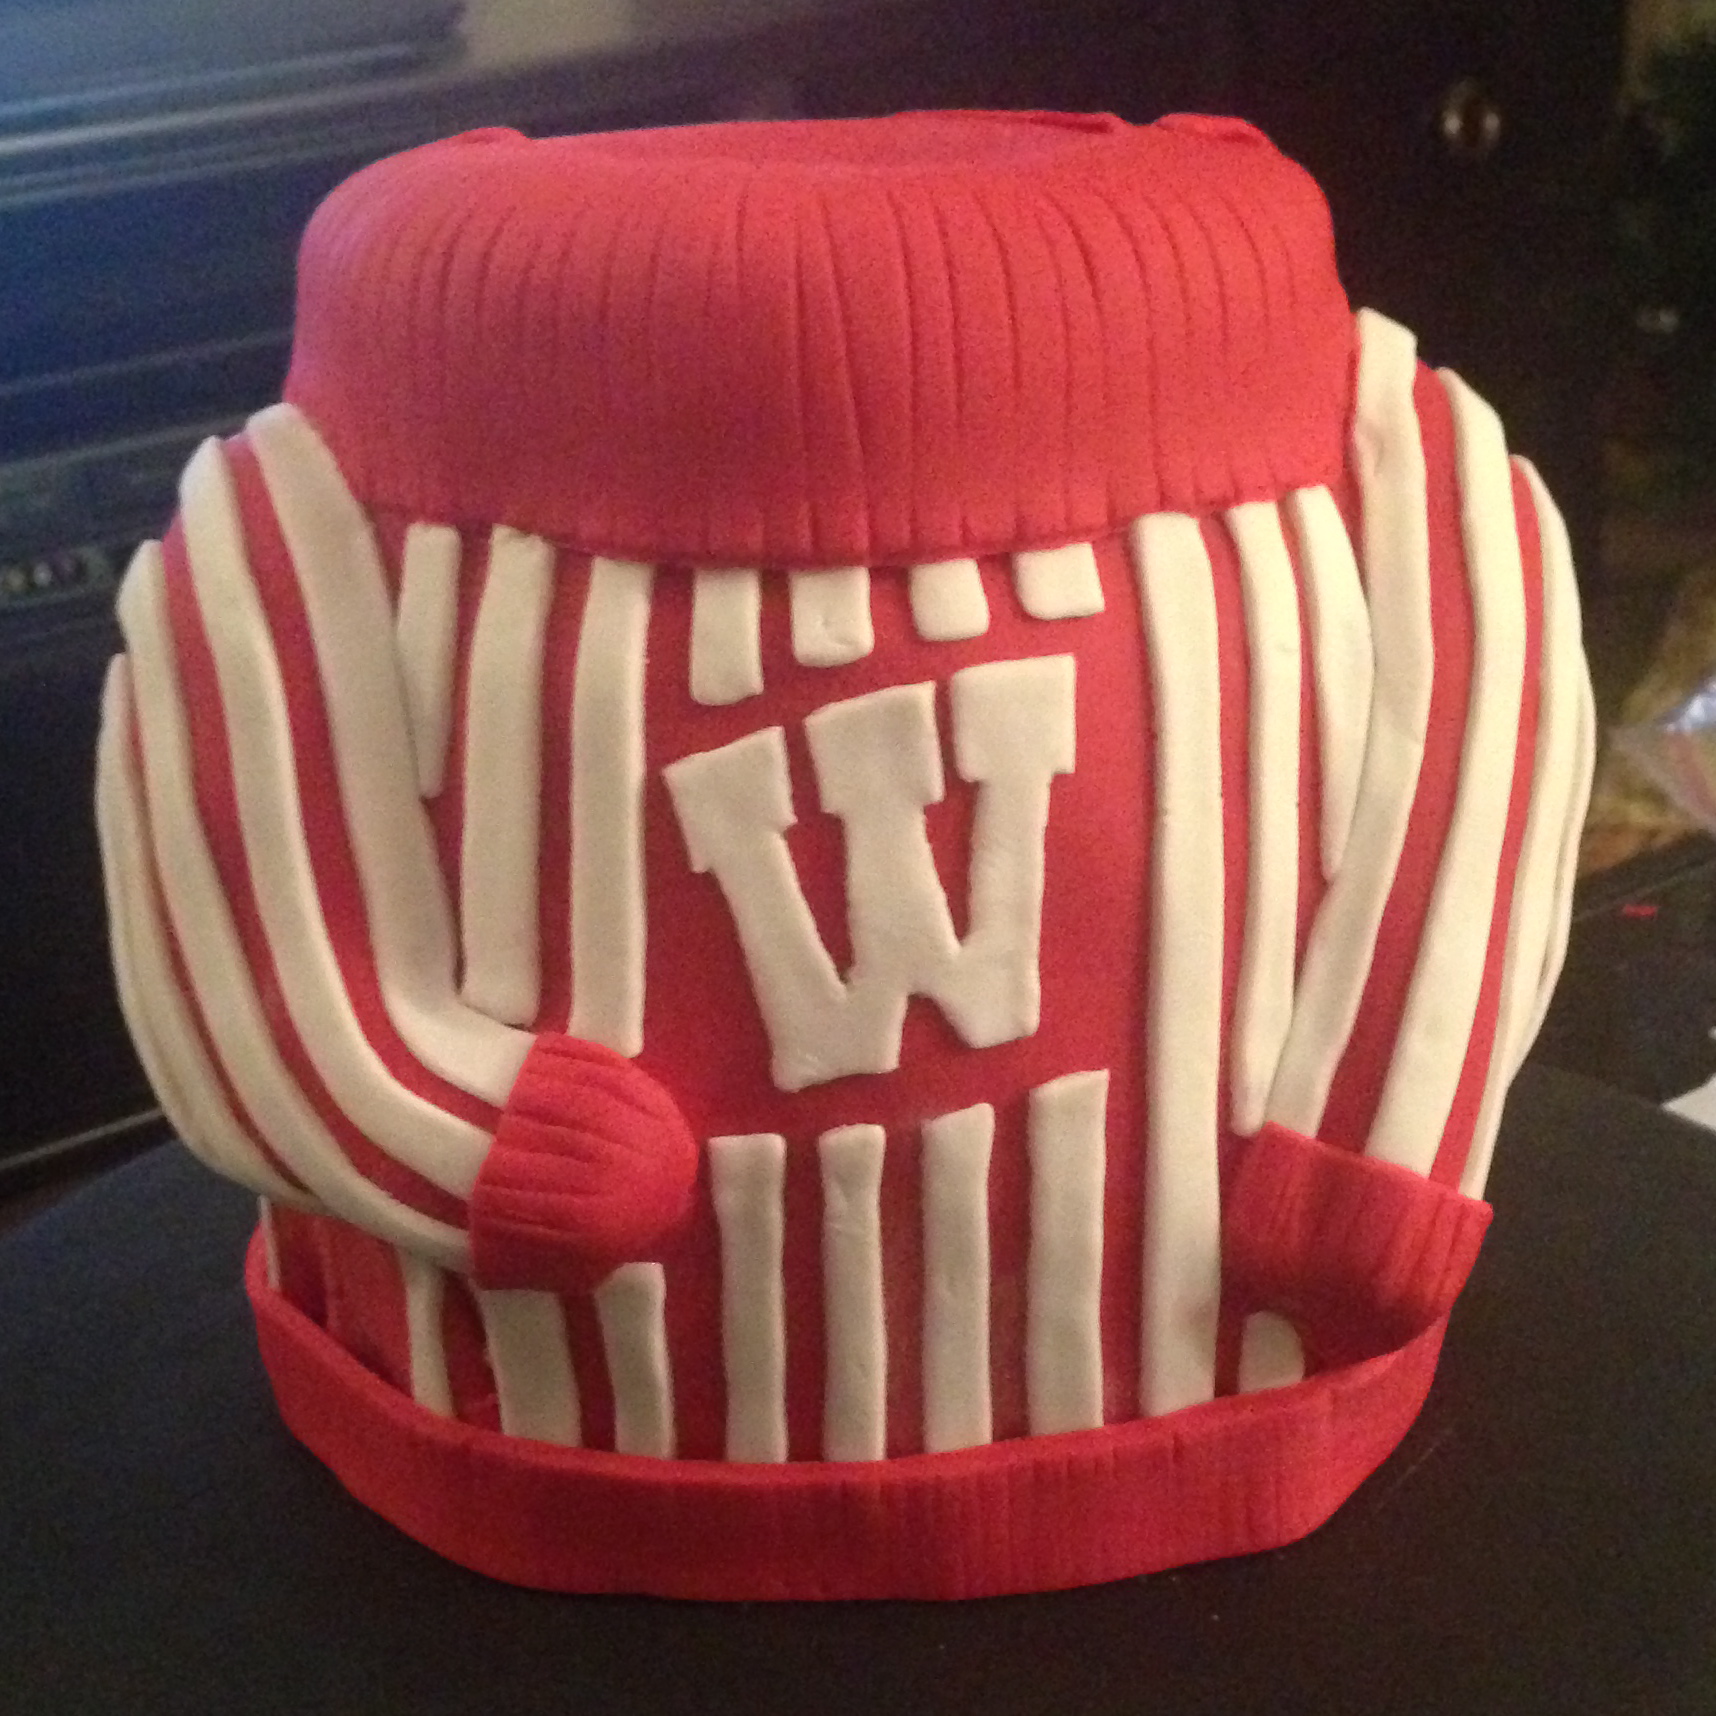
The final steps went extremely fast. Cover the carved cake in buttercream… and then fondant… and then embellish it:
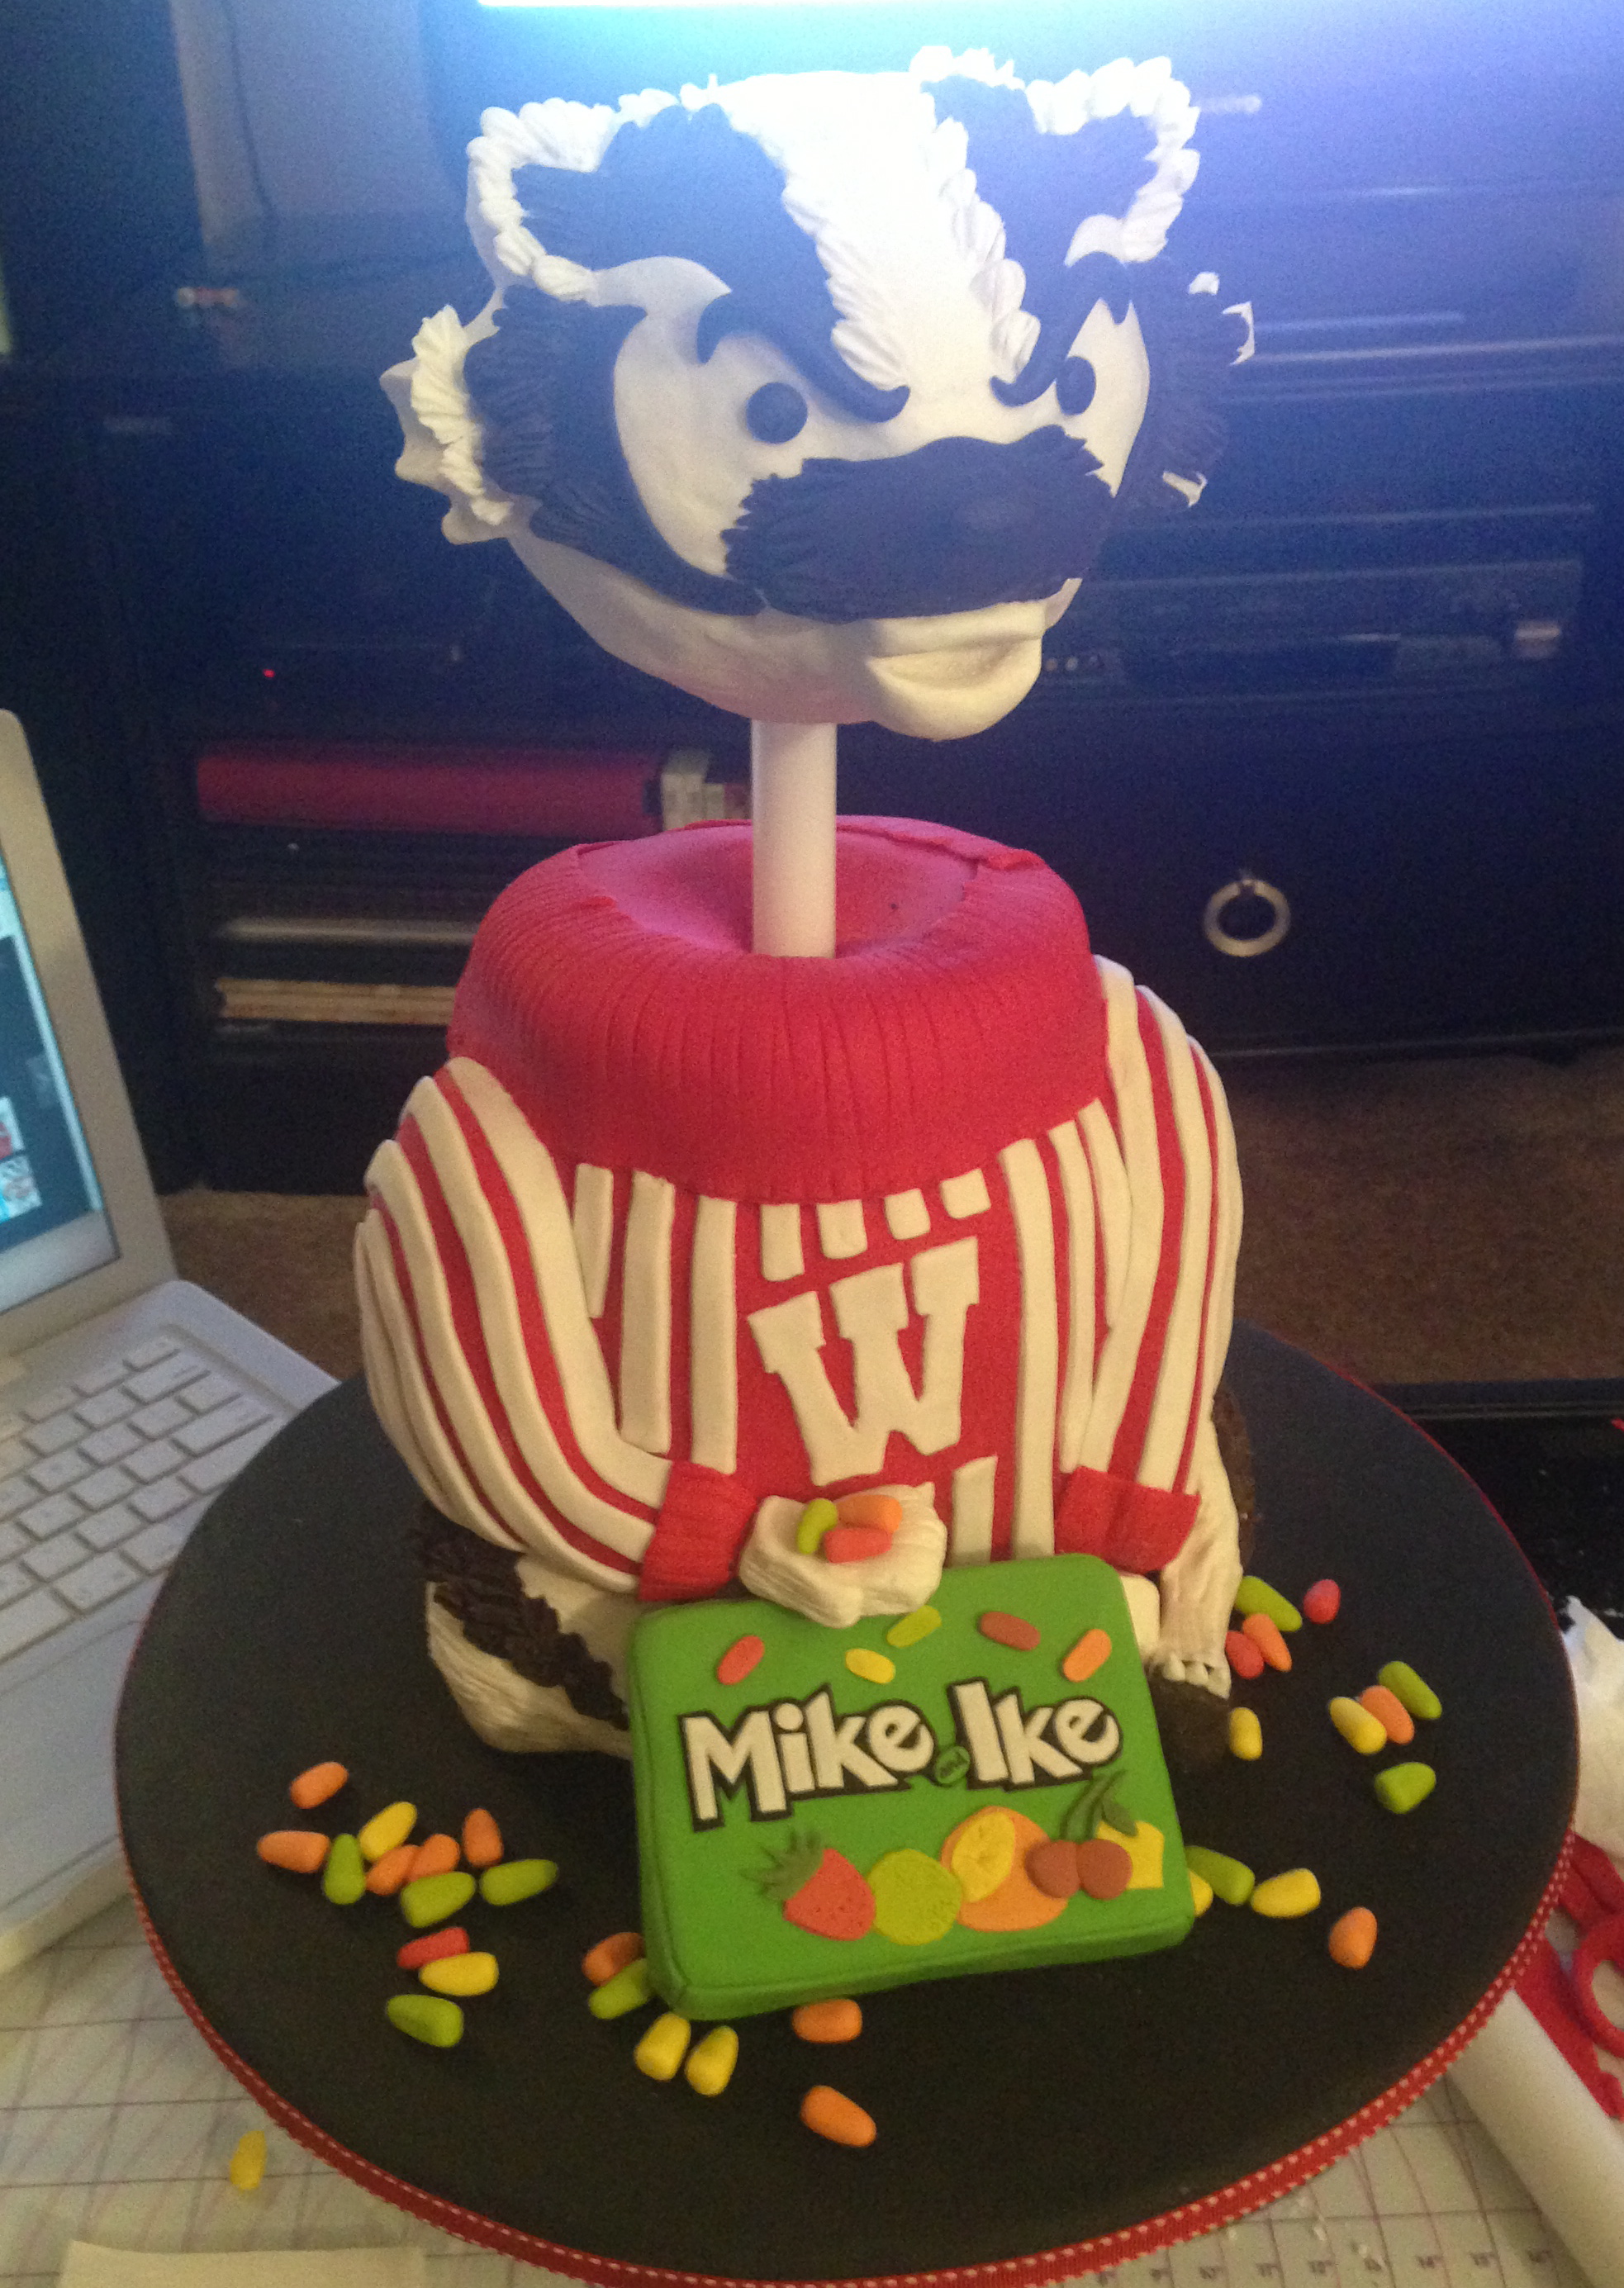
STEP 5: ADD THE HEAD
Self explanatory! 🙂
(The only thing I would suggest is this: see how Bucky wears a turtleneck? You’ll want to make sure that you carve a little dip into the top layer of cake- where the neck is- otherwise he’ll end up looking more like a giraffe than anything else.)
STEP 6: SIT BACK AND ENJOY!
I have to tell you a true story. I almost sliced off his arm. No joke! I was catching up on Season 3 of Downton Abbey and had just finished (or so I thought!) the last episode, so I went back to the carving. And suddenly, out of nowhere, it happened. WHAT?!?! I won’t spoil it for any of you, but if you’ve seen it, you can appreciate how Bucky almost became an amputee.
Thanks for checking out this post. As you can see, I still have much to learn. How do you carve cakes? Do you find pound cake to be the best? Do you have a modeling chocolate recipe or technique that does not cause immediate arthritis? 🙂

I feel bad you went through so much anxiety to make this unbelievable cake that everyone oooed and ahhhed over! The Wisconsin crew especially enjoyed your efforts…but no more than my daughter and her now husband. I thank you – you are incredibly talented.
Janet
LikeLike
Don’t feel bad! I loved doing it… I just didn’t want to disappoint! 🙂 I’m a perfectionist; it’s my calling in life to worry over the little details! 🙂
LikeLike
This is so awesome Kathryn! You are so talented in so many ways!
LikeLike
Thanks, Marie! You’re very kind! Thanks for checking out the blog!
LikeLike
On, Wisconsin! So awesome!
LikeLike
Wisconsin: a football team we can agree over! 🙂
LikeLike
^ I don’t know why I said that; I don’t even like football.
LikeLike
I am the lucky groom who almost fell on the floor when this cake was rolled out. Not only did it look amazing, the pictures don’t give it justice, but it tasted twice as good. My family, friends, and I were all completely amazed by this cake. Kathryn, you did an amazing job and I can’t even begin to tell you how much joy it brought to me, my wife (who had the idea to ask for it), and my fellow badgers. Thank you so much. On Wisconsin!
P.S. Bucky’s head is in our freezer!
LikeLike
Whew! If you approved, that makes me happy! 🙂 I’m so happy you liked the cake- I have many friends who went there, so I’ve got a pretty good feeling for how beloved Bucky is! I wanted to do him justice. 🙂 I’m glad you approved. Congratulations on your wedding, too- I heard it was stunning.
LikeLike
Echoing Janet and my Ken’s comments, that cake was so amazing. And delicious. You did a phenomenal job.
Mary (sister of the groom)
LikeLike
Thanks so much, Mary! It means a lot that you say that! I was so worried about it staying together once it left my sight- I’m glad everything worked out and his head stayed on, etc. 🙂
LikeLike
I was going to ask, would you mind if I submitted this picture (and the process) to the Sunday Sweets (the cool/good/awesome cakes that are praised! http://www.cakewrecks.com/home/tag/sunday-sweets) at Cake Wrecks (http://www.cakewrecks.com/). I know Jen usually focuses on pro bakeries, but she’s included home/hobby bakers before too, and I would love to submit Bucky to her to widen the exposure! But only if you feel comfortable doing so, and I can submit as much (this link, the picture, etc.) or as little (the picture and the brief story of how Bucky came to be).
Mary
LikeLike
Wow! That is an awesome vote of confidence! 🙂 I am hoping to finish updating my “Outtakes” section and a few other things these next few weeks, and then I’d absolutely love the extra exposure! You’re very kind!
LikeLike
Kathryn, I’m the groom’s Mom,. I would also like to say that your cake was totally awesome. I am still amazed that it was not done by a professional bakery. You are truly a talented person and after seeing all the details on how you put it together I can only say Thank You for making my son so happy. It truly was one of the highlights of the evening when they brought it out.
LikeLike
Hi Kathy! I’m happy you all liked the cake! I was honored to be able to participate in someone’s very special day!
LikeLike