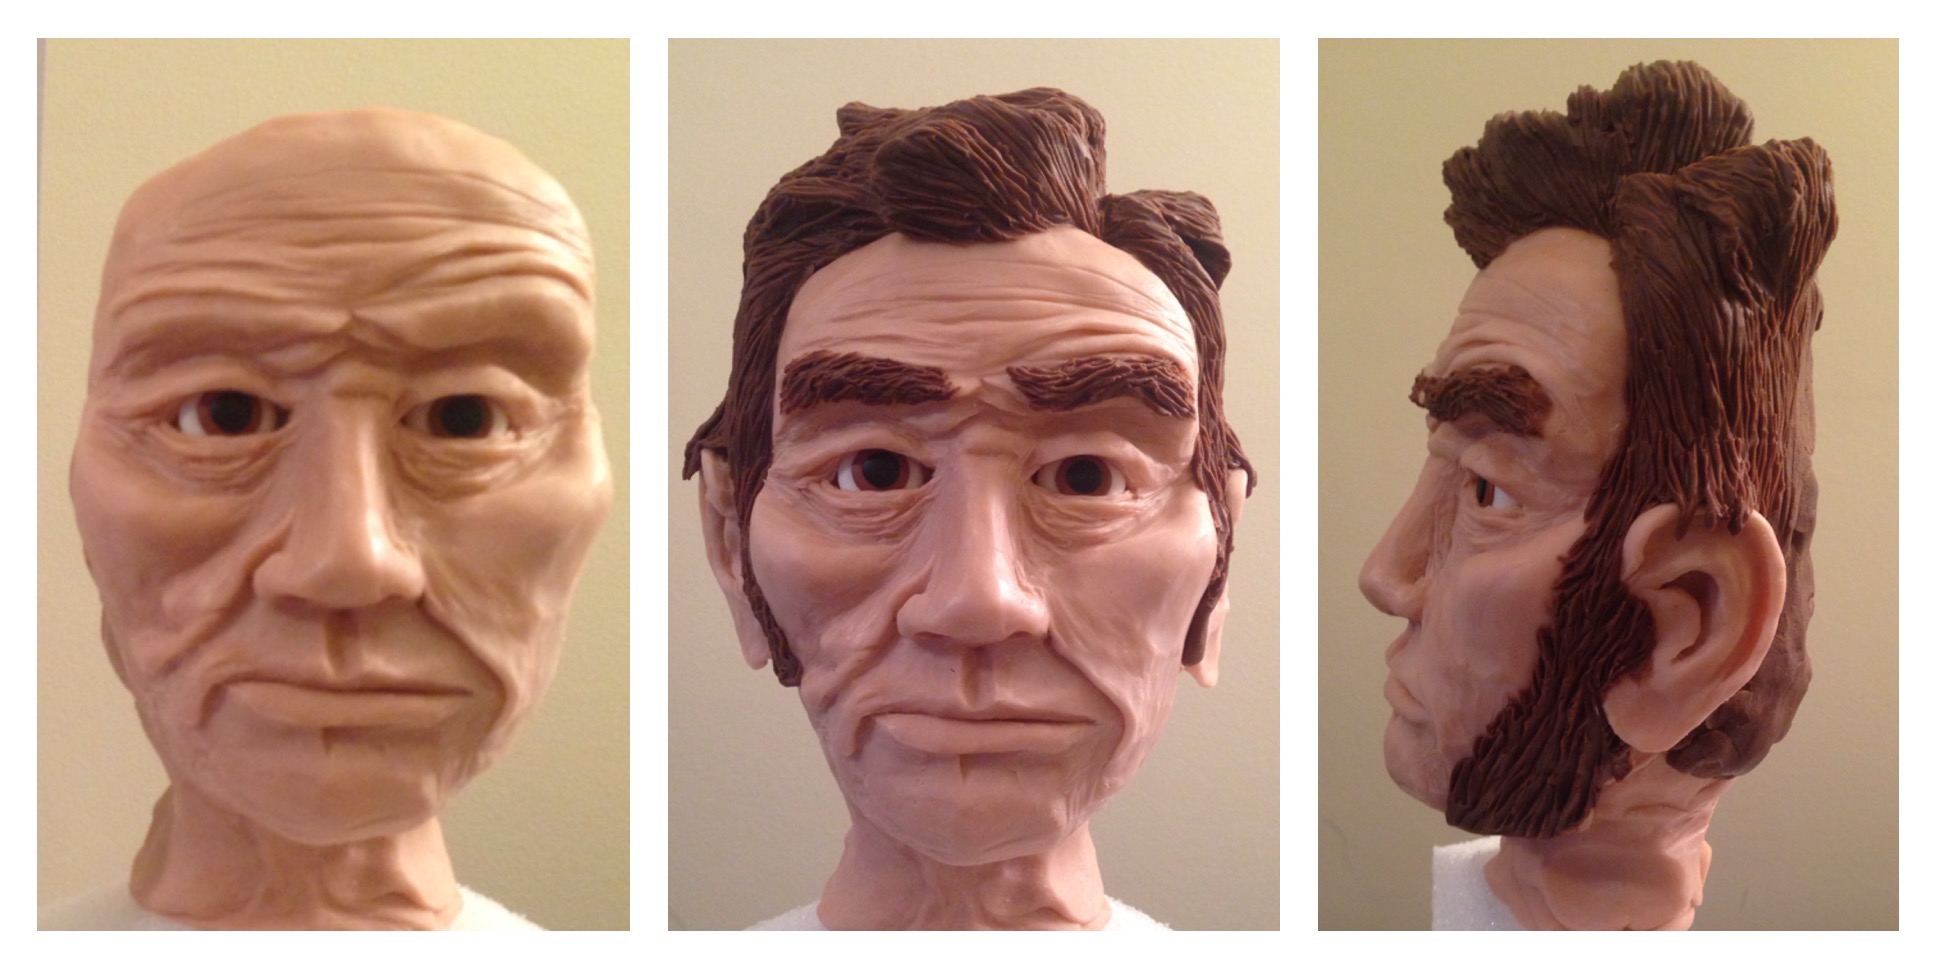
“You made this? Whoa, good job!” he said. I stared back, eyes wide, and attempted to process those words. Unfortunately, after what was probably far too long a pause, all my addled brain could come up with as a response was, “Um…well…good job playing hockey!” The last words came tumbling out. A very small corner of my brain screamed a warning, “Lame! Lame! Lame!” but the words slid out unimpeded.
An inward sigh. Alright, so perhaps my meeting with Chicago Blackhawks Captain Jonathan Toews didn’t go quite according to plan. But he was kind enough to sign a photo of the other Blackhawks cake I made for WGN last spring. In fact, I was able to meet many of the players that night and all were incredibly kind and gracious. Their reputation for being accessible, fun, and “normal” was certainly evident.
This event, “A Fetching Affair,” was at the Drake Hotel and sponsored by the Bryan and Amanda Bickell Foundation. A few months ago, I had seen an advertisement for this event, right around the time that I completed a different cake in the shape of a French Bulldog puppy. That puppy cake made me wonder if the Bickell’s foundation would like a similar cake for their fundraiser. I asked, they said yes, I made the cake, and next thing I know, I’m standing in the Drake shaking hands with the Bickells themselves. (Who couldn’t have been nicer, might I add.)
The cake was done in multiple steps. As I work full-time and have responsibilities on week-nights, I was really only able to work on this on the weekends. I will list the steps below, along with some photos of the process:
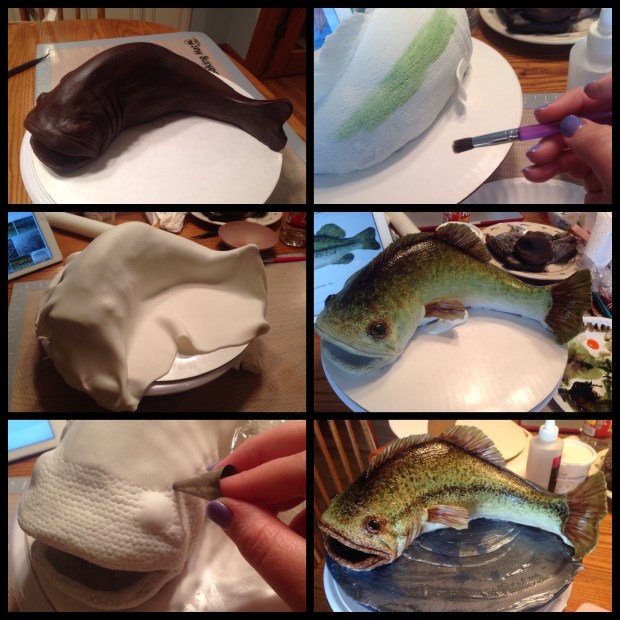
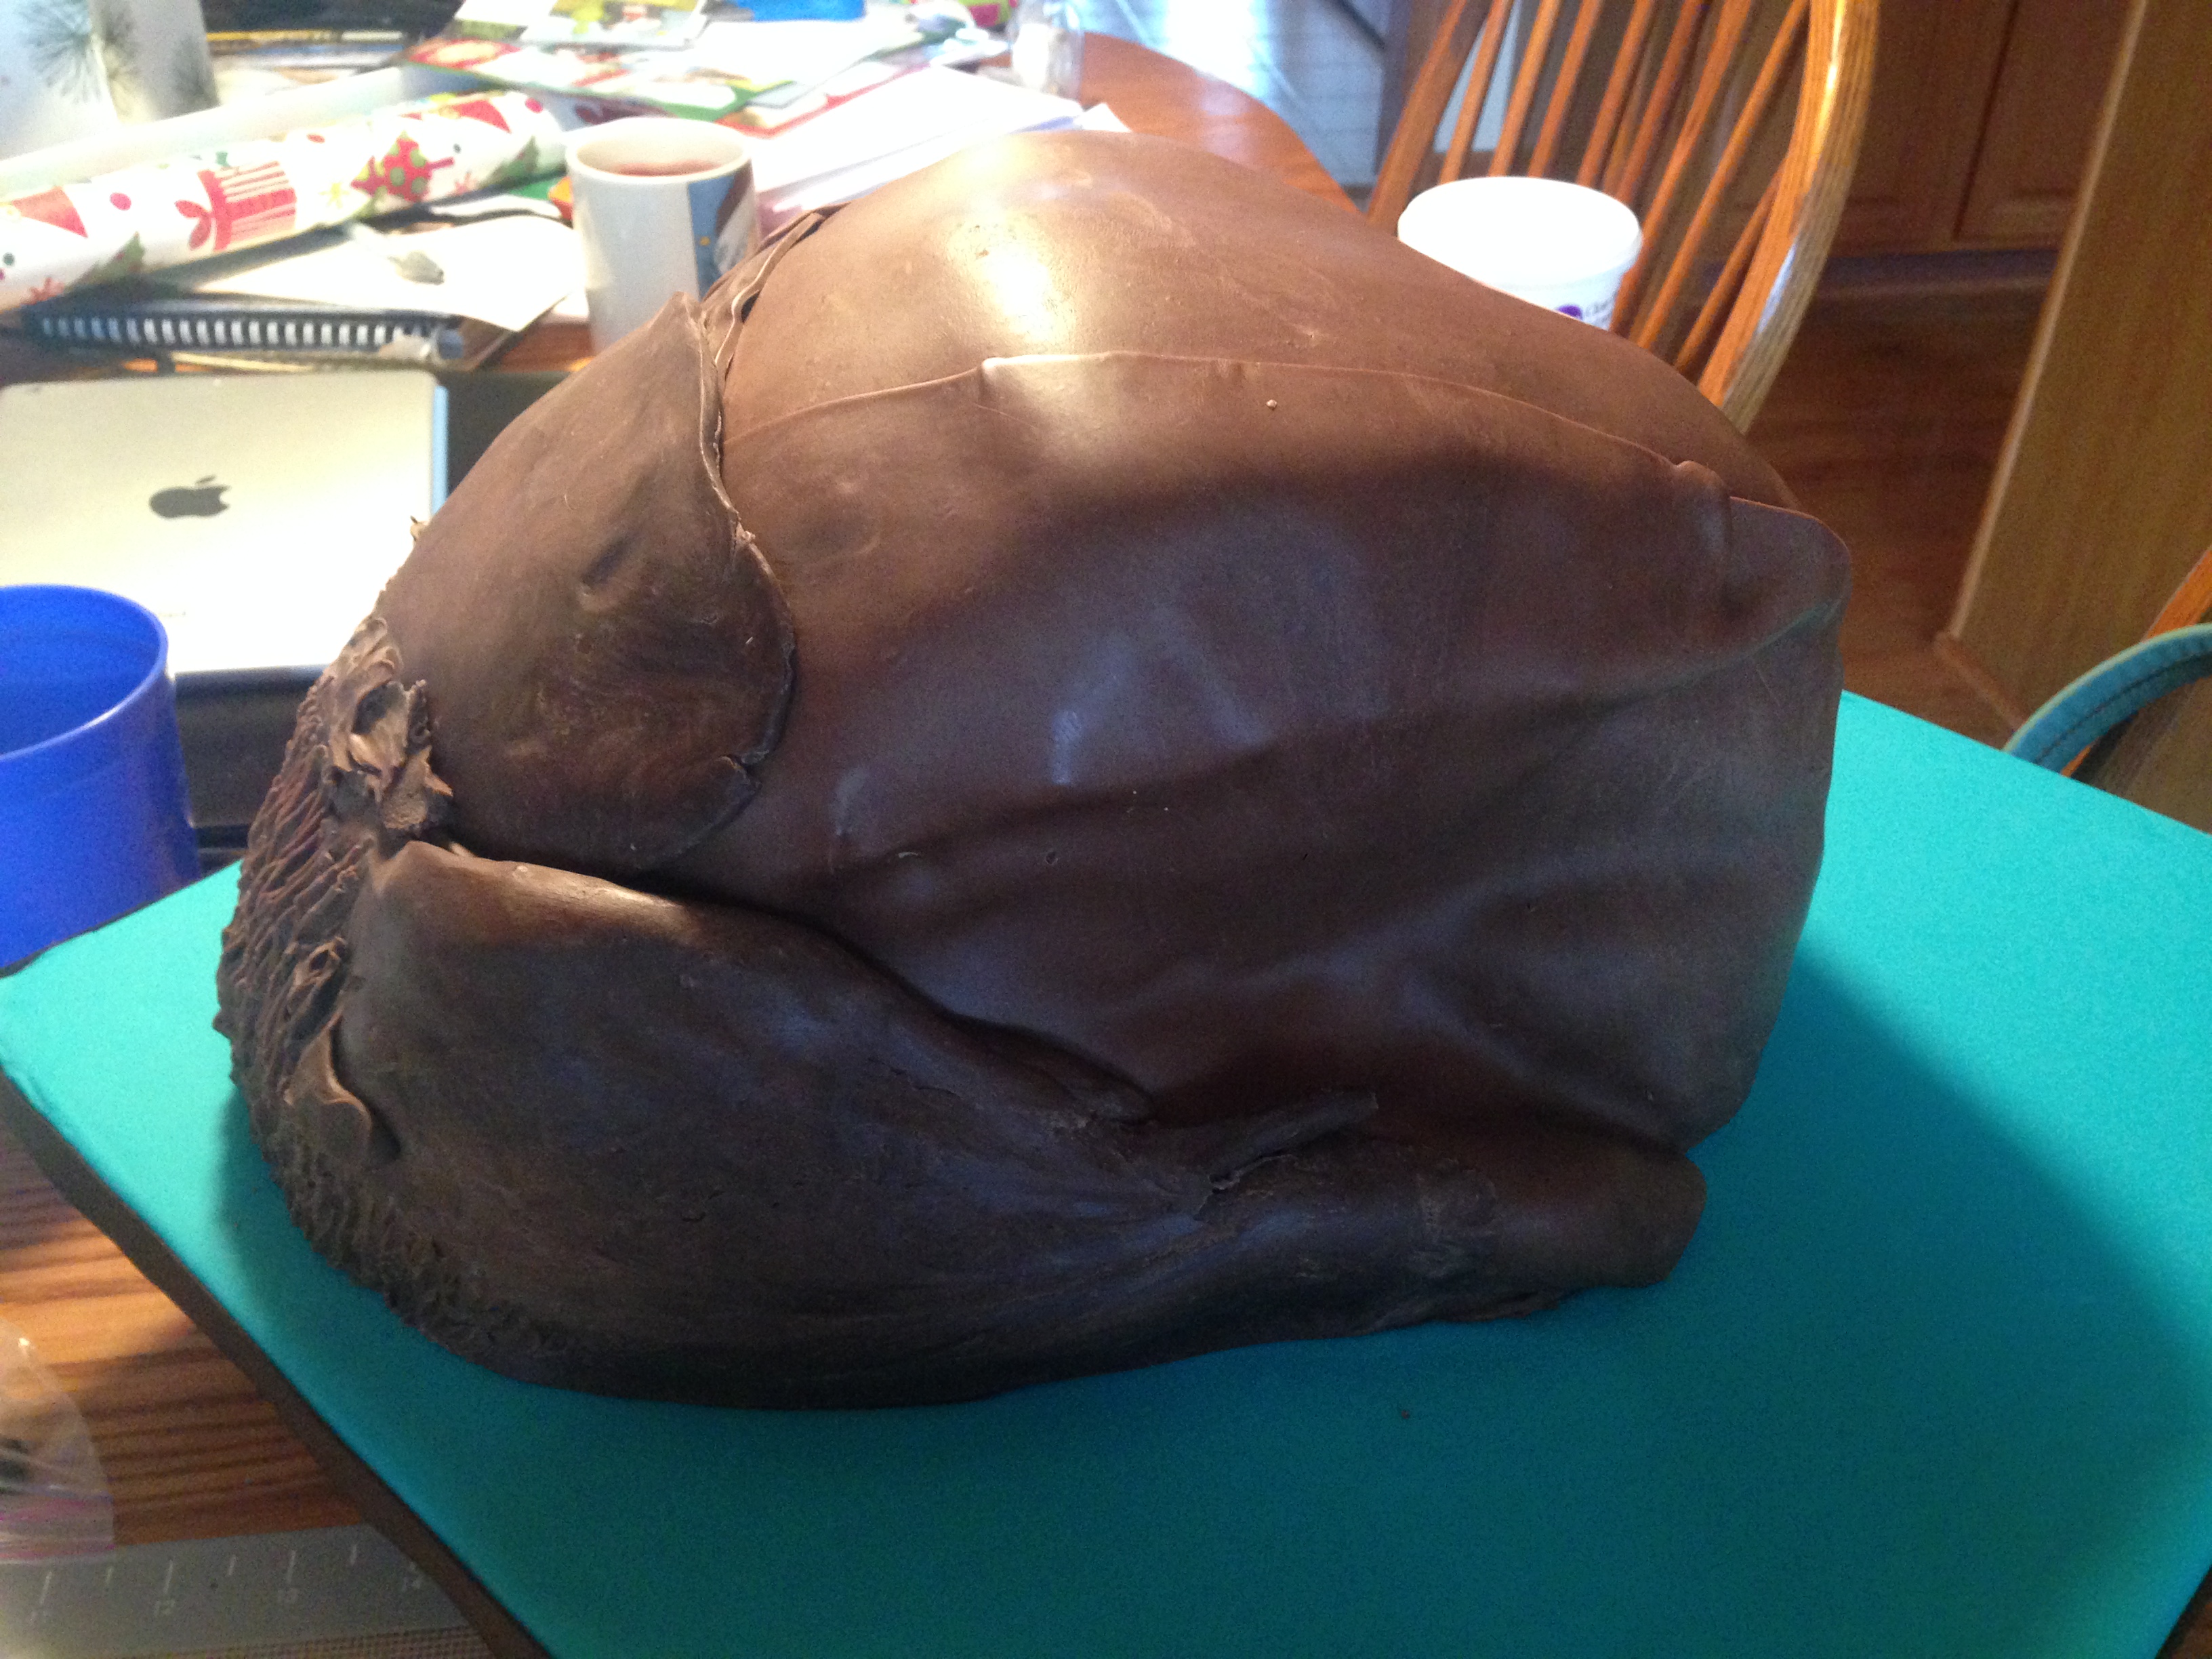
 STEP 1: Create Dog’s Head (two weeks before event)
1. Carve styrofoam ball in general shape of dog head.
2. Cover in modeling chocolate
3. Add modeling chocolate until it has the proper shape and color of your dog.
4. Add fondant eyes, tongue, and nose (fondant accepts gel colors and modeling chocolate does not. I don’t know why.)
5. Using a paintbrush, dab on black, brown, and pink luster dusts to add dimension and shading.
 STEP 2: Make the Dog’s Body (1 week before event)
1. Go to the hardware store and bother the workers with this question: “We are trying to make a life-size dog cake. Can you help us make a skeleton?
2. After they laugh at you, walk around until your parents find the appropriate wood, dowel rods, shims, screws, and general doo-hickies to make it happen. Then, have them put it together for you.
3. Make a batch of rice krispies and pile it on the bottom. (Remember to line your base with wax paper, otherwise the rice krispies will be stuck to it!)
4. Keep piling on the krispies! You have to really push them in together, squeezing from all sides. If it’s not compact, it will not be secure. This dog was 11 whole batches- and there was very little waste that I had to carve off at the end.
5. Any areas where gravity is pulling the krispies down, just shove in some modeling chocolate. It will hold it together.
6. Allow to cool completely.
7. Carve structure until it has the shape you want.
8. Cover with modeling chocolate. Try to make as smooth and even as possible.
9. A few inches at a time, apply another thin layer of modeling chocolate. Using a burnishing tool, press it in using parallel strokes so that it looks like fur. The direction of the fur should be consistent and should follow the contours of the dog’s body.
10. Once the body is finished, add the front legs with modeling chocolate.
11. Using a dry paintbrush, dab loose black and brown luster dusts where appropriate to enhance coloring.
 STEP 3: Make Dog Toys, Bones, and Pucks (1 week before)
1. Rawhide bone: Roll out white modeling chocolate and then wrap it until it looks bone-like.
2. Dog’s toy ball: The only other non-edible portion of this cake. Because I wanted a perfectly smooth appearance, I used a styrofoam ball. Notice the ball is completely smooth… how did I do that, you may wonder? A brilliant idea! It is no mistake that there is a black/white stripe down the center of the ball. I measured and then cut a circle of red fondant and then stuck it onto the ball. Do the same for the opposite side. Then, take a white stripe and wrap it around to hide the seams. I added a black stripe on top of the white (to model the uniforms’ stripes). But since my black stripe looked uneven, I then added black circles. (They were cut out with the base of an icing tip.) This not only hid the ugliness of the uneven black stripe, but it made it look more playful, like something a dog would have.
3. Hockey pucks: Roll out black fondant so it’s the same thickness as a real puck (1 inch, thank you wikipedia). Use a 3-inch circle cookie cutter to cut the puck out. Once it’s dried, use fondant to add the team logo on top. I cut each color individually and then put them together like a puzzle. I used a black food-coloring marker to draw around the edges, like the real logo is outlined. Forgive me that it doesn’t look perfect, but seriously, these are some teeny little feathers we are talking about here!
STEP 4: Make Hockey Puck Cake (1 day before)
1. Make two separate 16-inch cakes. They are GIGANTIC, fyi.
2. Cut off the domed top while it’s still in the pan. You’re more or less assured to get a straight cut that way.
3. Frost and then cover cake with black fondant.
4. Cut out approximately four thousand squares. (Kidding… sort of. I did get two blisters from using this teeny square cutter, so what does that tell you?)
5. Using gum-glue adhesive (a pinch of gum paste mixed with a tbsp of water to create an edible glue), stick the squares onto the side of the puck. (If you look at the side of a real hockey puck, it has these little scored indentations. I’ve placed a real hockey puck on top of the cake below.)
6. Add the words “OFFICIAL, MADE IN SLOVAKIA” out of fondant, if you want. (I had cutters for the smaller letters but free-handed the larger ones.) I decided to add the words because to be honest, the whole thing looked like a tire instead of a puck. (It actually stills looks like a tire, just a Slovakian one.)
7. Optional: greet Marian Hossa at the event by proclaiming that you, too, were “made in Slovakia.” I did NOT do this, although both my dad and brother separately suggested it.

 6. Create Fondant Jersey (1 day before)
1. Roll out several strips of red fondant.
2. Roll up some wax paper and tape it so it makes a little ball. I used several of these so the red fondant would stay “up,” instead of collapsing like a deflated balloon. You can see one on top of the cake in the photo below.
3. Lay a strip of red fondant, crumpled a bit here or there to look like an actual jersey. Then place a wax paper ball on it. Drape another piece of fondant on top of the ball. Keep going until it looks like an actual jersey. I actually crumpled my real jersey on the table and then copied the folds.
4. As you go, you’ll need to add the appropriate colors/logos/etc. This tomahawk logo pictured was fun but difficult to do: cut out yellow “C,” then cut out green sticks and white stones. Lay green sticks across the “C.” Cut and remove the yellow area under the green. Lay entire puzzle atop black fondant. Attach with gum glue adhesive. Cut around logo. Lay entire thing atop piece of red fondant. Then drape the red fondant on the rest of the jersey appropriately. Do ALL this before the fondant dries (about 5ish minutes), otherwise the logo won’t drape nicely and will be hard and flat. In this case, you WANT droopy fondant, since it’s supposed to simulate clothing.
5. Put several plastic tube supports into the cake. I had more than what is pictured below. That dog is heavy!

STEP 7: Transport Dog to Event! 
1. Pray.
No, seriously, driving in downtown Chicago traffic is unpleasant at all times, but especially unpleasant when you’re trying to protect a chocolate dog from moving about. We definitely had the dog with me in the backseat, and the rest of the cake in the trunk. Luckily there were no sudden movements and she made it safely!
We pulled up to the loading dock and a kind man came down with a cart. He was as careful as I wanted him to be wheeling Bailey around on that cart. And he stopped each person we passed, exclaiming, “Do you guys believe this is a CAKE?”
STEP 8: Set up Cake
The cart driver wheeled right into the ballroom, and there stood Bryan and Amanda Bickell. I paused in the entryway, because even though I was coming to their event, I was taken aback to see them there. They definitely recognized their (chocolate) puppy! Bryan doesn’t have his “nice-guy” reputation for nothing- he was as personable and genuine as they come. Aren’t hockey players the best??
Now that that is over, I am looking for another project. Any ideas? I’m thinking about a rotating tornado. Leave me a comment below if you have another idea! 🙂
 Like the Chicago Blackhawks? Check out some other goodies I’ve made here:
– Rink cake with gum-paste players
– Blackhawks/ hockey-themed iced cut-out cookies
– Blackhawks jersey cookies– Fondant logo cake
– Blackhawks logo cake

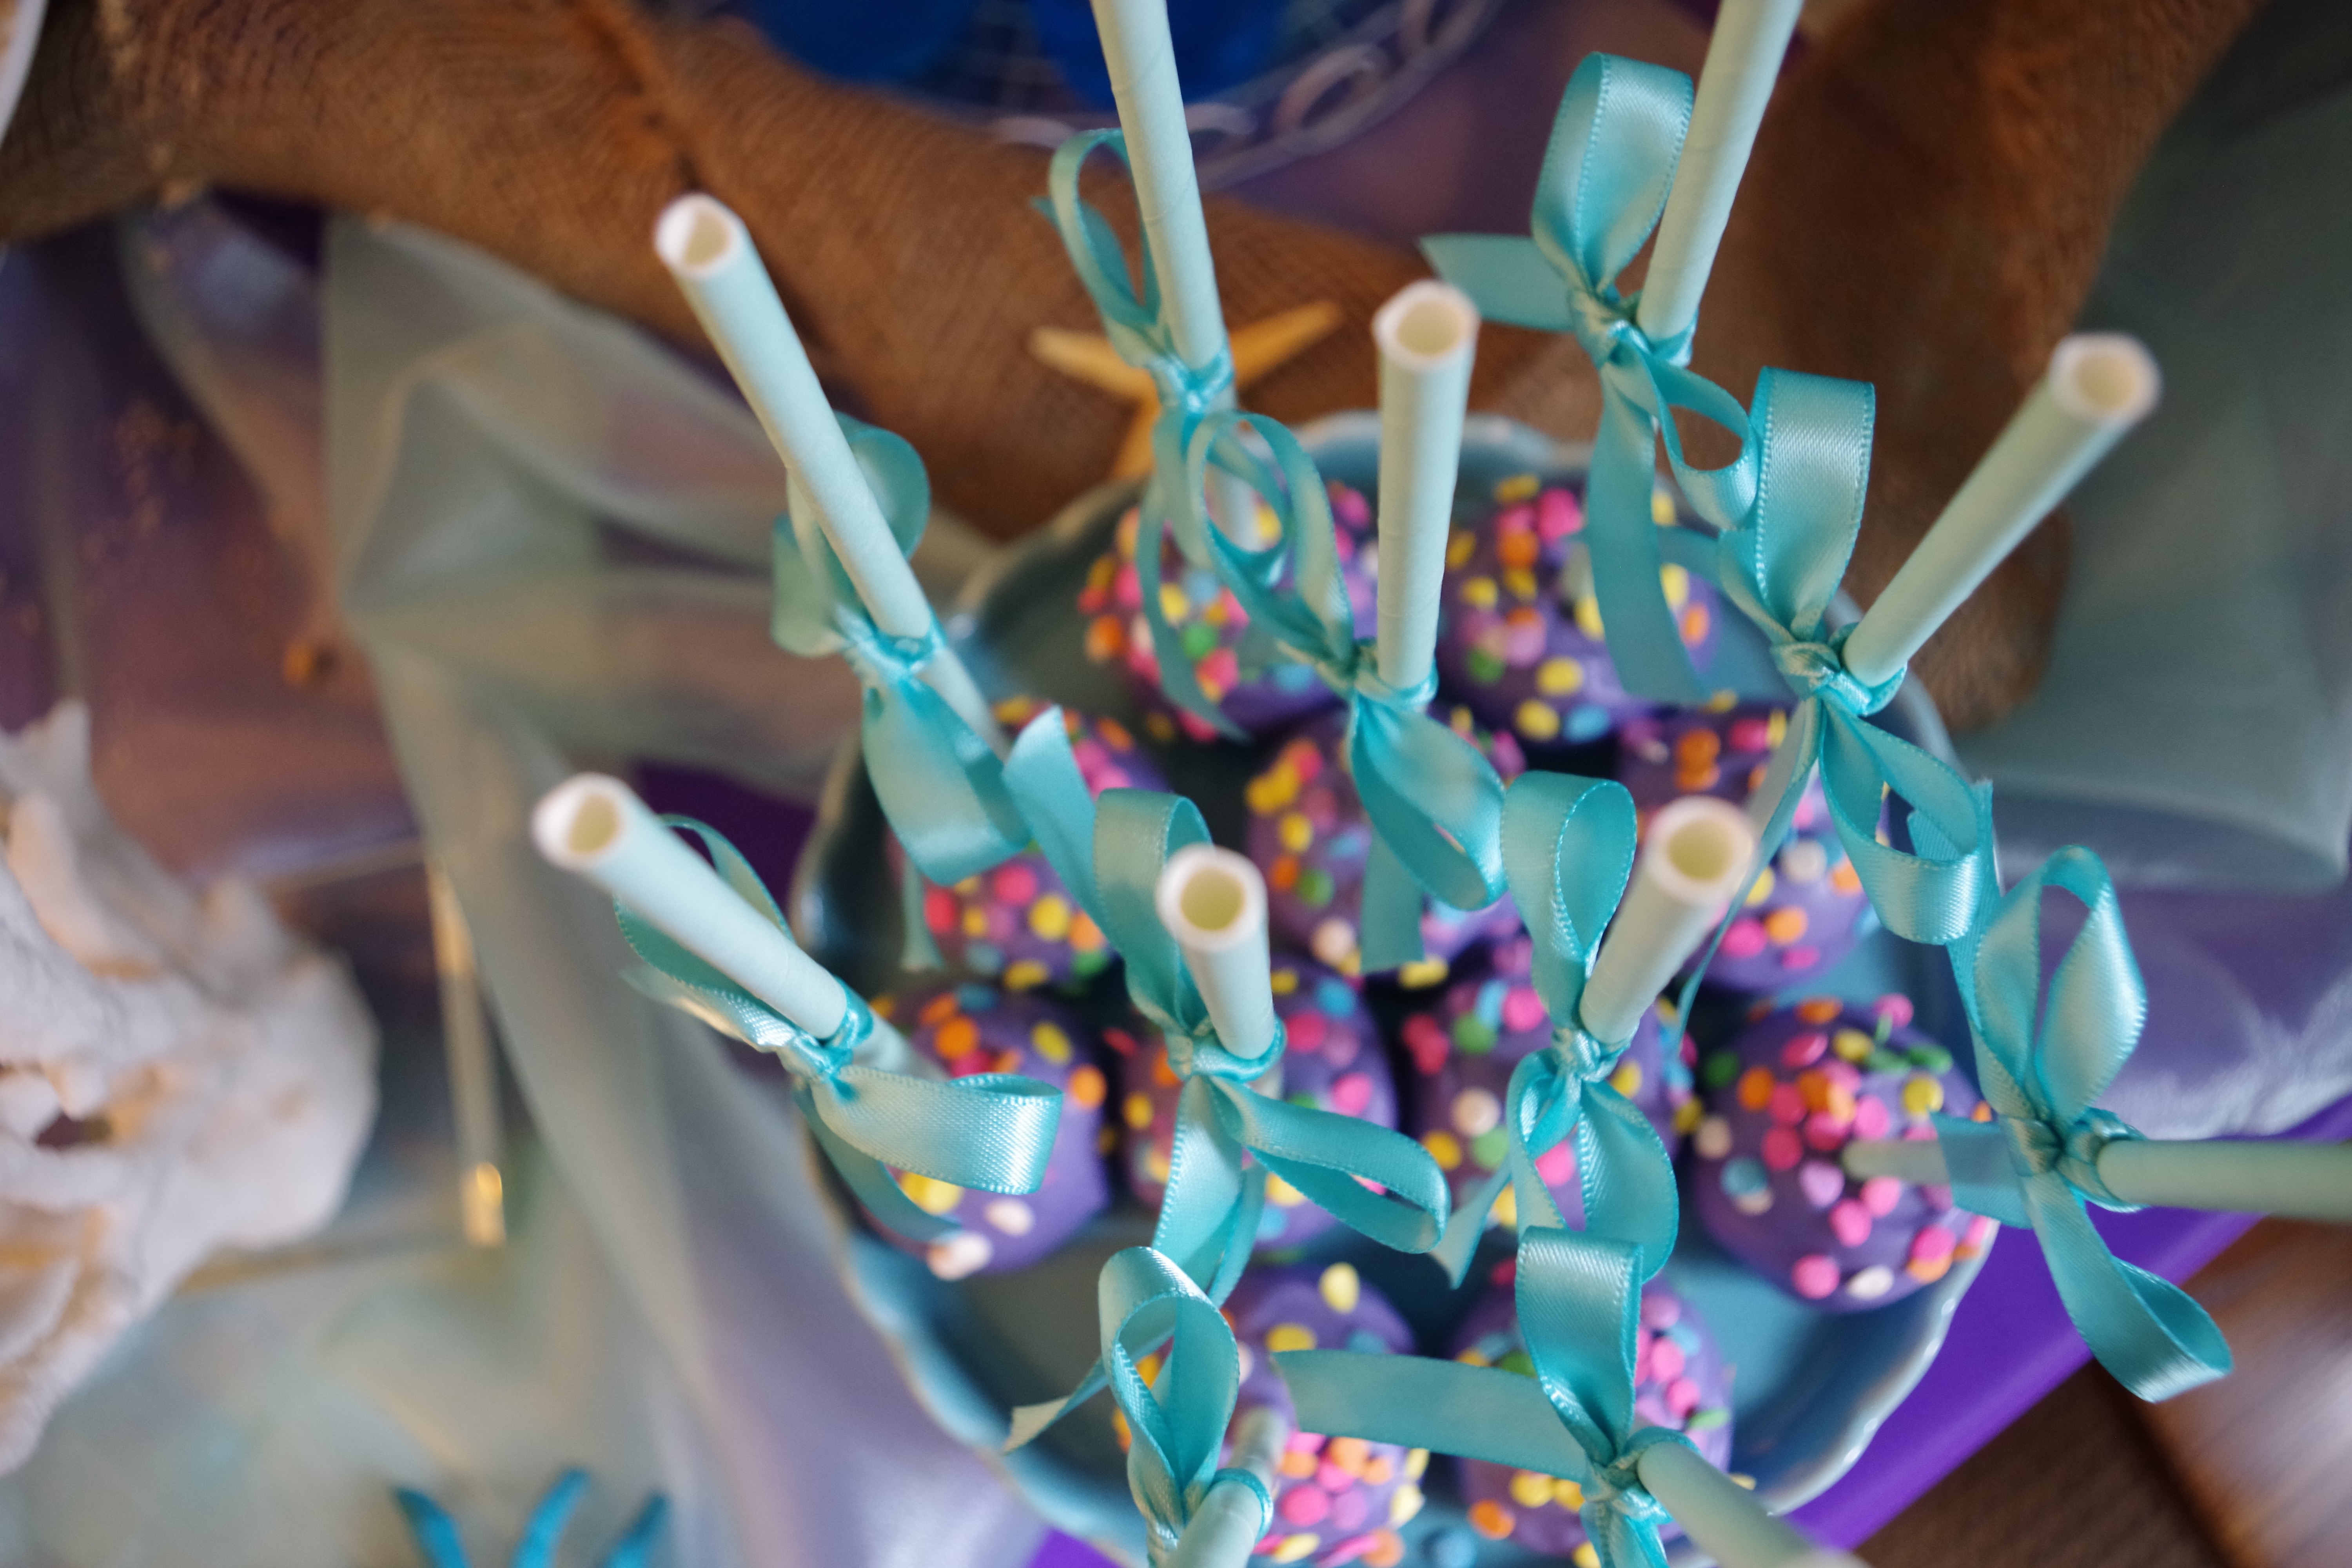
 I realized a girl can measure her love for her sister in individually-punched mermaid tail scales. “Yes, I love my sister roughly 7,000 evenly-spaced holes’ worth.”
  Then I painted it with gel food coloring and melted some isomalt and poured it on a silicone mat to harden in approximate “splash” shapes. Once they were hardened, I stuck them in the cake.
 Set those chocolate tails atop a buttercream cake, and voila!


 What other things would you like to see made of modeling chocolate? Comment below!
 “You’re a mean one, Mr. Grinch. You really are a heel!”
 3. That’s it! Just take a cute photo by your tree and serve him up! 🙂


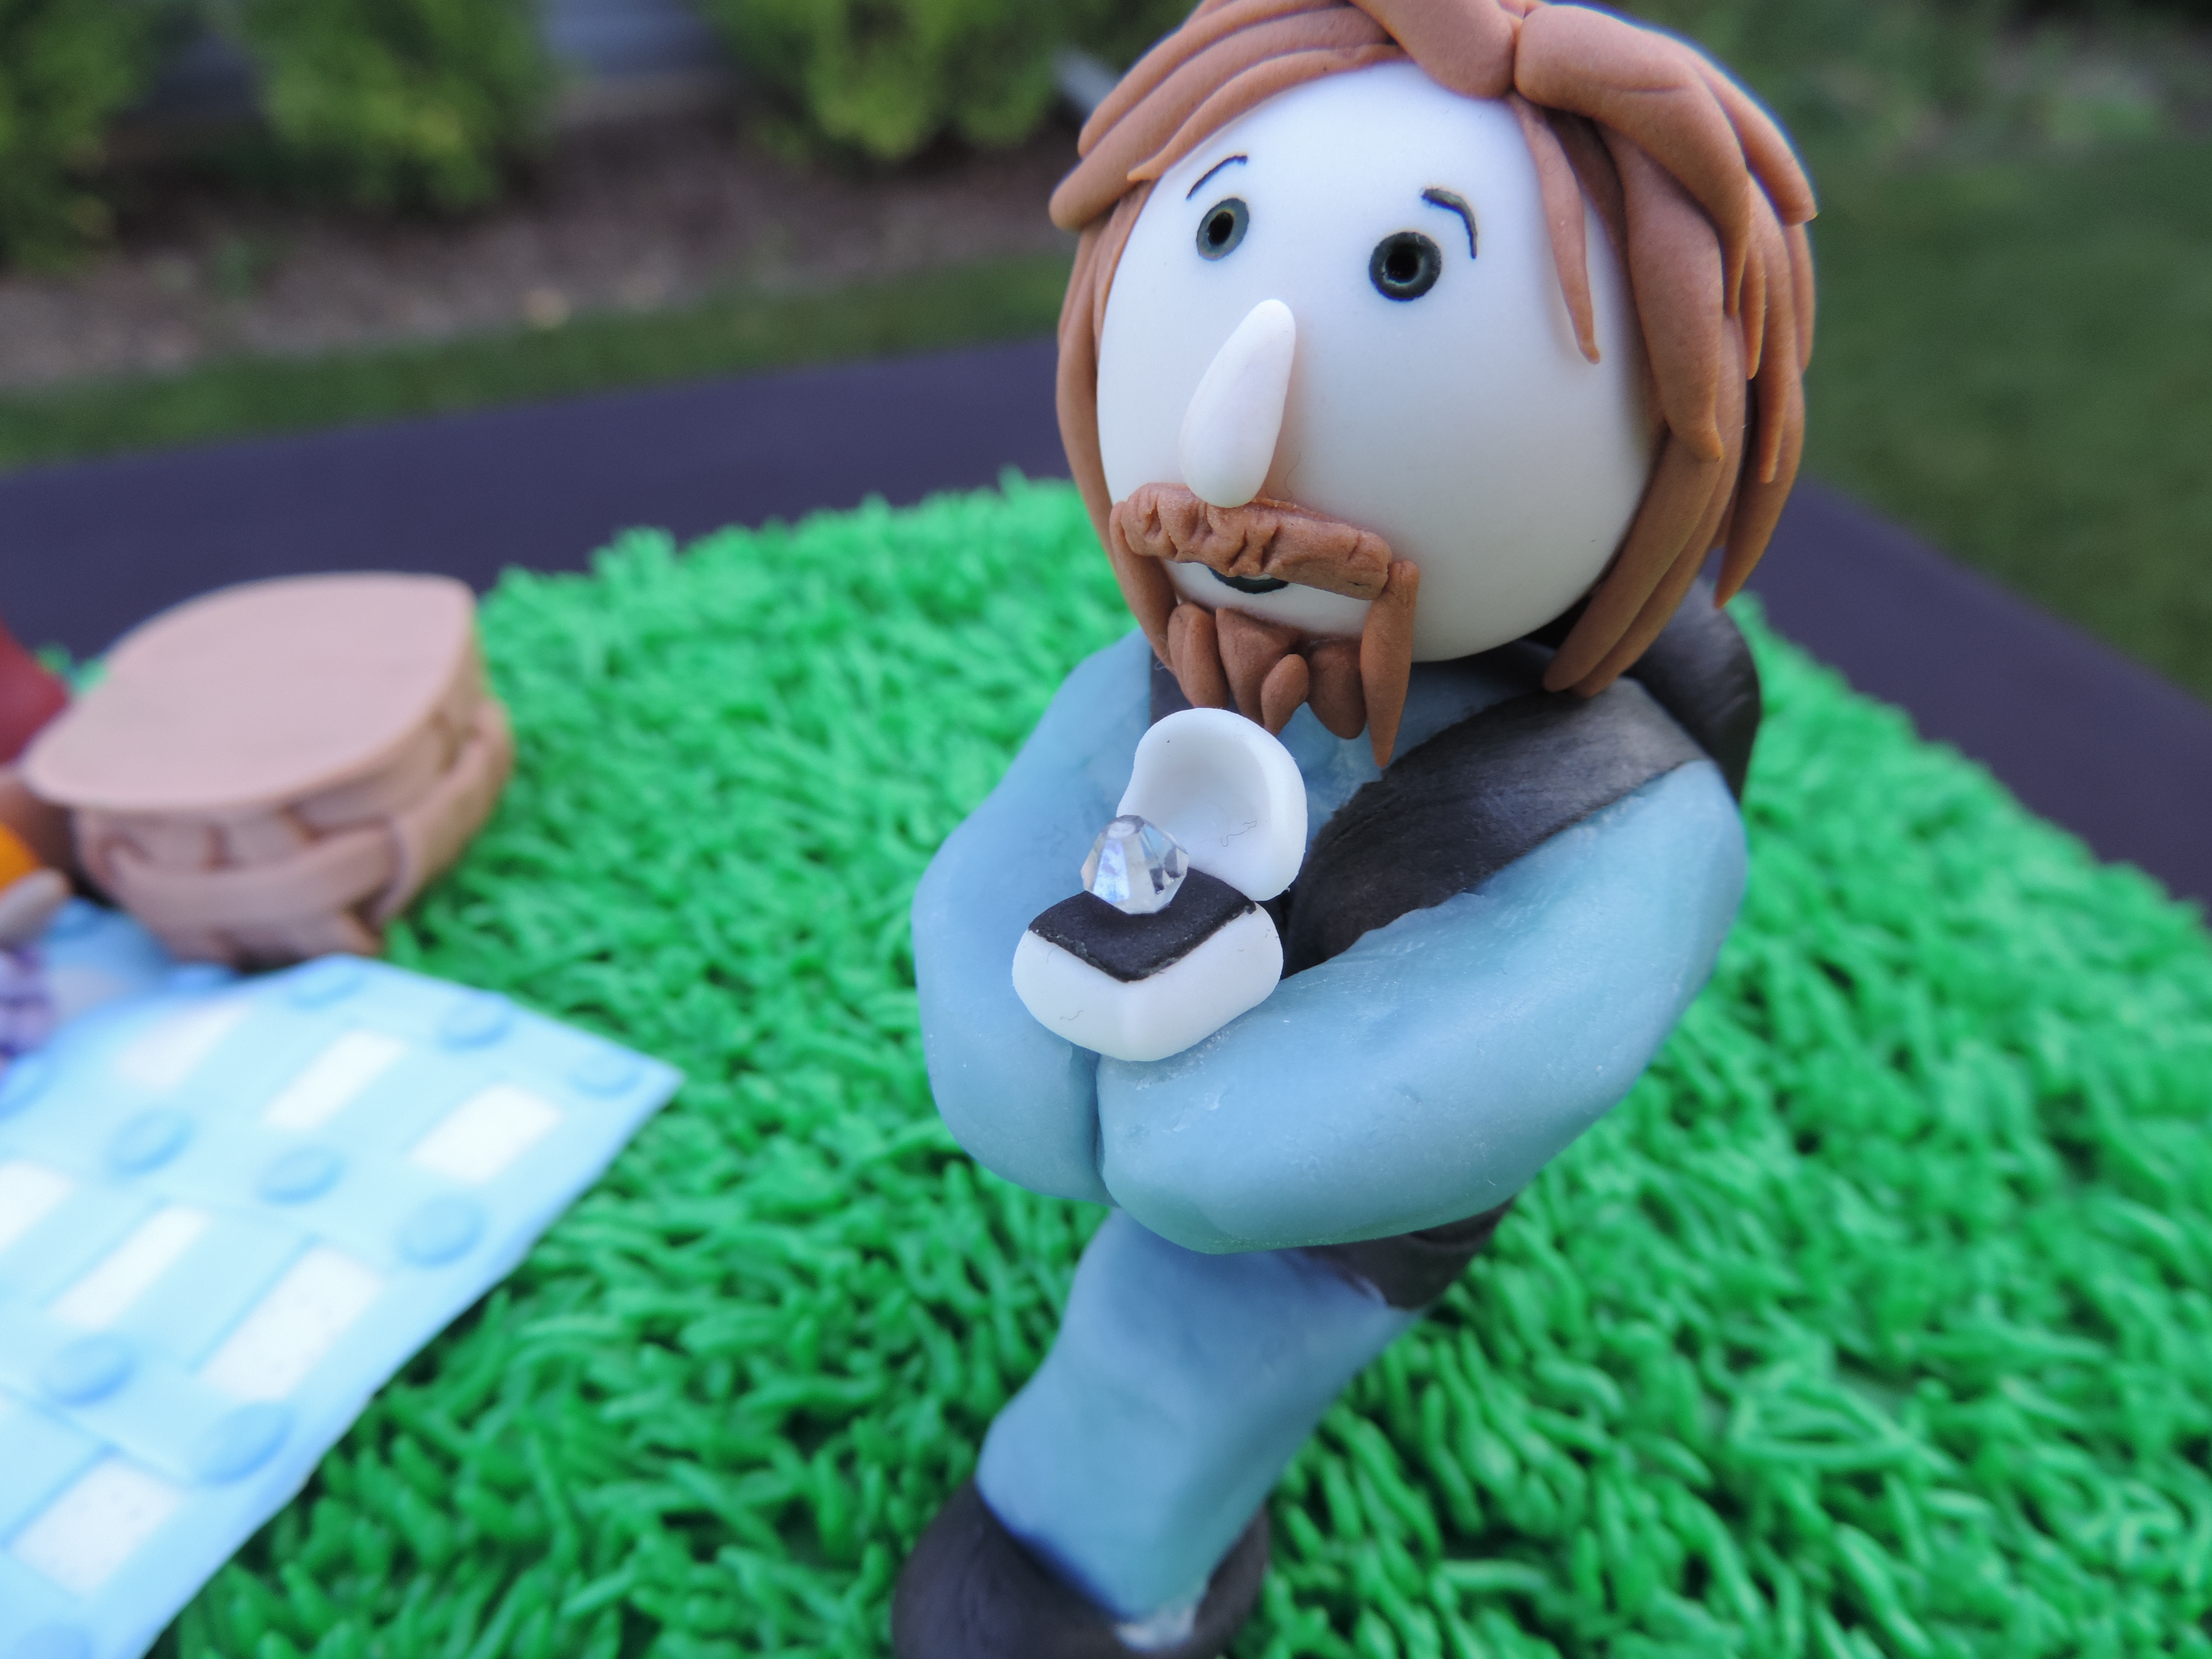
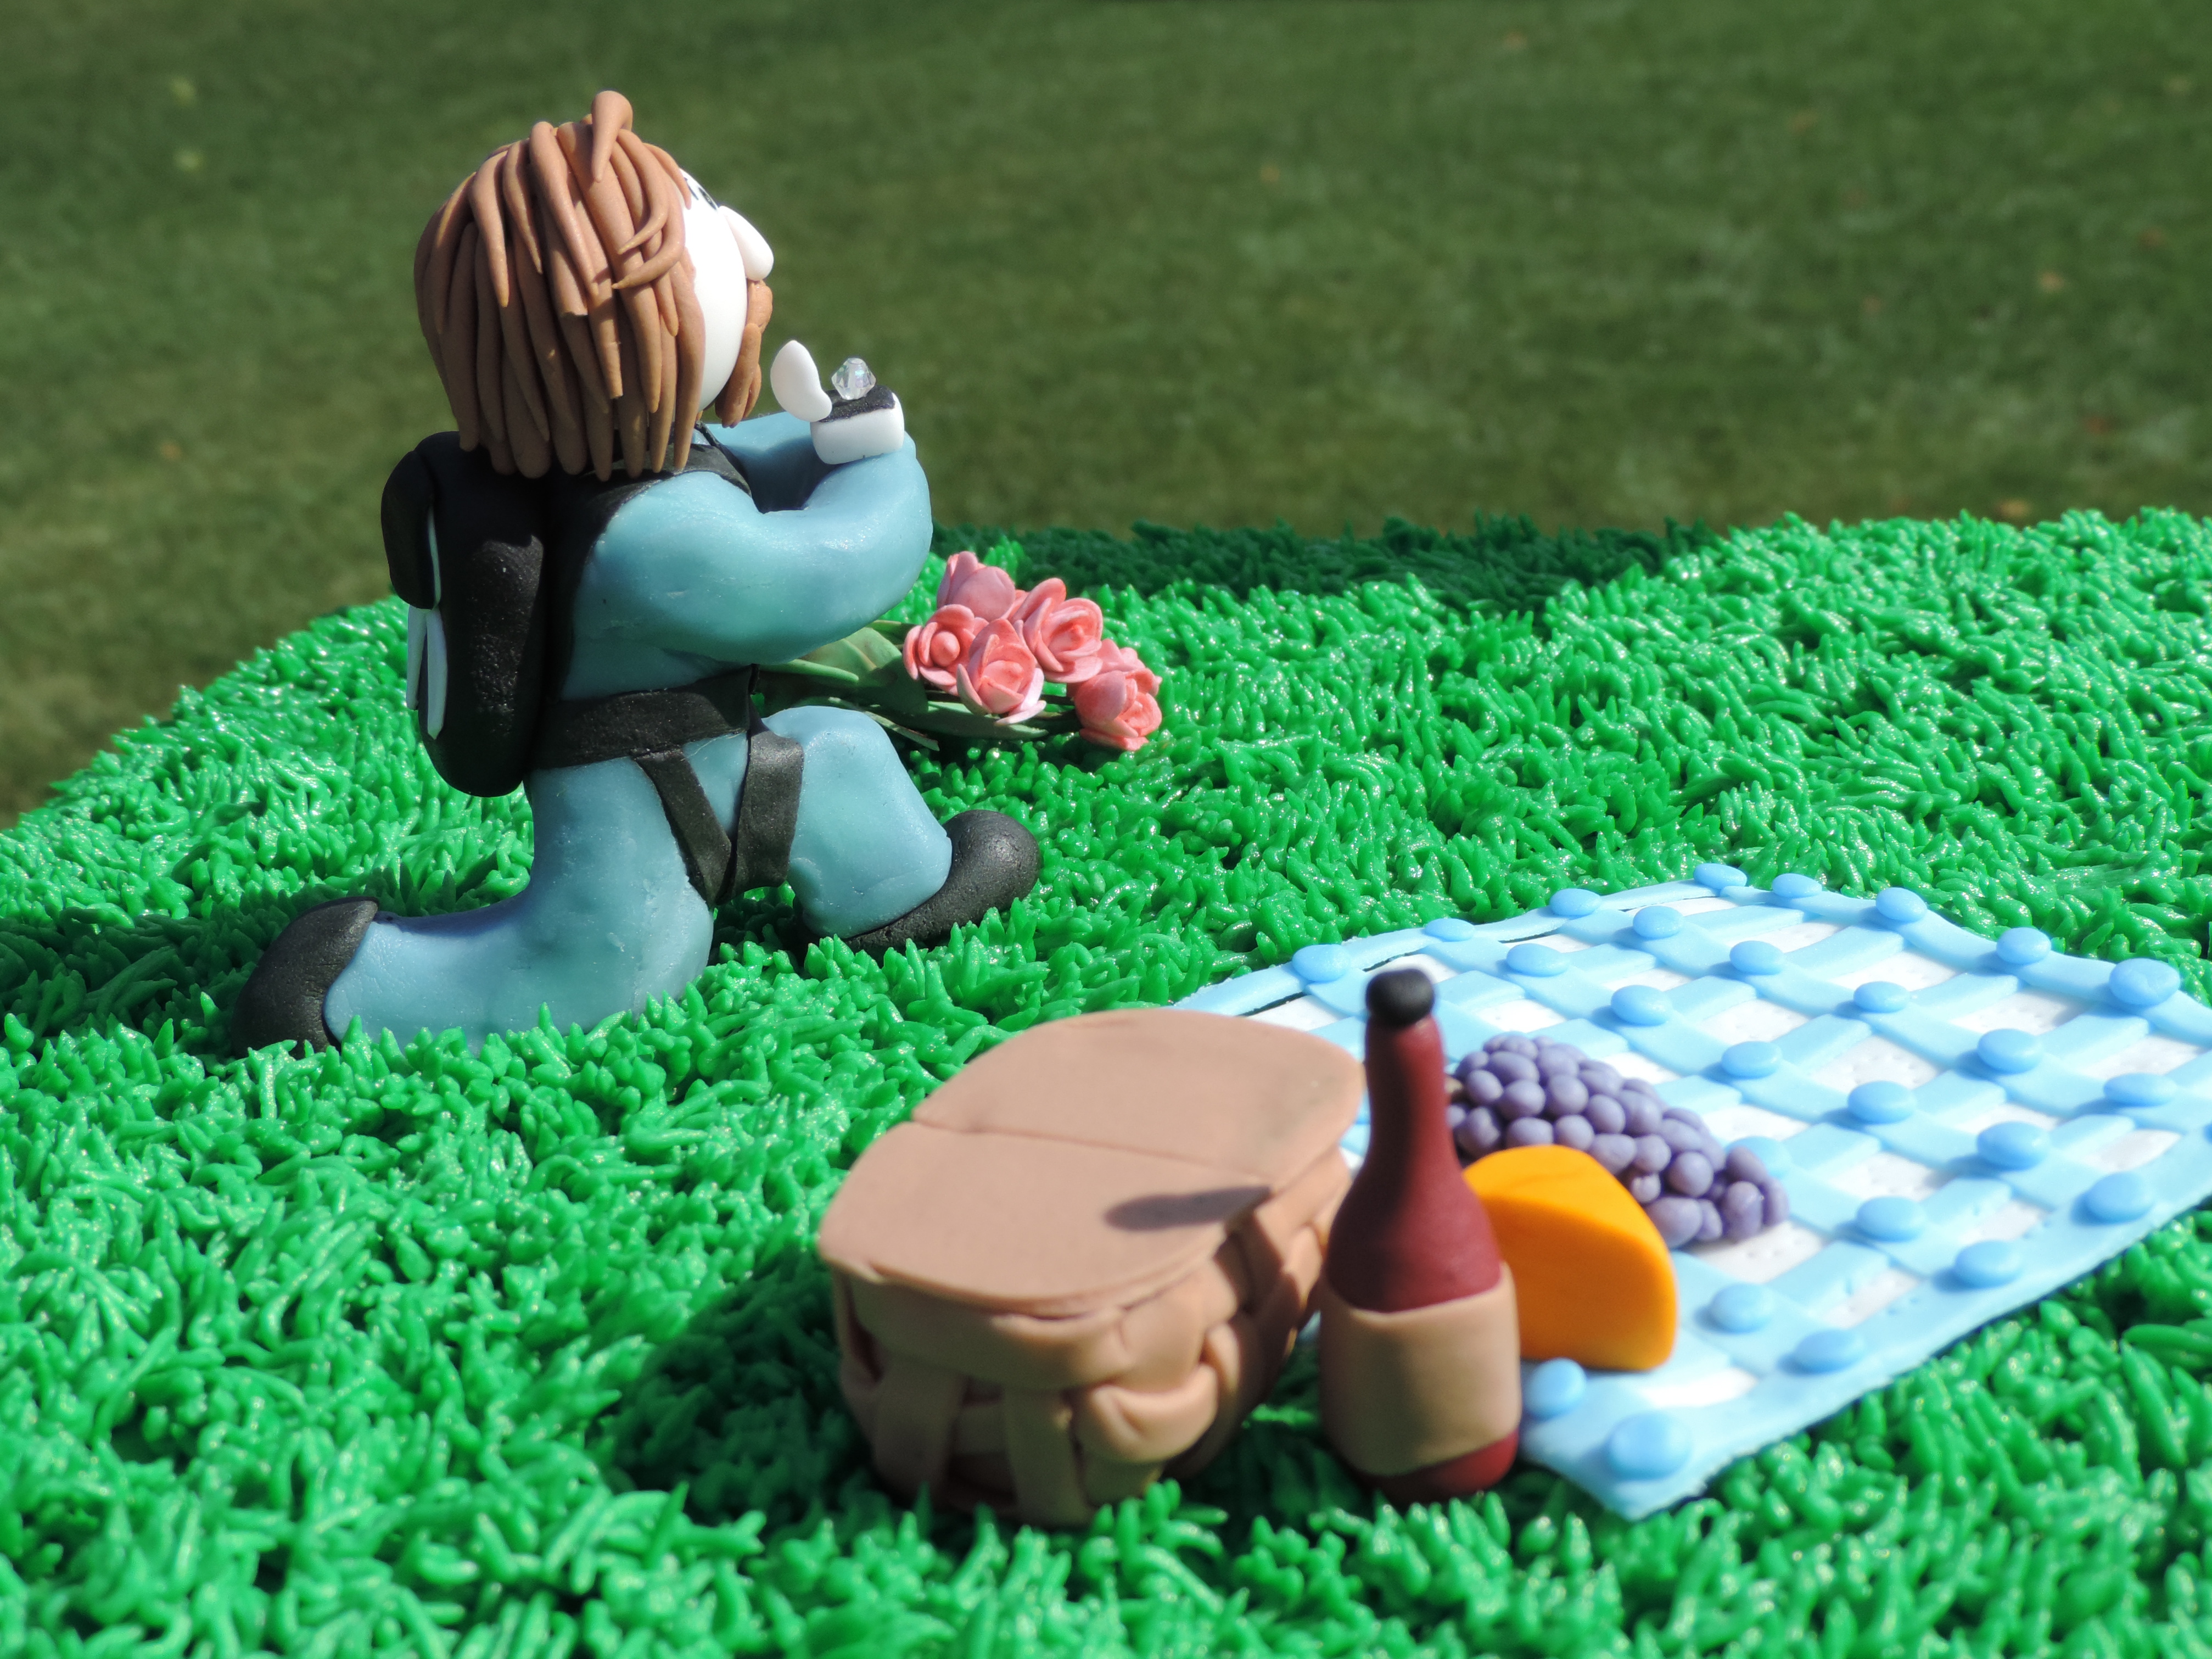
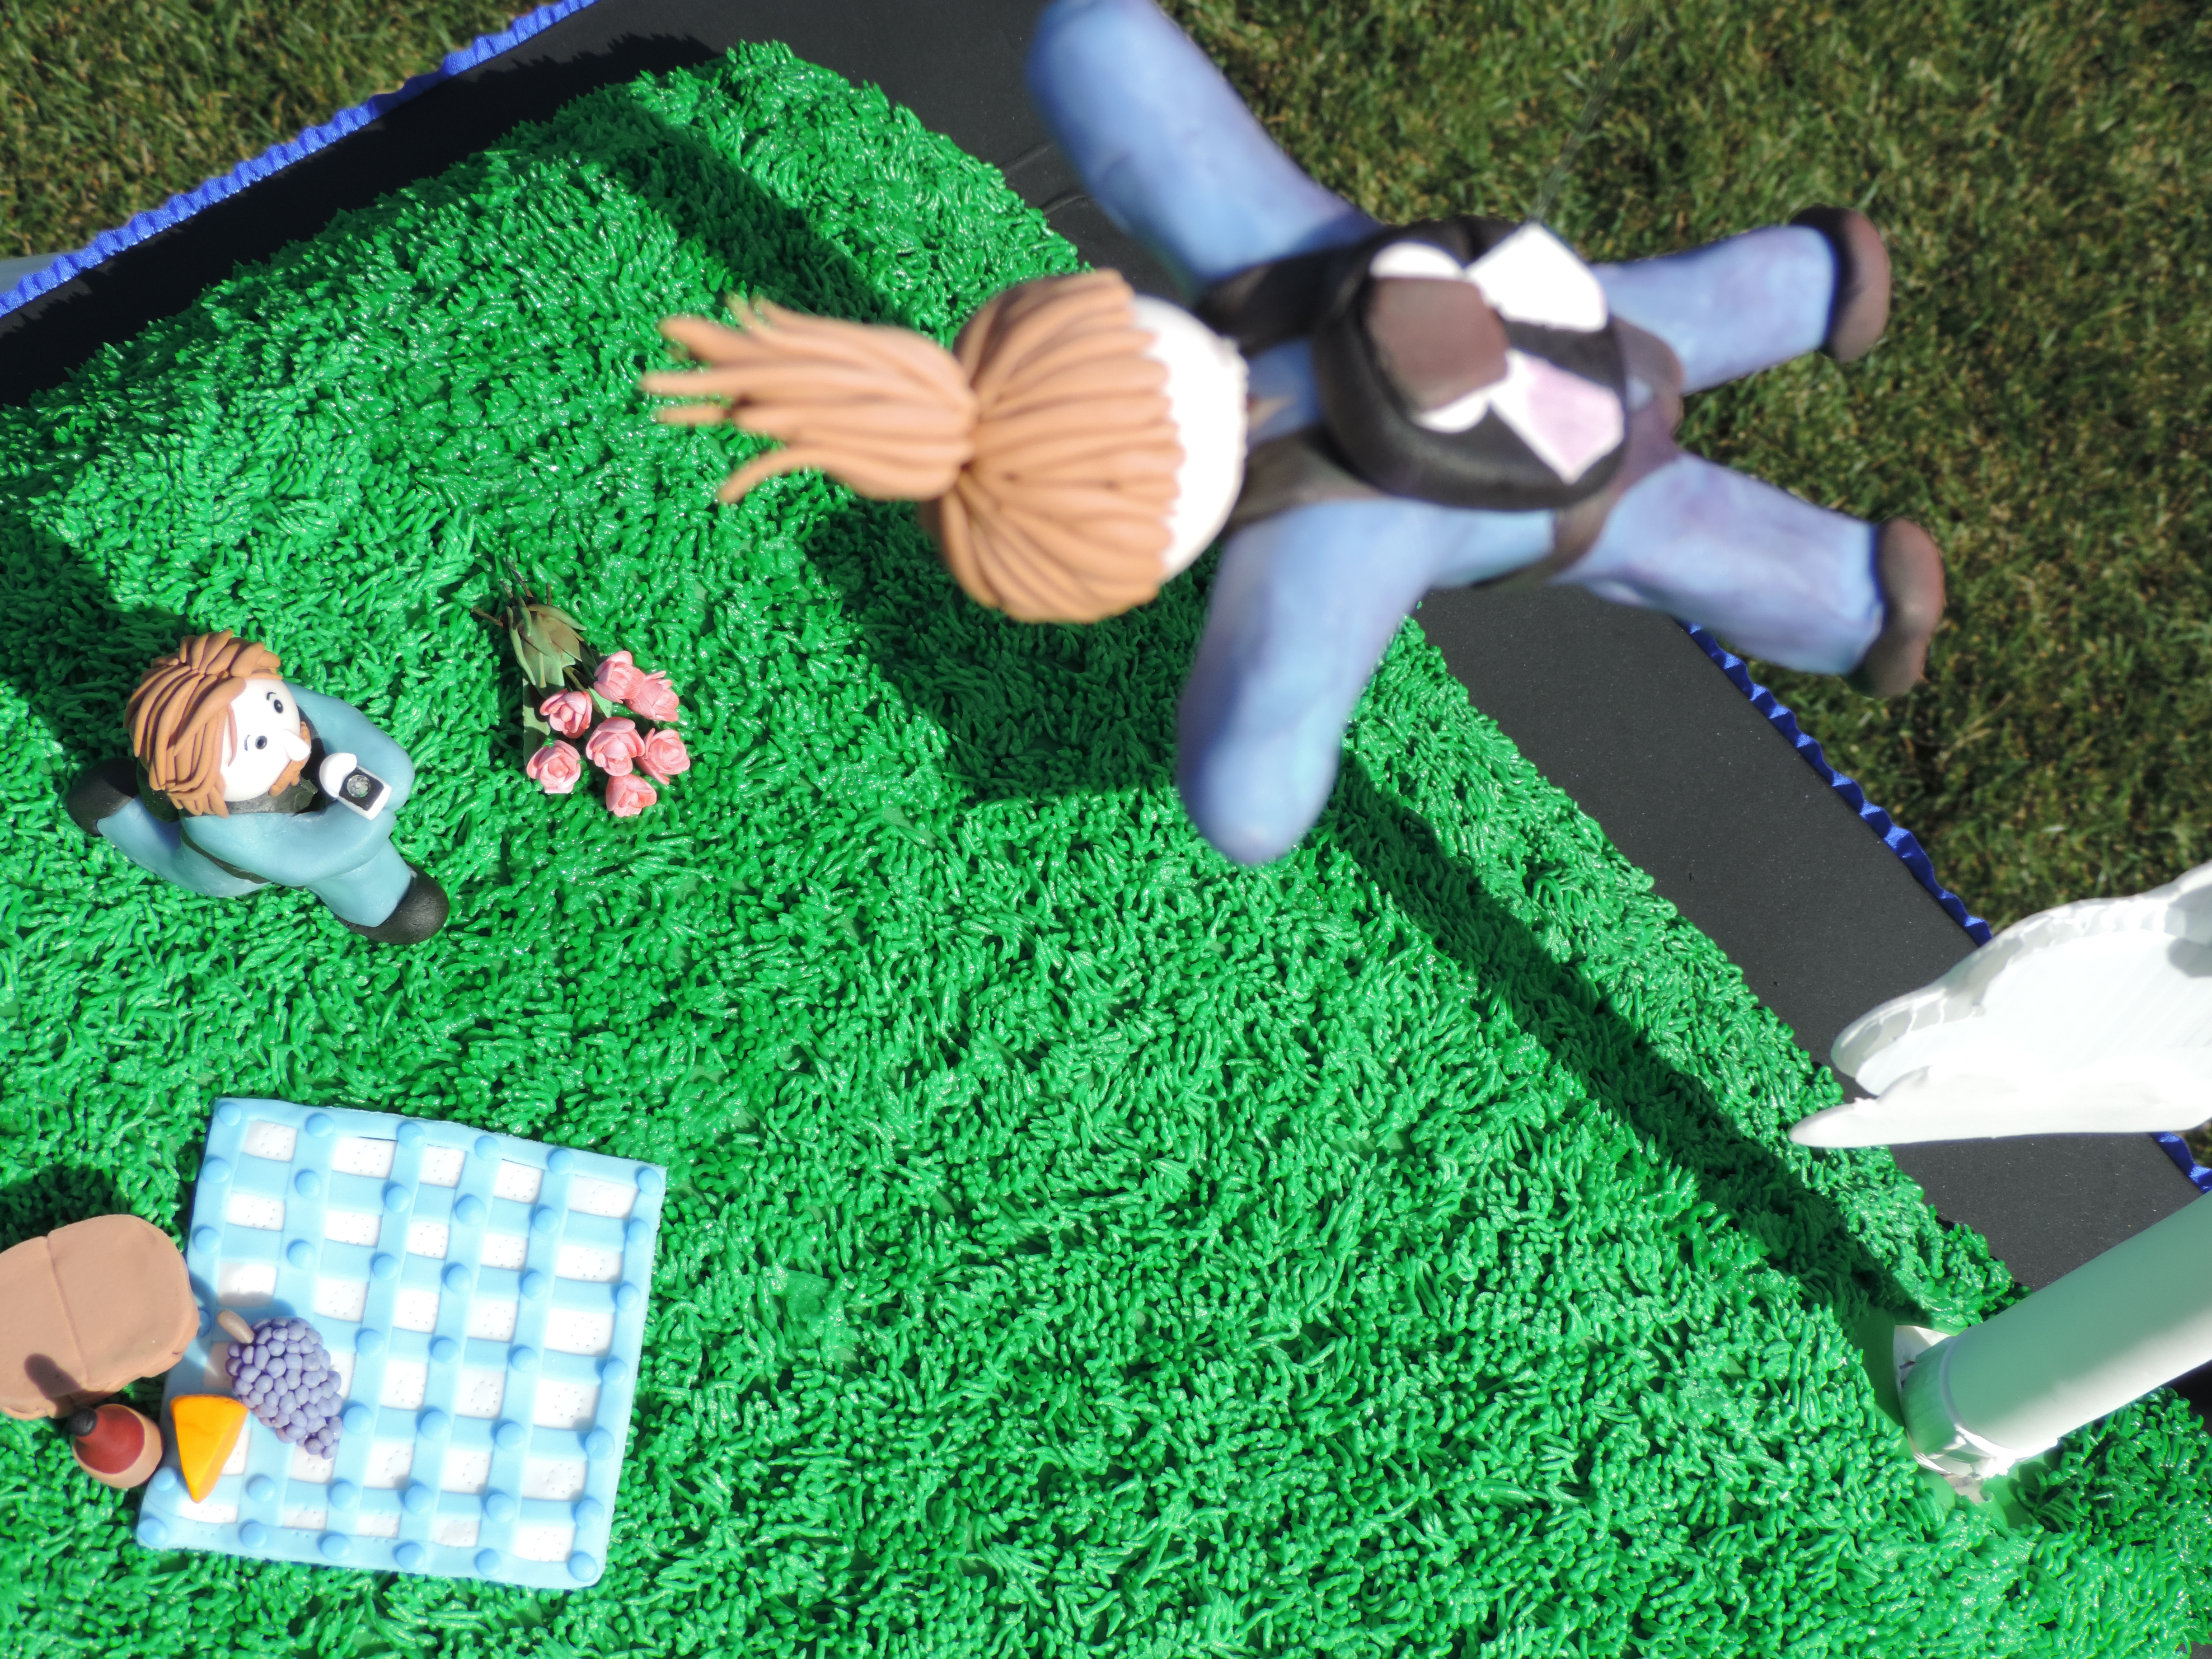
 And so began the hunt for materials. How does one make a plane suspended from the sky? Ideas were swimming around inside my brain until my Technical Director, er- I mean- my mom, and I finally went to Home Depot. We had the good fortune of running into the most creative and helpful employee in the place. “I’m making a cake, and it needs to have a plane suspended in midair. And a girl skydiving off the plane- so I want her suspended, too. The actual cake will be the hill underneath the plane.” I paused. “Do you have any ideas?”
 And next comes the cake! The wooden base was covered in black fondant, and then I put down a cake board. I then covered with several sheet cakes, cut up another sheet cake to make an angled side, covered with frosting and fondant, and then piped on the grass:
  And voila! You have a skydiving cake!