Um Yah Yah!

Here’s a question: What is the only college fight song in 3/4 time?

And here’s the more important question: What is the only college nerdy enough to notice that theirs is the only fight song in 3/4 time?

Thaaaaat’s right, folks, St. Olaf College! (And I say “nerdy” with only the utmost love and affection, for I myself was a music major.) Home of the melody that, rather than pump up athletes before the Big Game, suggests they grab the nearest opponent and go a-waltzin’ through the meadow.

The words don’t necessarily add any coherence to its puzzling status as a fight song. Here, for example, is the refrain:

Um yah yah! Um yah yah!
Um yah yah yah!

I don’t actually know what it means. But no matter! Comprehension takes a backseat when one is given such a bouncy and pleasing melody. (And just for your information, the text of the verse does make rather more sense.) For those of you unfamiliar with this toe-tapping tune, here is a clip (http://www.youtube.com/watch?v=g87707-_Asc, published on YouTube by St. Olaf) that perfectly illustrates the college’s character. As the video’s description states, the college was in the midst of moving things around, and all the pianos ended up temporarily in the recital hall. Naturally, the piano students and faculty wanted to see what they sounded like all played together, and what follows is the unrehearsed result, with “Um Yah Yah!” making an appearance at minute 1:59:
http://www.youtube.com/watch?v=g87707-_Asc

And THAT is why I love St. Olaf.

I was not only lucky enough to attend this incredible college, but I made some lifelong friends in the process. We met the first day of freshman year, lived together every year after that, and have managed (despite living states apart) to get together at every Christmas and every summer since graduation (with a healthy amount of weddings and baby showers sprinkled in between). At our most recent Christmas gathering, I decided to attempt recreating one of the traditional “St. Olaf scenes:” sitting on the sign at the college’s entrance.

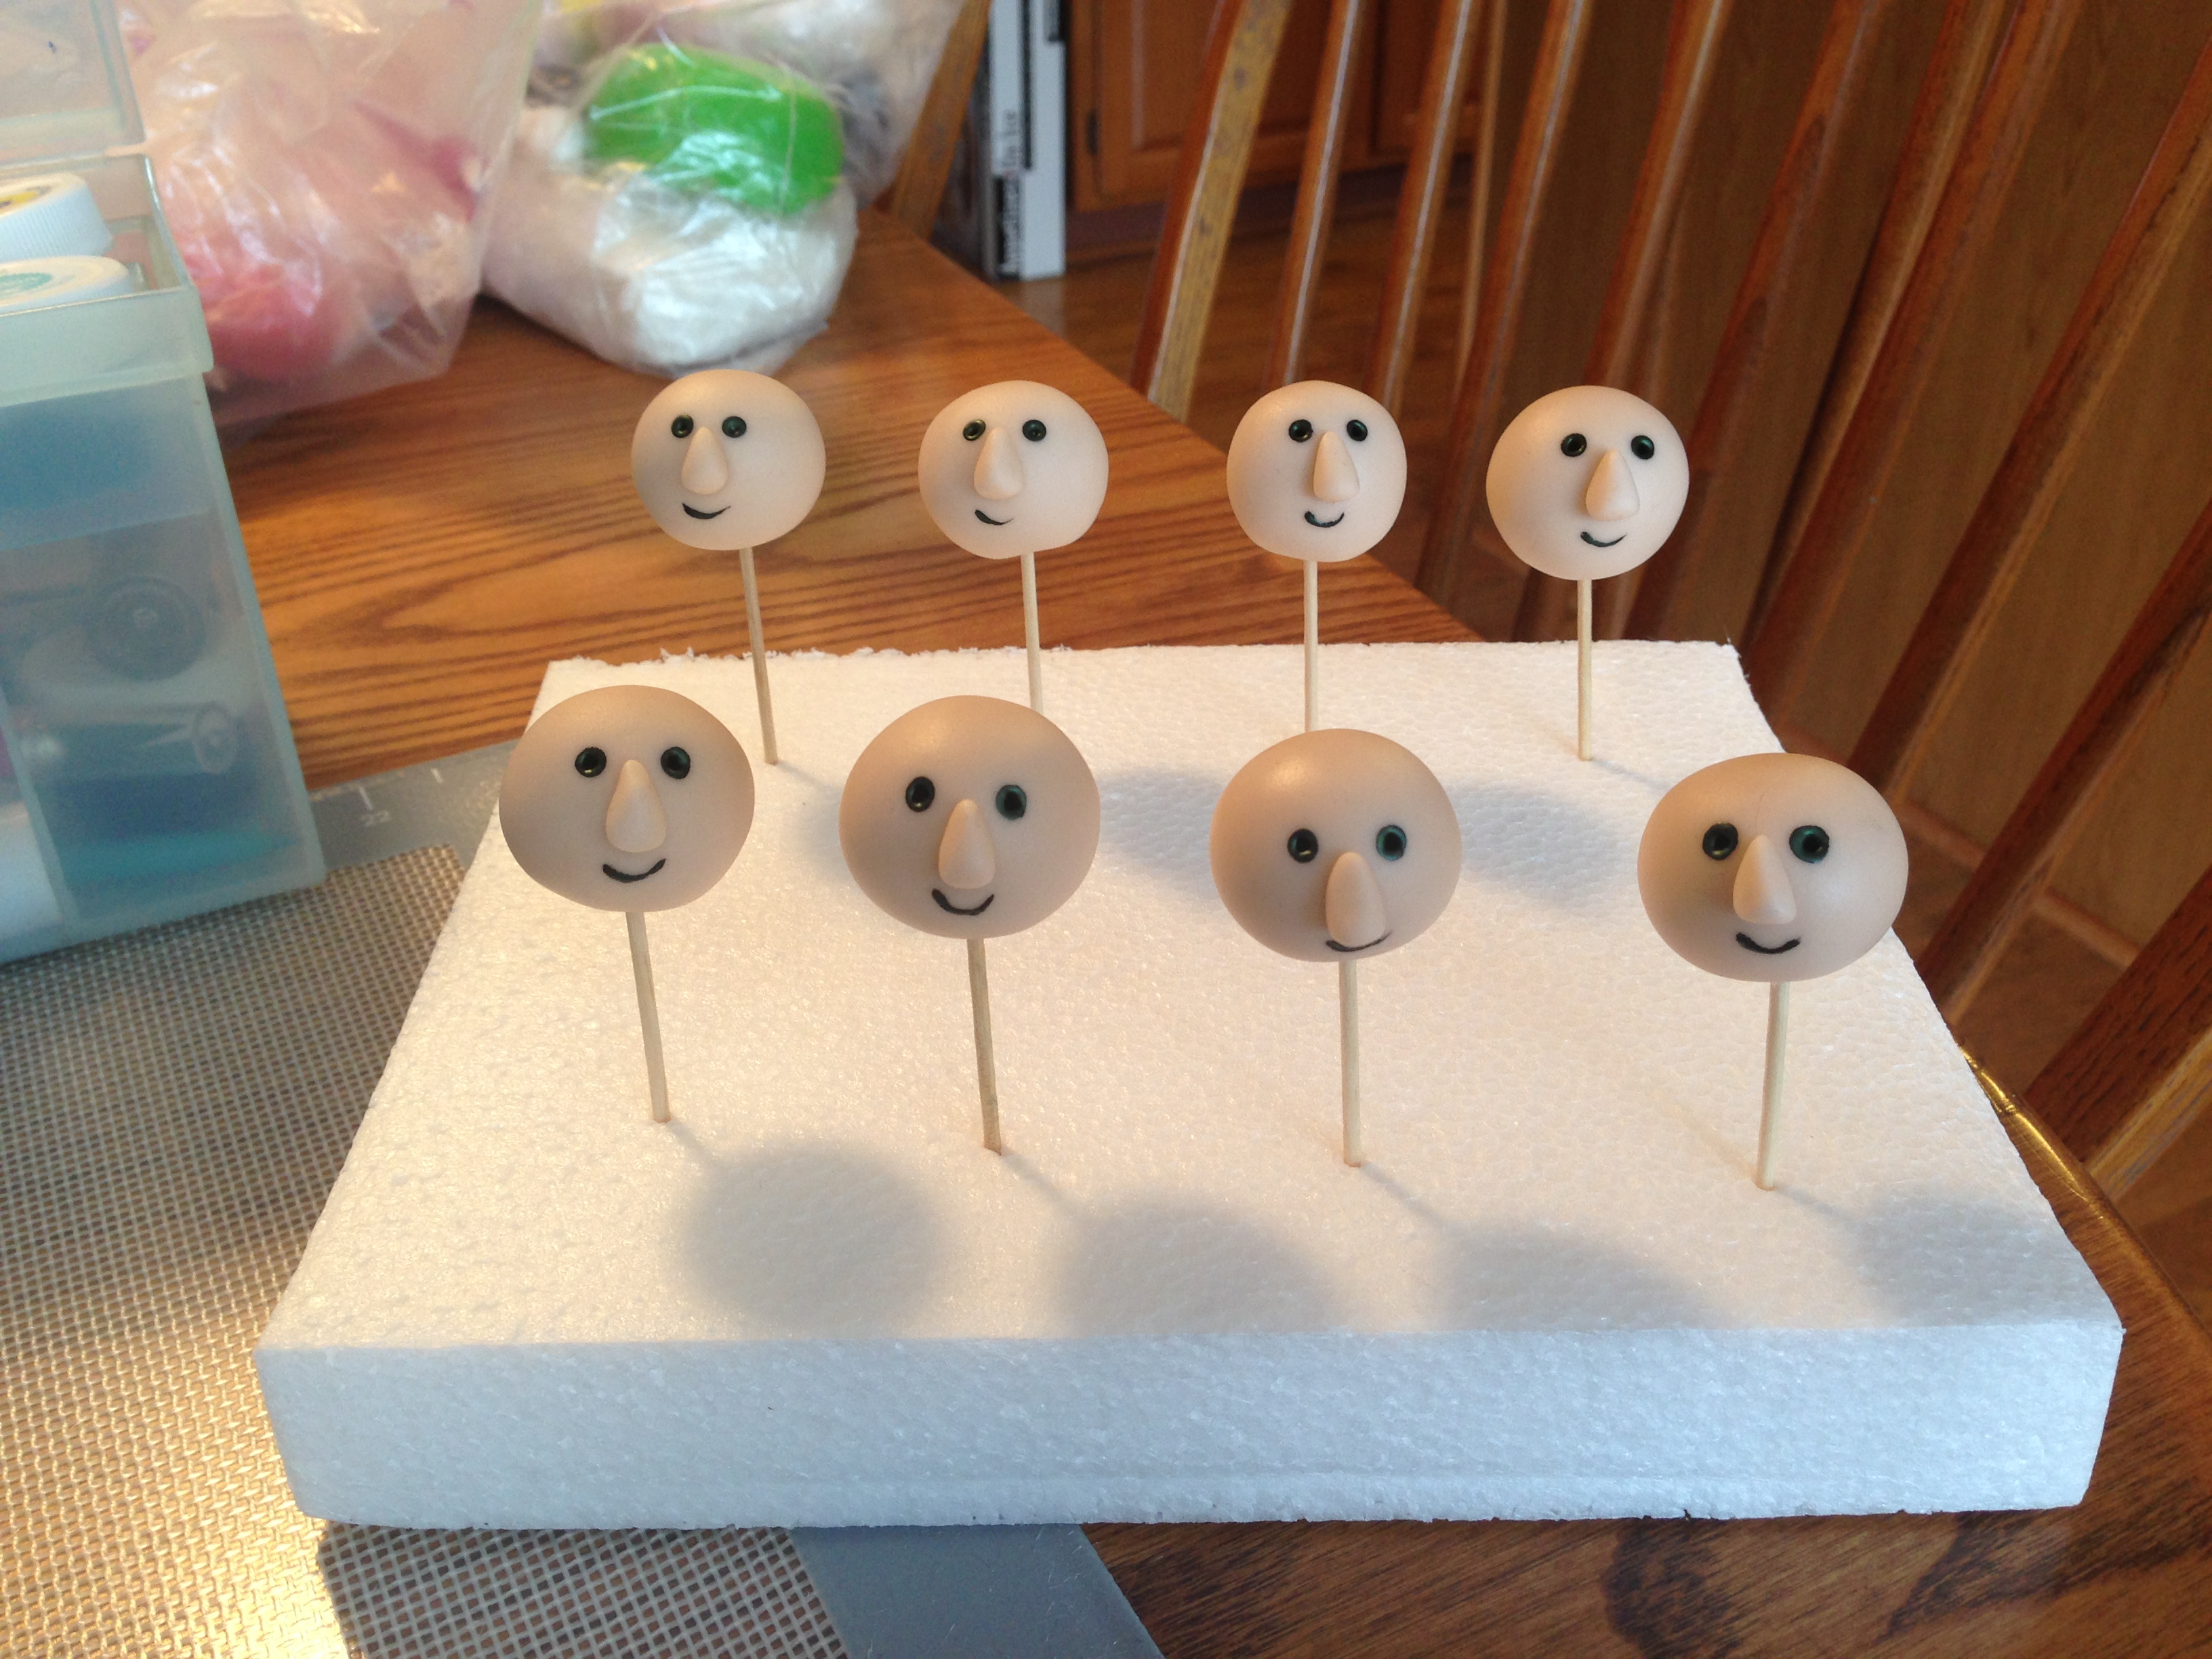
I created little fondant people modeled after each of my friends. First comes the head:

IMG_2700  IMG_2702
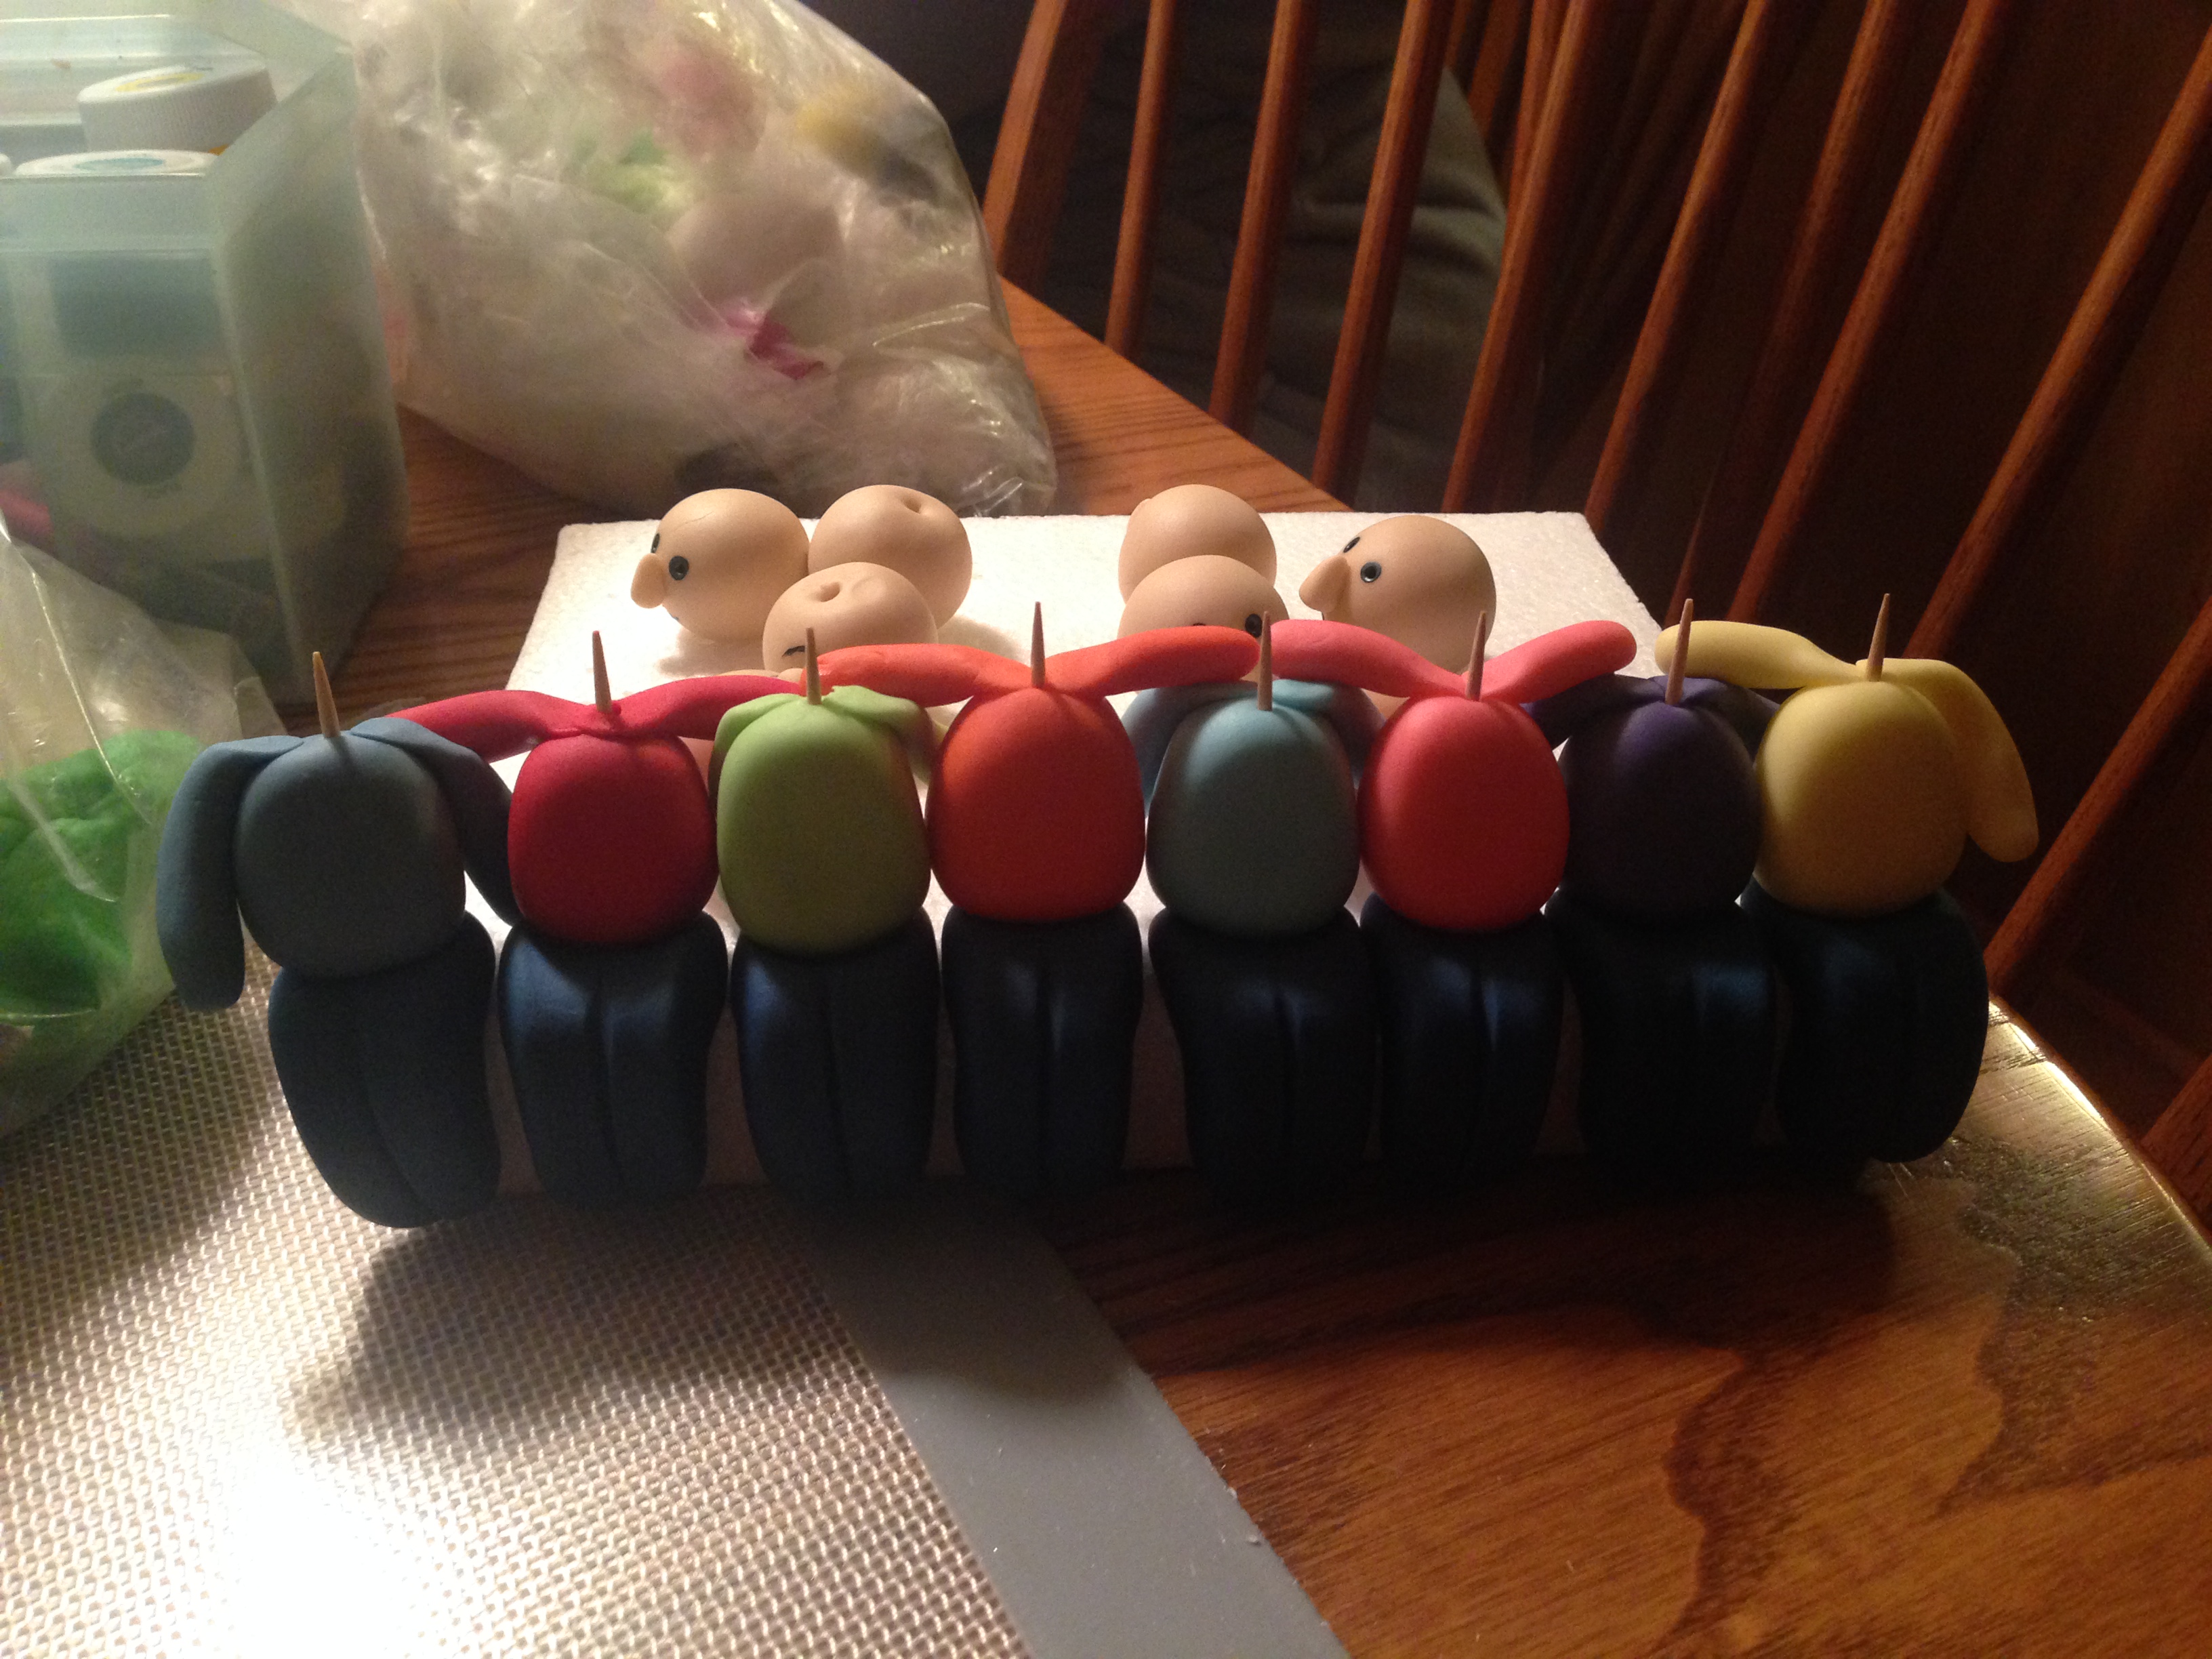
Next comes the body. Torso first, then the jeans:

IMG_2703

After the bodies were all made, I stuck a toothpick through the whole thing- jeans, torso, arms, and head- in the hopes it would provide structure and stability:

 IMG_2704 

On come the heads! This is the fun part- individually styling everyone’s hair. 🙂 For the curly girls, it seemed to work better if there was a base (like a helmet) and that way, if there was a part of the head not covered by the curls, the bald skull wouldn’t show through. You can see the “helmet” on the blonde below:

IMG_2706

Final additions: give each girl something related to one of her majors. (It was necessary in order to easily tell everyone apart- let’s face it, fondant people all look the same.) From left to right: Greek text for the Classics major, novel for the English major (there are some little white things under the book that I took out later- they were there holding up the book so it would dry upright as if she was reading it), stethoscope for the premed major, laptop for the English major, paperwork for the social work major, apple for the education major, baton for the music major, and a Bible for the religion major.

Ole girls

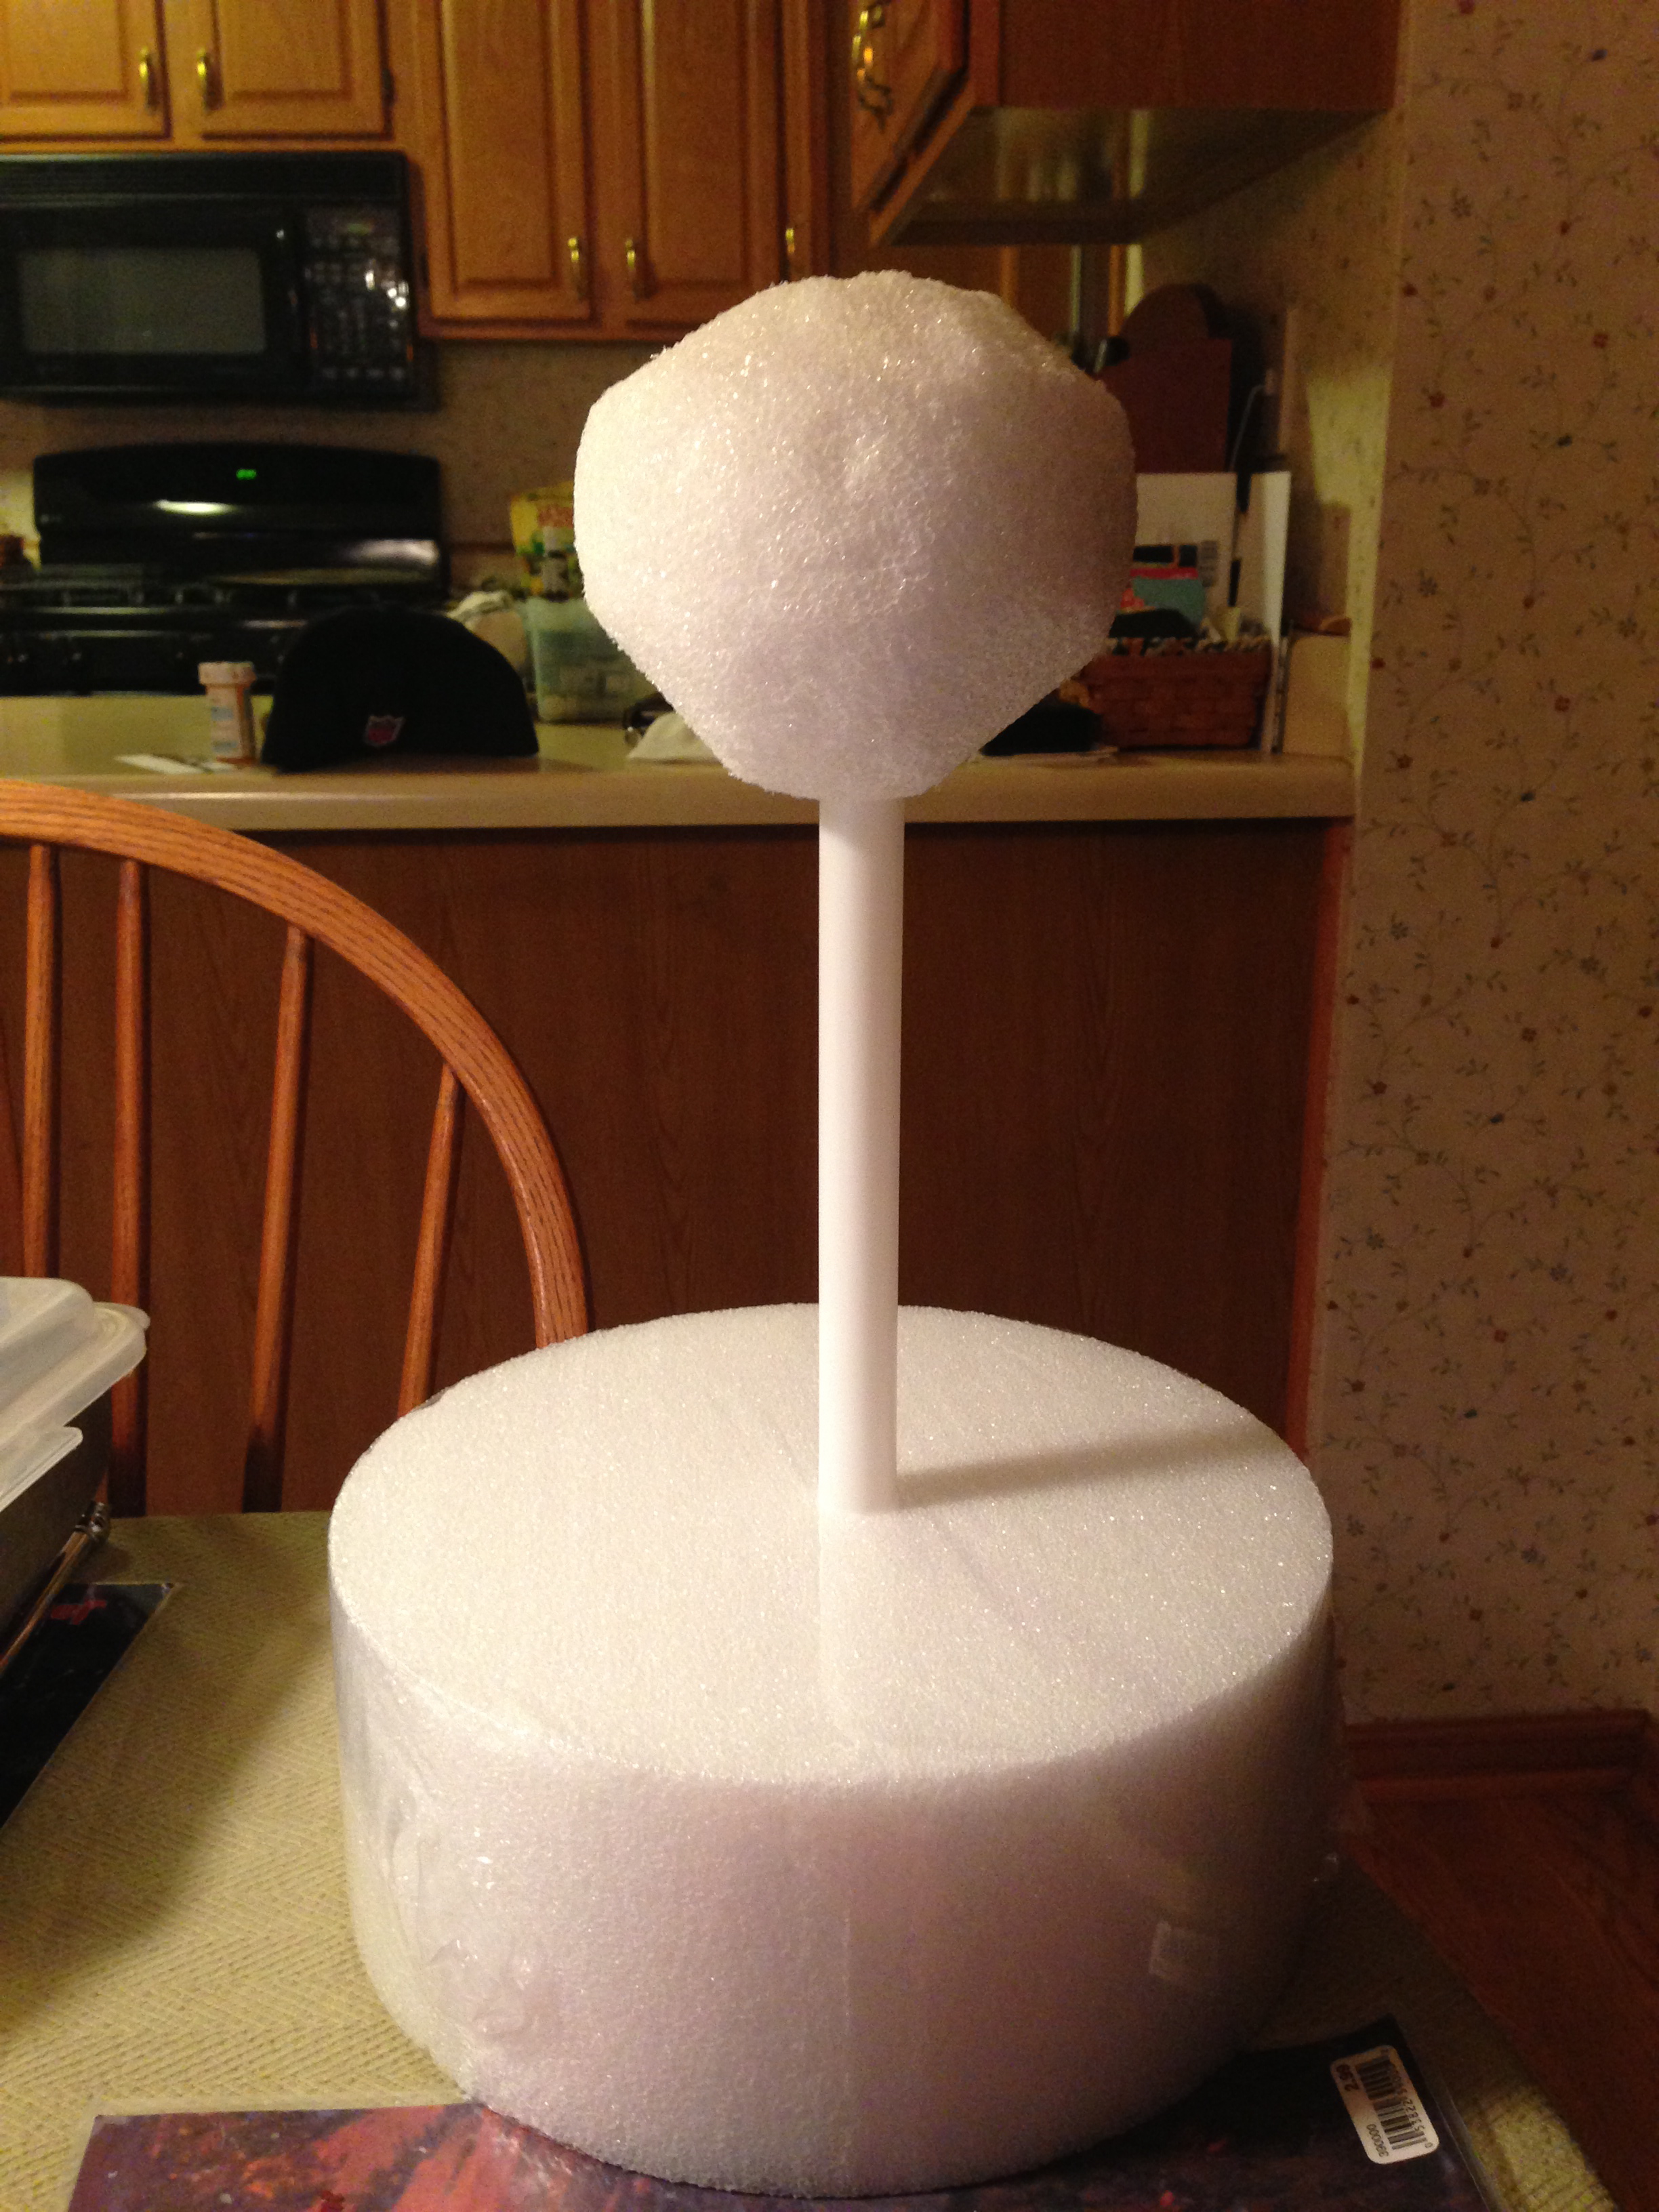
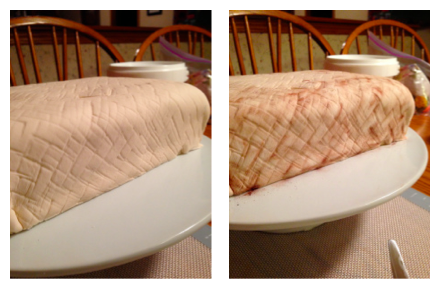
The next step was to create the sign. I just covered a piece of styrofoam with buttercream and then black fondant, and piped the letters with royal icing. Let this dry for a few days and it’s ready to stick on the final cake! Final step- create the actual cake. I used a brick mat to create the brick effect, and then added a little luster dust to create some dimension on the bricks:

cake base bricks

Final version! (I made the sign as it stands currently. Since our graduation, they changed it– I’m guessing they made it curved so that people would stop sitting on it. 🙂 )

Oles with sign

“If you have two friends in your lifetime, you’re lucky. If you have one good friend, you’re more than lucky.”
– S.E. Hinton

It looks like I’m seven times lucky!

Read sign and cake sign

Bucky Badger in Pound Cake Form!

Several months ago, a friend asked me to do a groom’s cake for her daughter’s wedding. “You can do a 3D Bucky holding some Mike and Ikes, right? Great. Thanks!” She promised to send more info and then waved and went on her way.

And I stood there, frozen, with my mouth gaping. No, I do not know how to carve cakes. No, I’ve never had a cake at a public event. And no, I do not like to disappoint people, especially on their wedding day!

But then there’s that little spark inside that pushes me to try something new. “If she thinks I can do it, maybe I can,” the little spark told me. So with much trepidation (and a pep talk from friends), I nervously assented to her request.

So began the research necessary for a carved cake. What type of cake works the best? And frosting? Fondant? How do you transport it? Does it need to be kept cold? How do you attach the head? What’s the best material for making the head? How about my head? Will I lose it during this process?

Armed with google and a determined spirit, I created the following calendar:

  • Two months before: answer the above questions
  • One month before: sketch cake design and figure out dimensions
  • Three weeks before: finalize cake design and purchase materialsStyrofoam head  and base
  • Two weeks before: begin working on the head
  • One week before: bake and freeze the cake
  • 3-5 days before: create gum paste extras
  • 2 days before: make the cake board, thaw the cake
  • 1 day before: assemble (and pray. Lots.)

Here’s how everything went down:

STEP 1: THE HEAD

I decided to use a styrofoam base to carve the head. (Are you supposed to do that? I have no idea!) I purchased some cake pillars from a local craft store that I think are meant to help stabilize cake layers, and I shoved one of the pillars into the head and stuck the other in a large styrofoam dummy cake as the base.

After the base was formed, I began to coat the styrofoam with modeling chocolate. I’ve used modeling chocolate twice before and, let me tell you, something went awry this time. It still made a beautiful finish and was easy to work with once it was kneaded, but I think I can safely say that I gave myself tendinitis just from this one afternoon. I “knead” to learn how to do this better. Haha. 🙂 After approximately 3 hours of kneading (I wish I were joking), most of the modeling chocolate was ready to go.

The photo below shows the modeling chocolate before and after. (The “before” is the crumbly-looking block and the “after” are warm and malleable logs:) modeling chocolate before and afterWith a pile of ready-to-use modeling chocolate by my side, I commenced Head Construction. The photos below show the progress: Bucky Badger head how to

STEP 2: MIKE AND IKE BOXES
For the candy boxes, I used a piece of styrofoam and covered it in fondant. That didn’t work one bit. So I coated it in frosting, then fondant, which worked a little- but the box was lumpy and weird. So I left it as is, waited a day, and then covered the fondant with a thick-ish layer of gum paste, which I managed to sort-of flatten with the rolling pin so it was a smooth surface. That seemed to work okay, but I am certainly not that happy with the result. I cut out little pieces of colored gum paste to form the fruits, candies, and words on the box (I cut the white letters out first, and then laid them on the black and carved around them) and stuck them on with some gum glue adhesive. Next step: let the whole thing dry for a few days, and voila!
(Oh- I only wanted one box for the final cake, but I made two, just in case. Believe me- make an extra copy of all your embellishments.)
Mike and Ike fondant boxes

STEP 3: THE BODY
I have no idea what I’m doing! I don’t even know what a badger is, really! And how do you carve arms on an animal- it’s not like cake can just withstand the powers of gravity without something supporting it, right?! So I decided to just make his arms close to his body and hope for the best. What follows is a series of in-progress photos. My badger ended up short and morbidly obese. :/

Bucky Badger cake in progress When carving the body, repeat after me: “Little cuts. Little cuts. Little cuts.” Once you cut out the cake, it cannot be put back. Carving this body took me two hours, but I’m not sorry! The result was a coffee table that looks like this:
Bucky crumbs

STEP 4: COVERING THE BODY
The final steps went extremely fast. Cover the carved cake in buttercream… and then fondant… and then embellish it:
Bucky Buttercream  Bucky fondant  Bucky embellishment

STEP 5: ADD THE HEAD
Self explanatory! 🙂
(The only thing I would suggest is this: see how Bucky wears a turtleneck? You’ll want to make sure that you carve a little dip into the top layer of cake- where the neck is- otherwise he’ll end up looking more like a giraffe than anything else.)
Adding Bucky's head

STEP 6: SIT BACK AND ENJOY!

Bucky Badger cake

I have to tell you a true story. I almost sliced off his arm. No joke! I was catching up on Season 3 of Downton Abbey and had just finished (or so I thought!) the last episode, so I went back to the carving. And suddenly, out of nowhere, it happened. WHAT?!?! I won’t spoil it for any of you, but if you’ve seen it, you can appreciate how Bucky almost became an amputee.

Thanks for checking out this post. As you can see, I still have much to learn. How do you carve cakes? Do you find pound cake to be the best? Do you have a modeling chocolate recipe or technique that does not cause immediate arthritis? 🙂

Gum paste flowers and… straws!

Finally: gum paste flowers!

I have been waiting and waiting until I could learn how to make these! I loved the first three cake-decorating courses, but I couldn’t WAIT for the last one! I just think these  flowers look so realistic. Everything on the flowers is edible except for the wire stems and the stamens. Pretty neat!

The process of making the flowers is fairly time-consuming, but worth it, in my opinion! The more time you take on the flowers, the better they will look in the end. Spend the time to mix appropriate colors, roll the petals thin, and take care how you lay them out to dry. This will give them life and movement!

If you’re interested in learning how to make these flowers, check out a local craft store near you- they often offer beginning cake decorating classes.

IMG_1957

Now, the cake does look kinda cool– unless, of course, you see it from the backside… yikes.

*Must… improve… cake… design…*

Once I made the flowers, I didn’t really know what to do with them! We didn’t use them in a cake during my final course, so I didn’t exactly know how to use them. My instructor said that they sell tubes that you can insert into cakes and put the flowers into (presumably because the wiring and floral tape is not food safe). But since I was in an experimental and money-conscious mood, I decided to use straws. I have no idea if this is the right technique, but it seemed to work okay at that moment!

…But then you have a cake full of straws… right?

IMG_1966IMG_1967IMG_1964

HELPFUL HINT: Use luster dust around the edges of the petals and leaves for a realistic look!

In this photo below, I used a mixture of orange fondant and gum paste to create the rose. Once the rose was dried (at least a day or two later!), I smudged some luster dust on my finger and dusted the edges to create some dimension.What a difference!

Thanks for reading! Do you have any advice about how to use gum paste flowers in an actual cake? Please leave a comment below if you can help! What am I missing? Or do cakes with flowers also come punctuated with holes? 🙂

Salad Cake

DSCN8981 What does a cake decorator do when asked to bring something to share for “Salad Day” at work? Oh yeah. This is my kind of salad. 🙂

The first step in this cake is to make all of the veggies and lettuce leaves. This takes a while but is very relaxing and fun to do while watching a movie, for example. 🙂 It is imperative that these are made at least a week in advance, otherwise they won’t be dry in time.

I like the leaves to have a little dimension and movement. Therefore, rather than cutting them out of fondant and laying them down flat, I crumpled up wax paper and put the lettuce leaves all over that. This part actually goes pretty quickly- take it from me! I am an extremely fastidious person (that’s the nice way of putting it!) but DSCN8983it’s good if these are done a bit hastily. No two lettuce leaves are unique, right? 🙂

Once you’re ready to put it all together, it’s a cinch! This cake came together in less than an hour! Just stack a few rounds together, carve the bottom in a little (so that it looks like a bowl), and put on the frosting! Smooth the sides (I wanted to add a basket weave, but I didn’t have time) and then add a border on the top and bottom of the bowl.

Once you’ve added the border, it is super simple. Throw on the veggies and you’re good to go! DSCN8993

Lord of the Rings book

LOTR letteringI took a class from Michelle Bommarito (from “Sugar Rush” on the Food Network) on how to create a cake that looked like an antique book! She taught the book construction; the subject matter was entirely my choice. 🙂

The book is simply cake covered in buttercream and fondant. I dusted the cover with gold luster dust to give it an old-fashioned finish. The lettering was definitely the trickiest part! I used royal icing because I wanted a smooth and glossy finish. But I didn’t want it to be thick- I needed a super fine point! So, as if I were a calligrapher from the 1700s, I sat and dipped my pointed stick into the royal icing. Bit by bit, the letters came together! Here are some photos of the finished product:

DSCN0117

Here’s a close-up of J.R.R. Tolkien’s monogram. You can see all the initials of his name. I love it!DSCN0122

I couldn’t resist adding Gollum to at least one photo. 🙂
DSCN0126

Chicago Blackhawks cake

How to create a Hawks logo out of fondant? Cut and layer, cut and layer… (For a more intensive Blackhawks cake, check out my other post here, or here for intricately iced Blackhawks/ hockey cookies, or here for some Hawks jersey cookies, or here for a life-sized puppy cake for Bryan Bickell’s foundation!)

I was sooo out of time with this cake that I didn’t even take one photo. Ridiculous! Unfortunately, you’ll have to rely on my verbal description. 😦

1. Cover cake with white fondant.
2. Roll out a piece of black fondant. Carve the outline of the Blackhawk head.
3. Roll out a piece of skin-tone fondant. Gently lay the black cutout on top of that, and lightly trace the outline.
4. Remove the black piece and place on the cake. Then, using your lightly-traced outline as a guide, go in about a quarter inch and cut out the face. 5. Cut out the indentations marking the nose, mouth, cheek, chin, and forehead. Lay on the black piece.
6. Cut an eye and eyebrow and lay them on top.
7. Cut out the feathers and lay them on top.
8. Use buttercream and pipe the detail on both the feathers and the hair. And you’re done!

hawks cakes

Yoda birthday cake

“Do or do not. There is no try.”

I recently watched these movies for the first time (I know, I know) as part of a year-long project. (I turned 30 this year and made a goal to have 30 new experiences during my 30th year!) Since I’d never seen any of the Star Wars movies, I decided it was high time! And who better to share it with than my dad, the Ultimate Fan? (We once went to a Star Wars concert and there were Stormtroopers milling about. My dad insisted on waiting in line to take a photo with them. There he stood in the long line, the oldest person by at least 40 years… but you’ve gotta admire his tenacity!)

Anyways, of the entire series, the line that stuck with me the most was that one: “Do or do not. There is no try.” When it came time for my dad’s birthday, it was pretty clear that Yoda was the man on the menu!

This was my first experience using modeling chocolate, and let me enlighten you on its many wonders! I’ve used fondant a bit, but with fondant, it’s basically impossible to work out seams. With modeling chocolate, you can stick on another piece and blend the two together so it is seamless. This works perfectly for creating Yoda’s face. Take a look below at the process! Simply start by covering a piece of styrofoam, and then add on from there. Use pointed tools to create wrinkles and other texture. (His face became flattened, a condition from which he never recovered, in between the fifth and sixth pictures, when I accidentally set him down face-first.) yoda 3fixing yoda cake Once the face was finished, it was time to stick it on the body. I had created the body out of a stack of round cakes, with a cup shoved down the center. Let me be the first to inform you to NEVER DO THIS. I had failed to foresee the need for Yoda’s head to need to be on a strong pillar of some sort, something I could stick into the cake. So instead, I was stuck trying to balance it on the cup. Bad plan! Bad plan!

Before I finalized the cup-balancing-situation, I did some last-minute touch-ups, which included my sticking a pole up Yoda’s nose. DSCN0091That part was more fun than I care to admit. 🙂

Oh! The ears! I hate them! They are made of rice krispies and are waaay too thick. I wish I had had the foresight to use gum paste, but by the time I thought of it, it was too late. So instead, I used two blobs of rice krispie treats and formed them into that shape. Cover them with fondant, add some texture and highlighting colors, and put a little candy stick in the end, and there you have it. I just think that they are so thick (especially from this angle here on the left). If I do this cake again, I will create gum paste ears in advance!

Yoda birthday cakeYoda cake inside Yoda cake face

Thanks for reading! Do you have any tricks or tips that would have solved some of my conundrums? How about your favorite line from Star Wars? 🙂

White gum paste roses

Gum gum paste roses smallpaste roses are a time intensive process, but in the end, they look so delicate and beautiful!

It takes a few days to create these, because the buds need to harden. You simply take a small amount of gum paste, shape it into a teardrop shape, stick it on the end of a piece of spaghetti, and let it dry. (The flowers pictured here were created using the Wilton method.)

The flowers on the right are Day 2, when I’ve added another layer of petals. Adding one more layer (below) creates a large and open blossom.

gum paste roses medium

Here’s a question I have- once you’re ready to use the flowers, do you just stick the piece of spaghetti in the cake?! That’s what I did! Once it’s time to eat, you pull them out? How weird is that! Please comment below if you have a suggestion!

gum paste flower cake 

       DSCN9290 DSCN9286

Biking up the hill

I created a bike rider cake for a friend who is into cyclocross. This provided me with #1, the opportunity to learn what that is, and #2, create the world’s cutest little fondant biker man!! Isn’t he adorable?!

fondant biker from front   fondant biker from back

I baked a few rounds of chocolate cake, stacked two together, and then proceeded to cut and stack the rest. Then came the crumb coat, and, can I just say… this was the crumbiest of all crumb coats! The chocolate cake I used was so moist and fresh that it was literally impossible for me to make a clean coat. In fact, in the photo below, it looks like cookies and cream frosting! biker cake hill  biker cake hill with frosting   biker cake covering with fondant

Then came the time to lay the fondant. I absolutely stink at covering cakes with fondant. I would love to practice or something, but it is way too expensive. So I just always roll it out and hope for the best! In this particular case, it didn’t really matter, because it was supposed to be textured anyways. But still. I wish I could be better.

Once the fondant was laid down, it was time to create the path. I painted a bit of piping gel up the hill and sprinkled graham cracker crumbs over the top. Ta-da!

biker cake adding path

biker cake

Fondant animals

Lions and tigers and bears, oh my! It’s a fondant jungle out there!

I have to admit: I really enjoyed working on this cake. It was for a friend’s baby shower at work and though it took me a long time to decide on the theme, I’m really happy with what I chose. The only problem I had was narrowing down which animals I had time to make! 🙂 Each was created with fondant. Most of the limbs were attached with support sticks after they had dried for a day or two. Enjoy! IMG_2321 IMG_2299

IMG_2301

IMG_2316