
 Recently, a friend asked me to make cake pops in the shape of roses for her “Bachelor” finale party. Always up for a challenge, I readily accepted and began my preparation for the event.
In order to fully immerse myself in the experience, I set the DVR for Monday evenings. I could practically feel the machine looking at me confusedly, thinking, “I’m sorry, WHAT do you want me to record?!” Avoiding its accusing glare, I plunked myself onto the couch and flipped on the program.
It’s not that it’s a bad show, it’s just that, for me, personally, hearing the word “connection” used approximately 27 times in 60 seconds is a little much. I’m certainly not one to judge a person’s tv choices- after all, my DVR is equal parts “Friends,” “Ace of Cakes,” “Jimmy Kimmel,” and “The Voice” (not exactly the most cerebral combination of programming) – but I just couldn’t make it happen.
Luckily, I was familiar with the shape of a rose, even without JP’s helpful weekly examples. Read on below to learn how I created this flowery bunch! (For another example of cake pops- Easter eggs!- click here!)
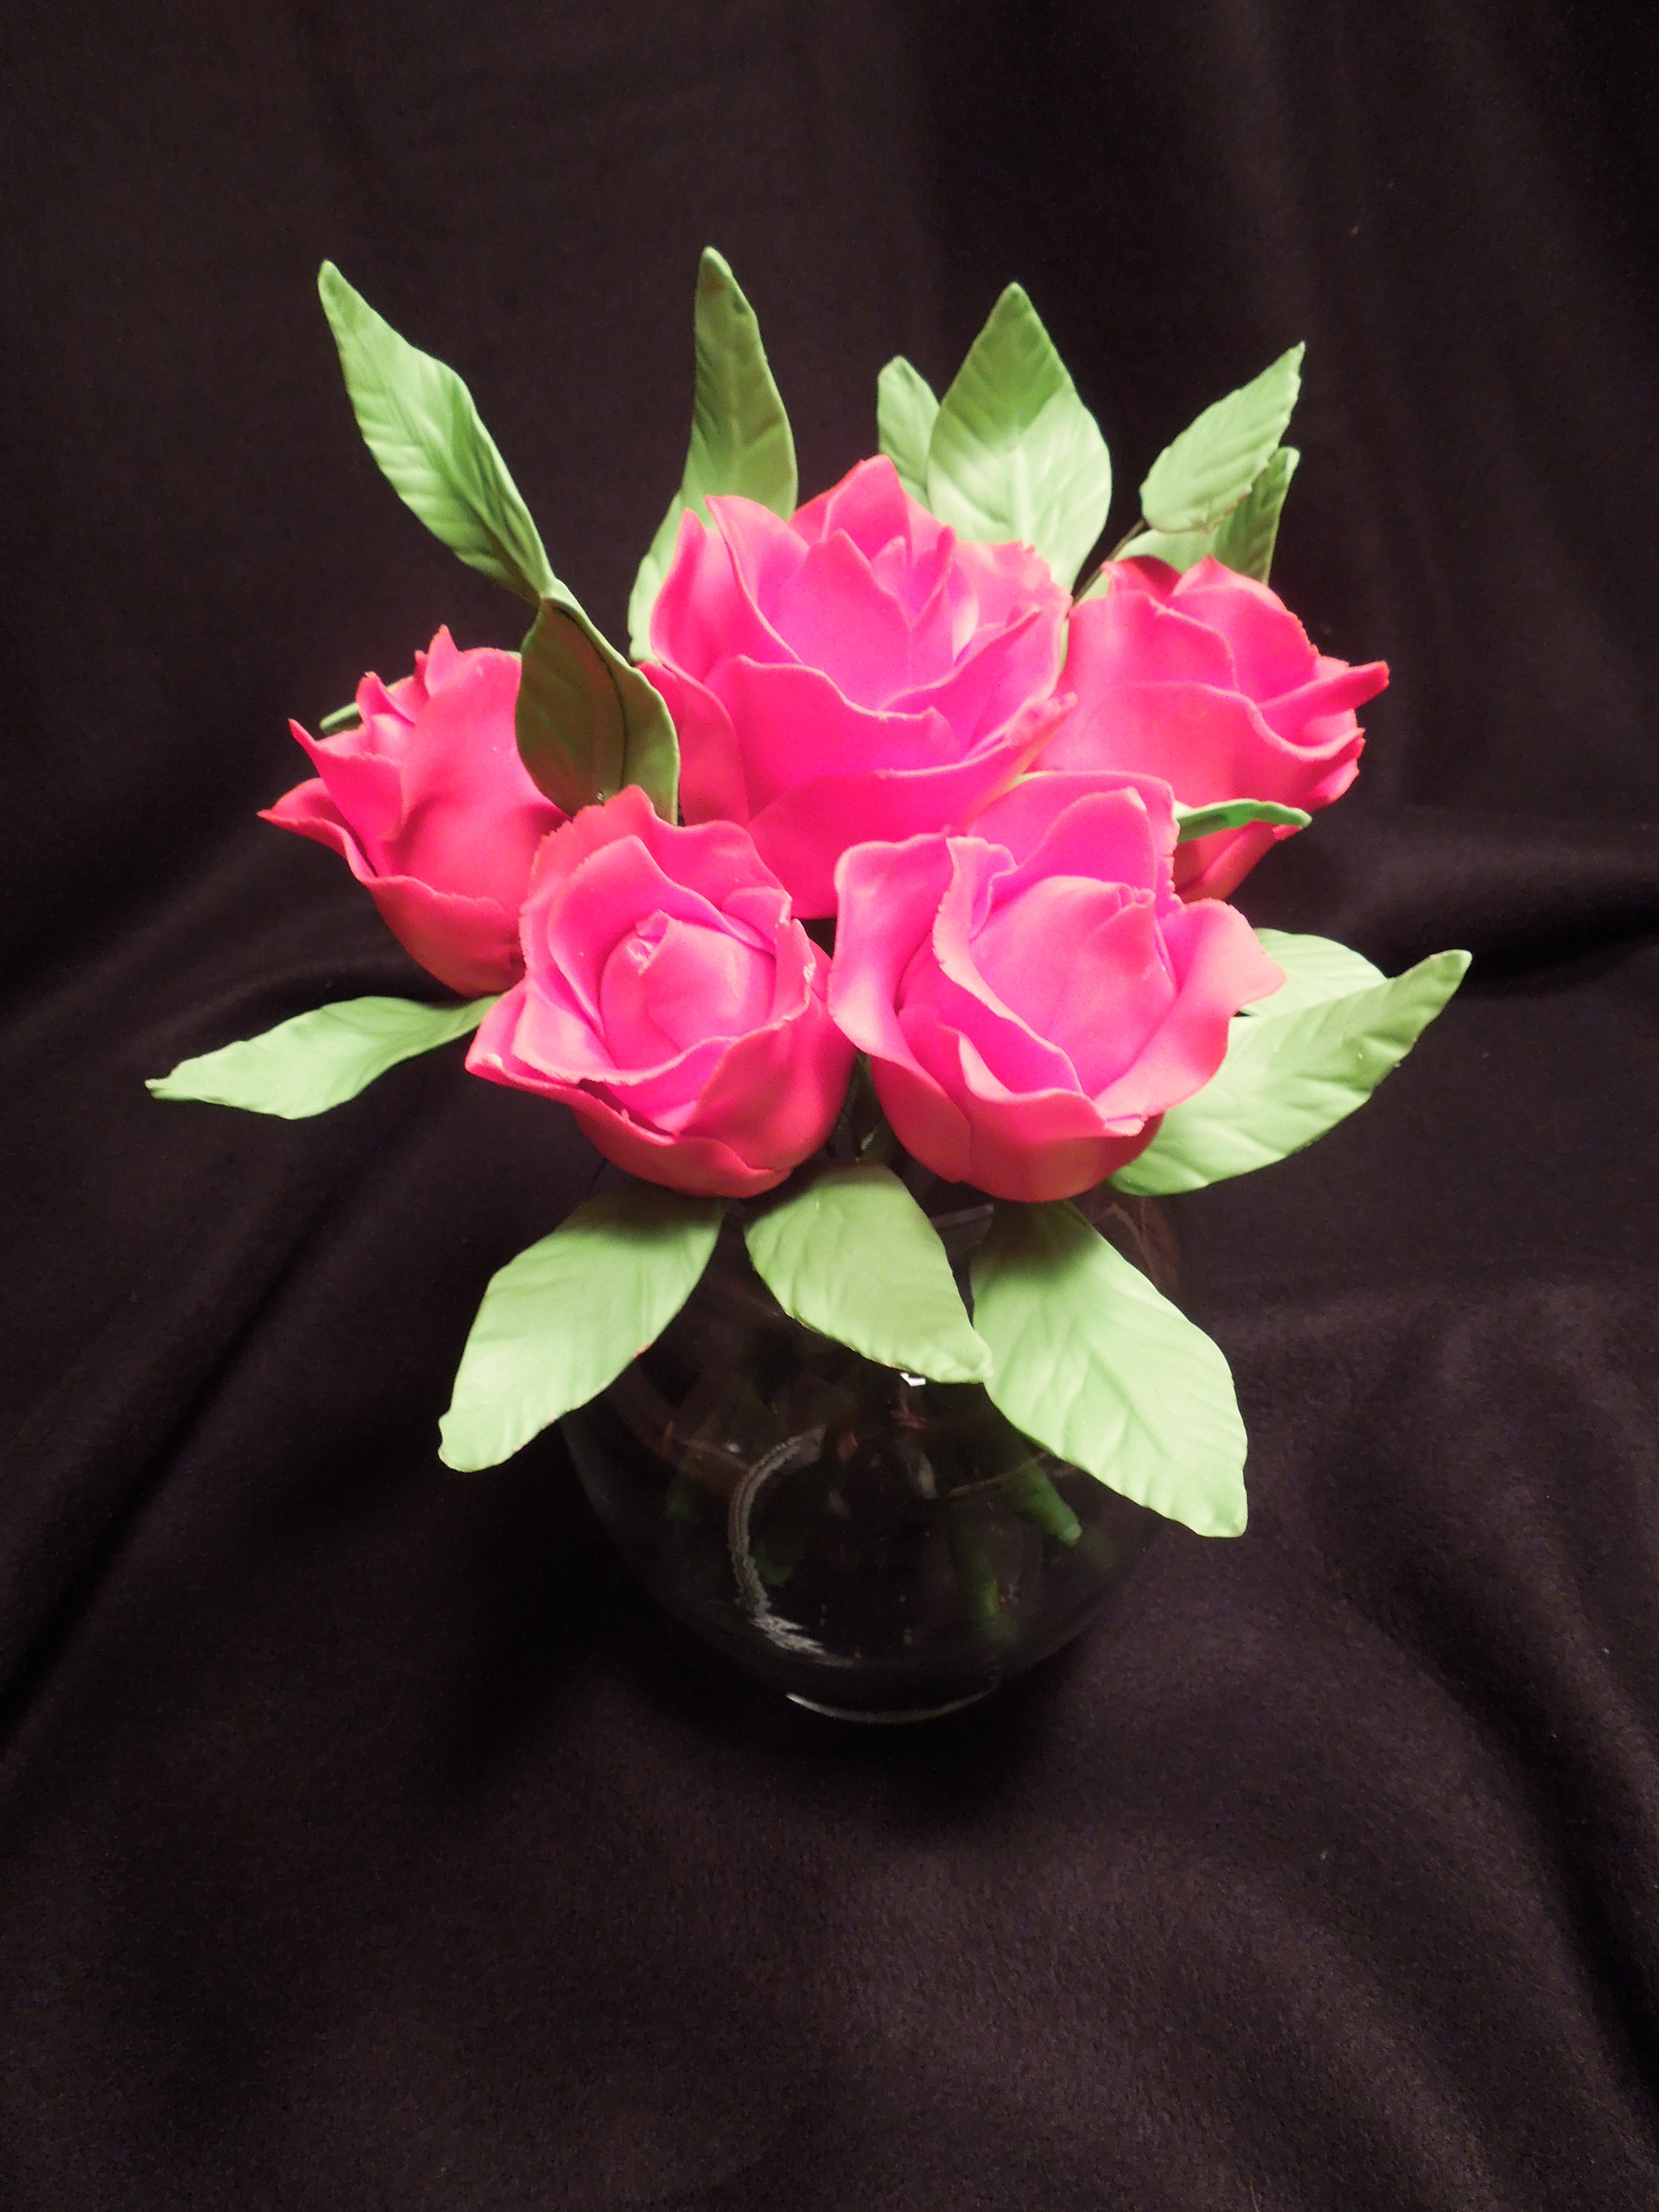
1. Create Leaves: Use green gum paste to form leaves, laying them across crumpled wax paper in order to let them dry in a more realistic manner.
 2. Find a good cake-pop recipe! I tried this one from Bakerella. (Check out her site– it’s amazing! She’s the cake pop queen!) This recipe could not have been easier, and tastes so delicious! Of course I needed a red velvet recipe, since I was doing red roses. 🙂
 3. Form cake pops into a teardrop shape. This will help create the illusion of a flower bud.
 4. Cover cake pops with melted chocolate. I wanted the pops to be really secure for this project, so I dipped the end of the stick into the melted chocolate before I stuck it into the pop. This will help the pop adhere to the stick. Once that has hardened, dunk the entire pop into the melted chocolate. To dry, put the sticks into a piece of styrofoam.
 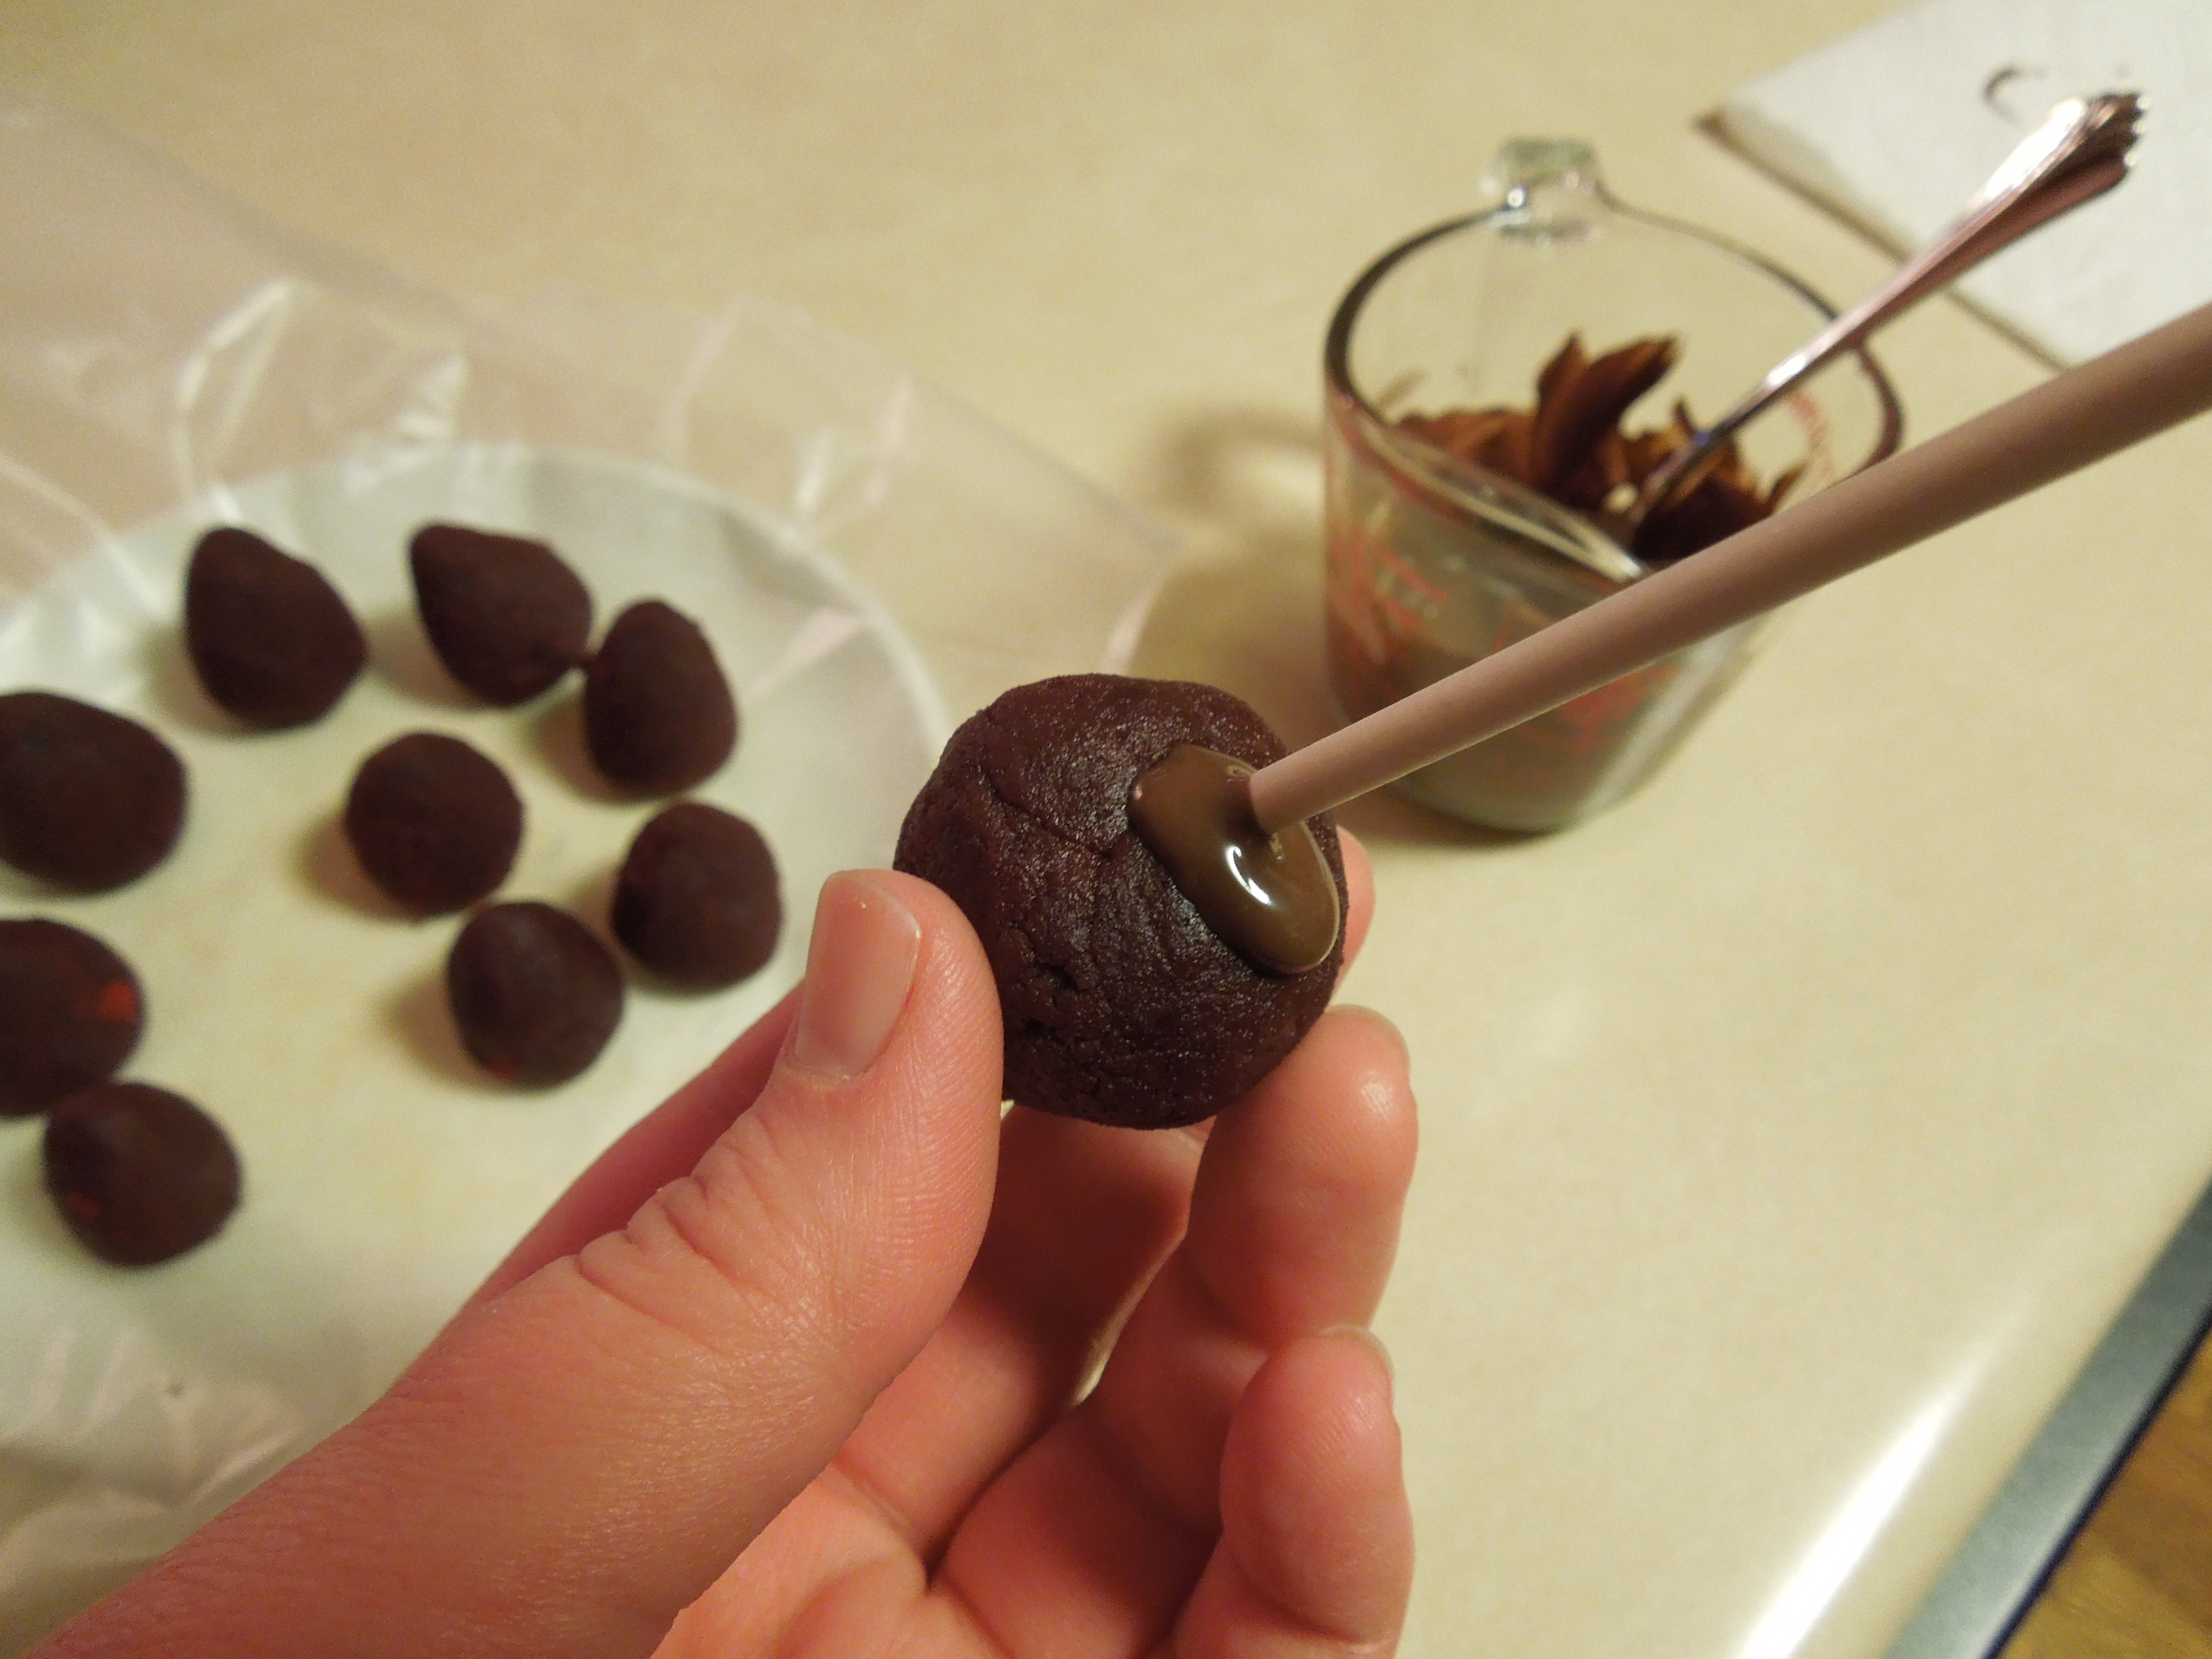 5. Cut out petals. I didn’t have a petal cutter, so I just used my spatula to cut out petals. (The modeling chocolate rolls out easily.) Luckily, with modeling chocolate, any seams or extra bit can just be smoothed out (unlike fondant). Before putting the petal on the flower bud, I pinched the edges to make them very thin. This will give it a more realistic appearance.

6. Layer petals around flower bud. Use your artistic eye to find a pleasing composition! I found that 2 petals around the chocolate bud, and then two petals around that (going the opposite direction, so as to cover the seams), and then three petals around that, created a pretty rose. To make a bigger rose, keep adding petals!

7. Add leaves. Carefully twist the wired ends of the leaves around the cake pop stick. Once they’re twisted, and the pointy ends are pushed down, cover with green modeling chocolate.

8. Artfully arrange flowers in a vase.


How beautiful! Are they aromatic? Chocolate of course! Another amazing creation!
LikeLike
Unbelievable…hard to believe all of the work that goes into a single cake pop…they are gorgeous!!! How about a bouquet of them for Valentines Day?
LikeLike
I don’t know how you do it, beautiful job
LikeLike
Hello… Its beautiful…
Would like to ask are the leafs edible i mean it’s wire inside. Or its just for show… For the pops i can use modelling chocolate and for leafs its gum paste for show right
LikeLike