Finally: gum paste flowers!
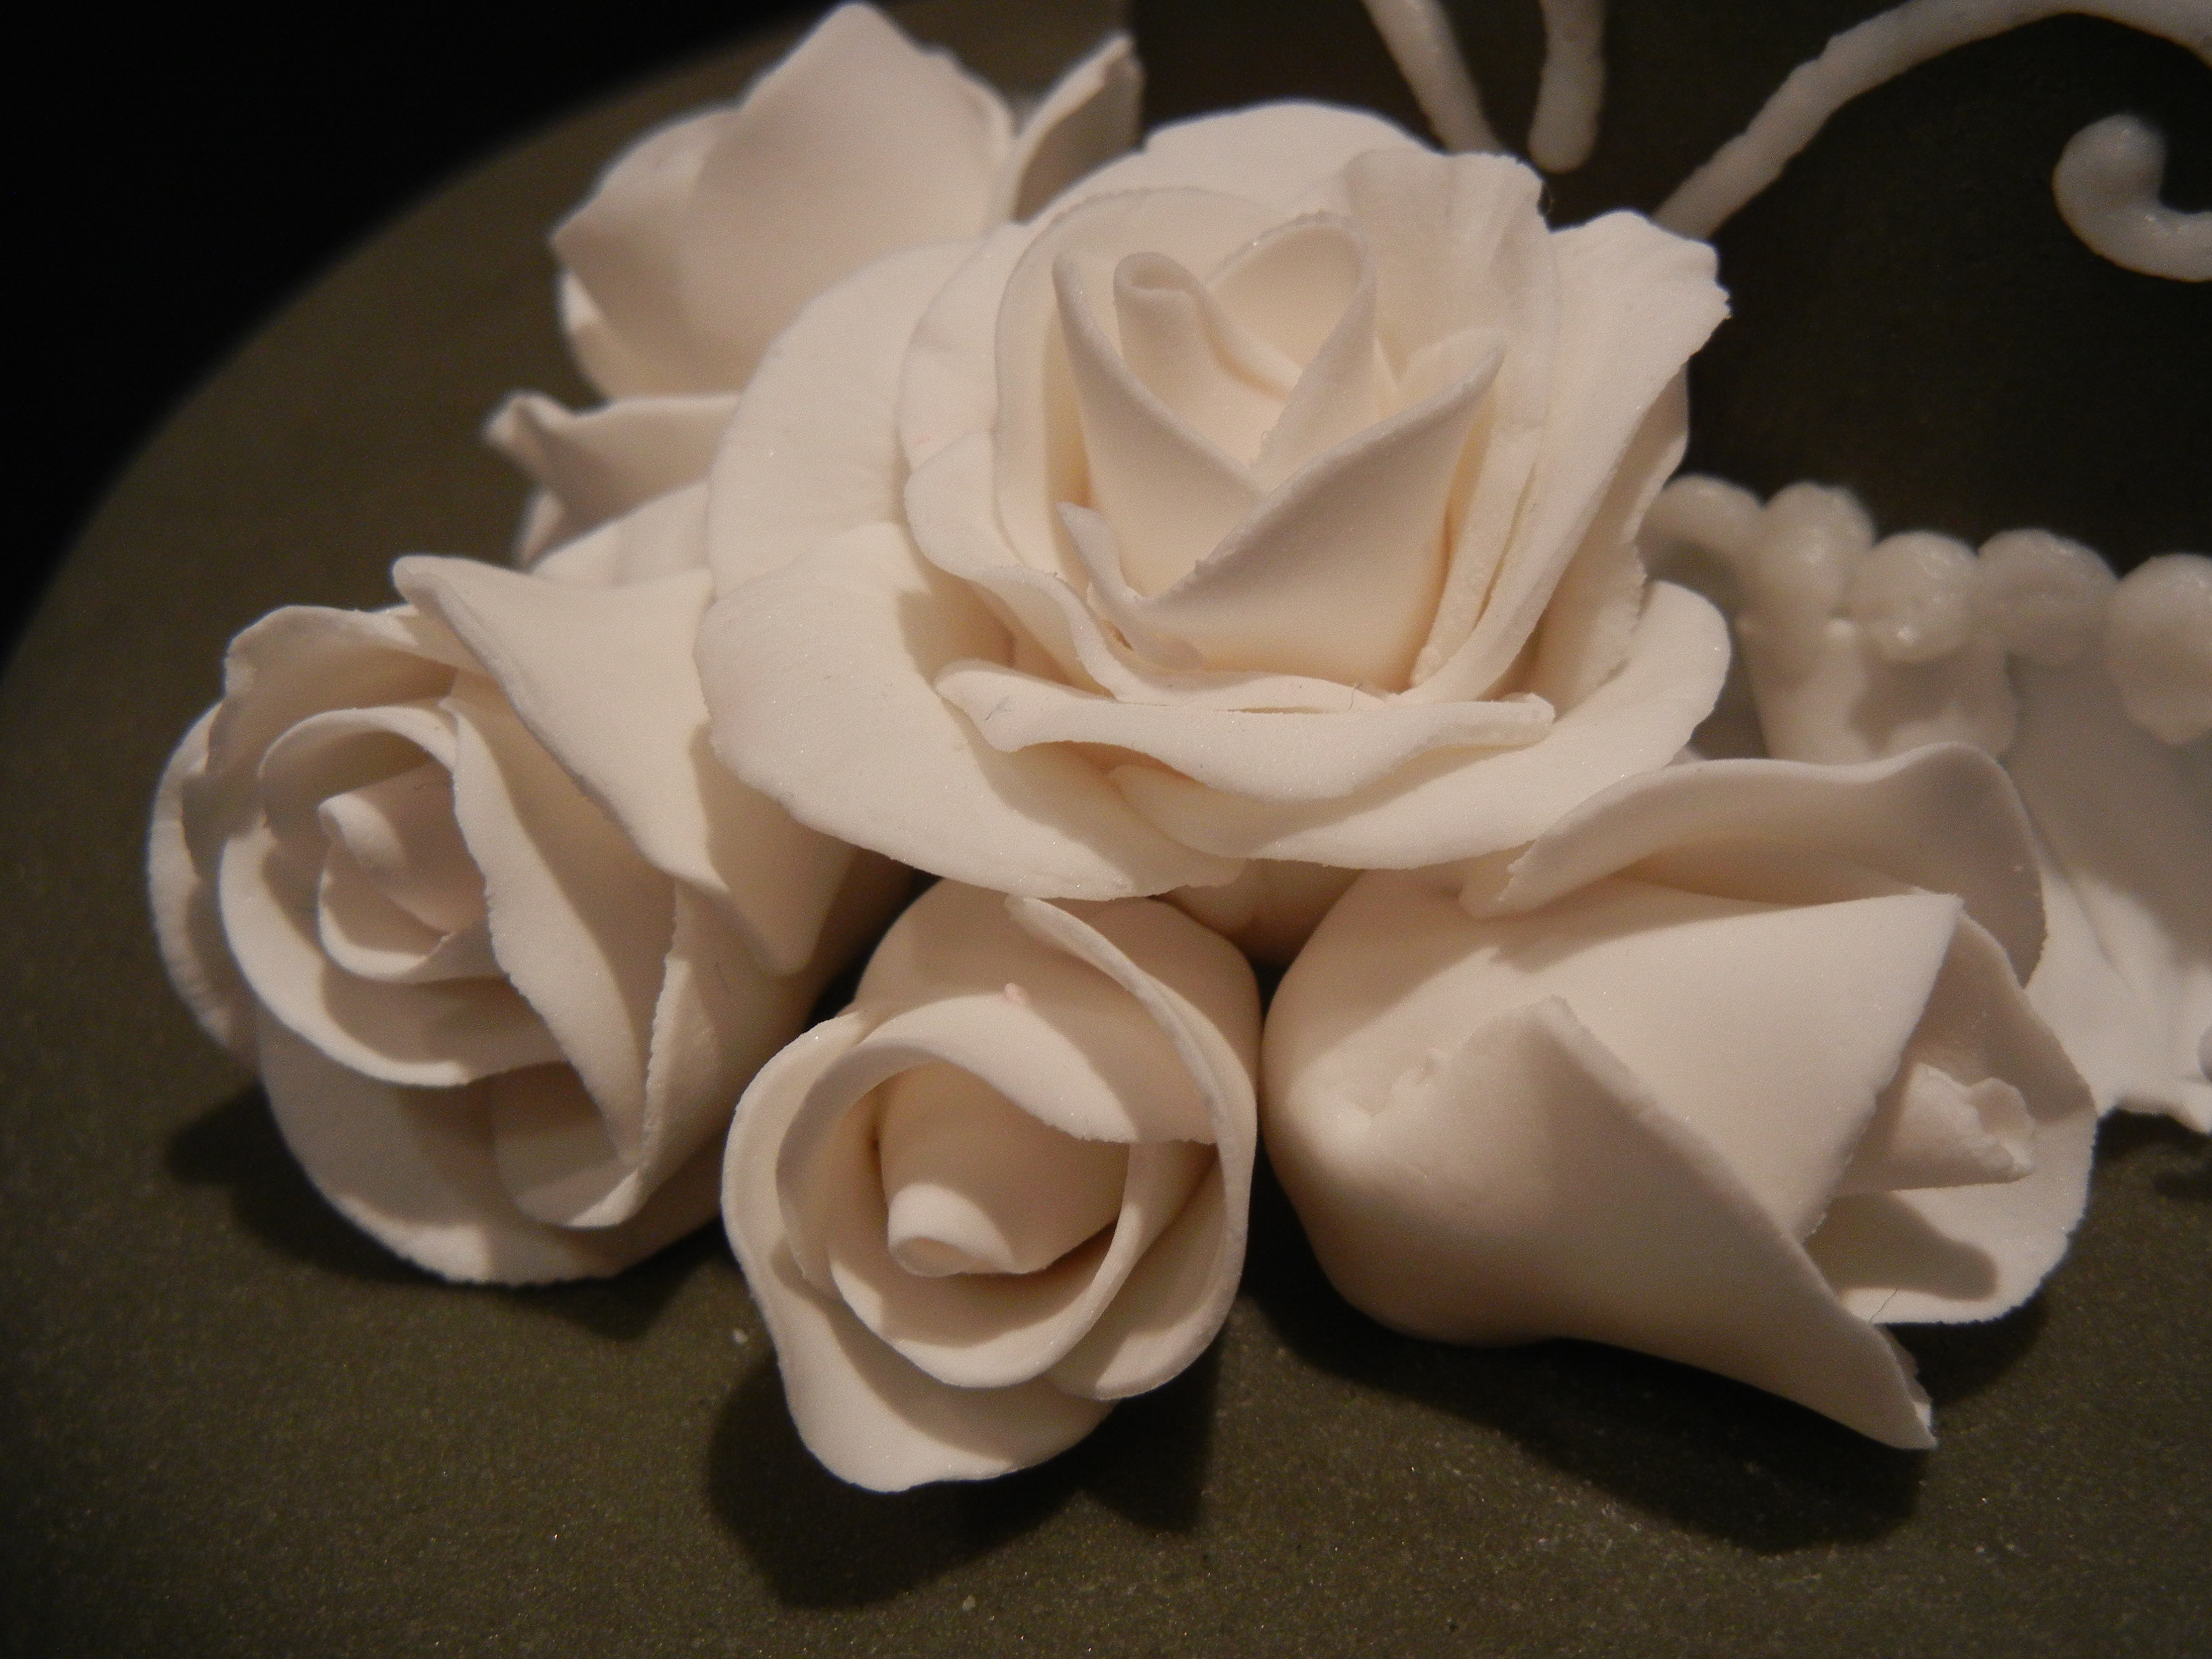
I have been waiting and waiting until I could learn how to make these! I loved the first three cake-decorating courses, but I couldn’t WAIT for the last one! I just think these flowers look so realistic. Everything on the flowers is edible except for the wire stems and the stamens. Pretty neat!
The process of making the flowers is fairly time-consuming, but worth it, in my opinion! The more time you take on the flowers, the better they will look in the end. Spend the time to mix appropriate colors, roll the petals thin, and take care how you lay them out to dry. This will give them life and movement!
If you’re interested in learning how to make these flowers, check out a local craft store near you- they often offer beginning cake decorating classes.

Now, the cake does look kinda cool– unless, of course, you see it from the backside… yikes.
*Must… improve… cake… design…*
Once I made the flowers, I didn’t really know what to do with them! We didn’t use them in a cake during my final course, so I didn’t exactly know how to use them. My instructor said that they sell tubes that you can insert into cakes and put the flowers into (presumably because the wiring and floral tape is not food safe). But since I was in an experimental and money-conscious mood, I decided to use straws. I have no idea if this is the right technique, but it seemed to work okay at that moment!
…But then you have a cake full of straws… right?


HELPFUL HINT: Use luster dust around the edges of the petals and leaves for a realistic look!
In this photo below, I used a mixture of orange fondant and gum paste to create the rose. Once the rose was dried (at least a day or two later!), I smudged some luster dust on my finger and dusted the edges to create some dimension.What a difference!

Thanks for reading! Do you have any advice about how to use gum paste flowers in an actual cake? Please leave a comment below if you can help! What am I missing? Or do cakes with flowers also come punctuated with holes? 🙂