
 Being a Pinterest/ Facebook/ Twitter fan, I have been seeing many Thanksgiving treats in my news feed recently. Adorable “gobble gobble” cookies, cakes in the shape of turkeys ready to carve, cupcakes with pilgrim hats… but I had yet to come up with an idea of my own. I saw a post with a pumpkin bundt cake recipe that looked heavenly, and it occurred to me: a bundt cake has ridges. A pumpkin has ridges. What if I covered a bundt cake with fondant? It would actually look like a pumpkin, right?
I’m sure there are about a million people that have figured this out already, but I’m a little slow to the party! So here is my attempt at a pumpkin cake!
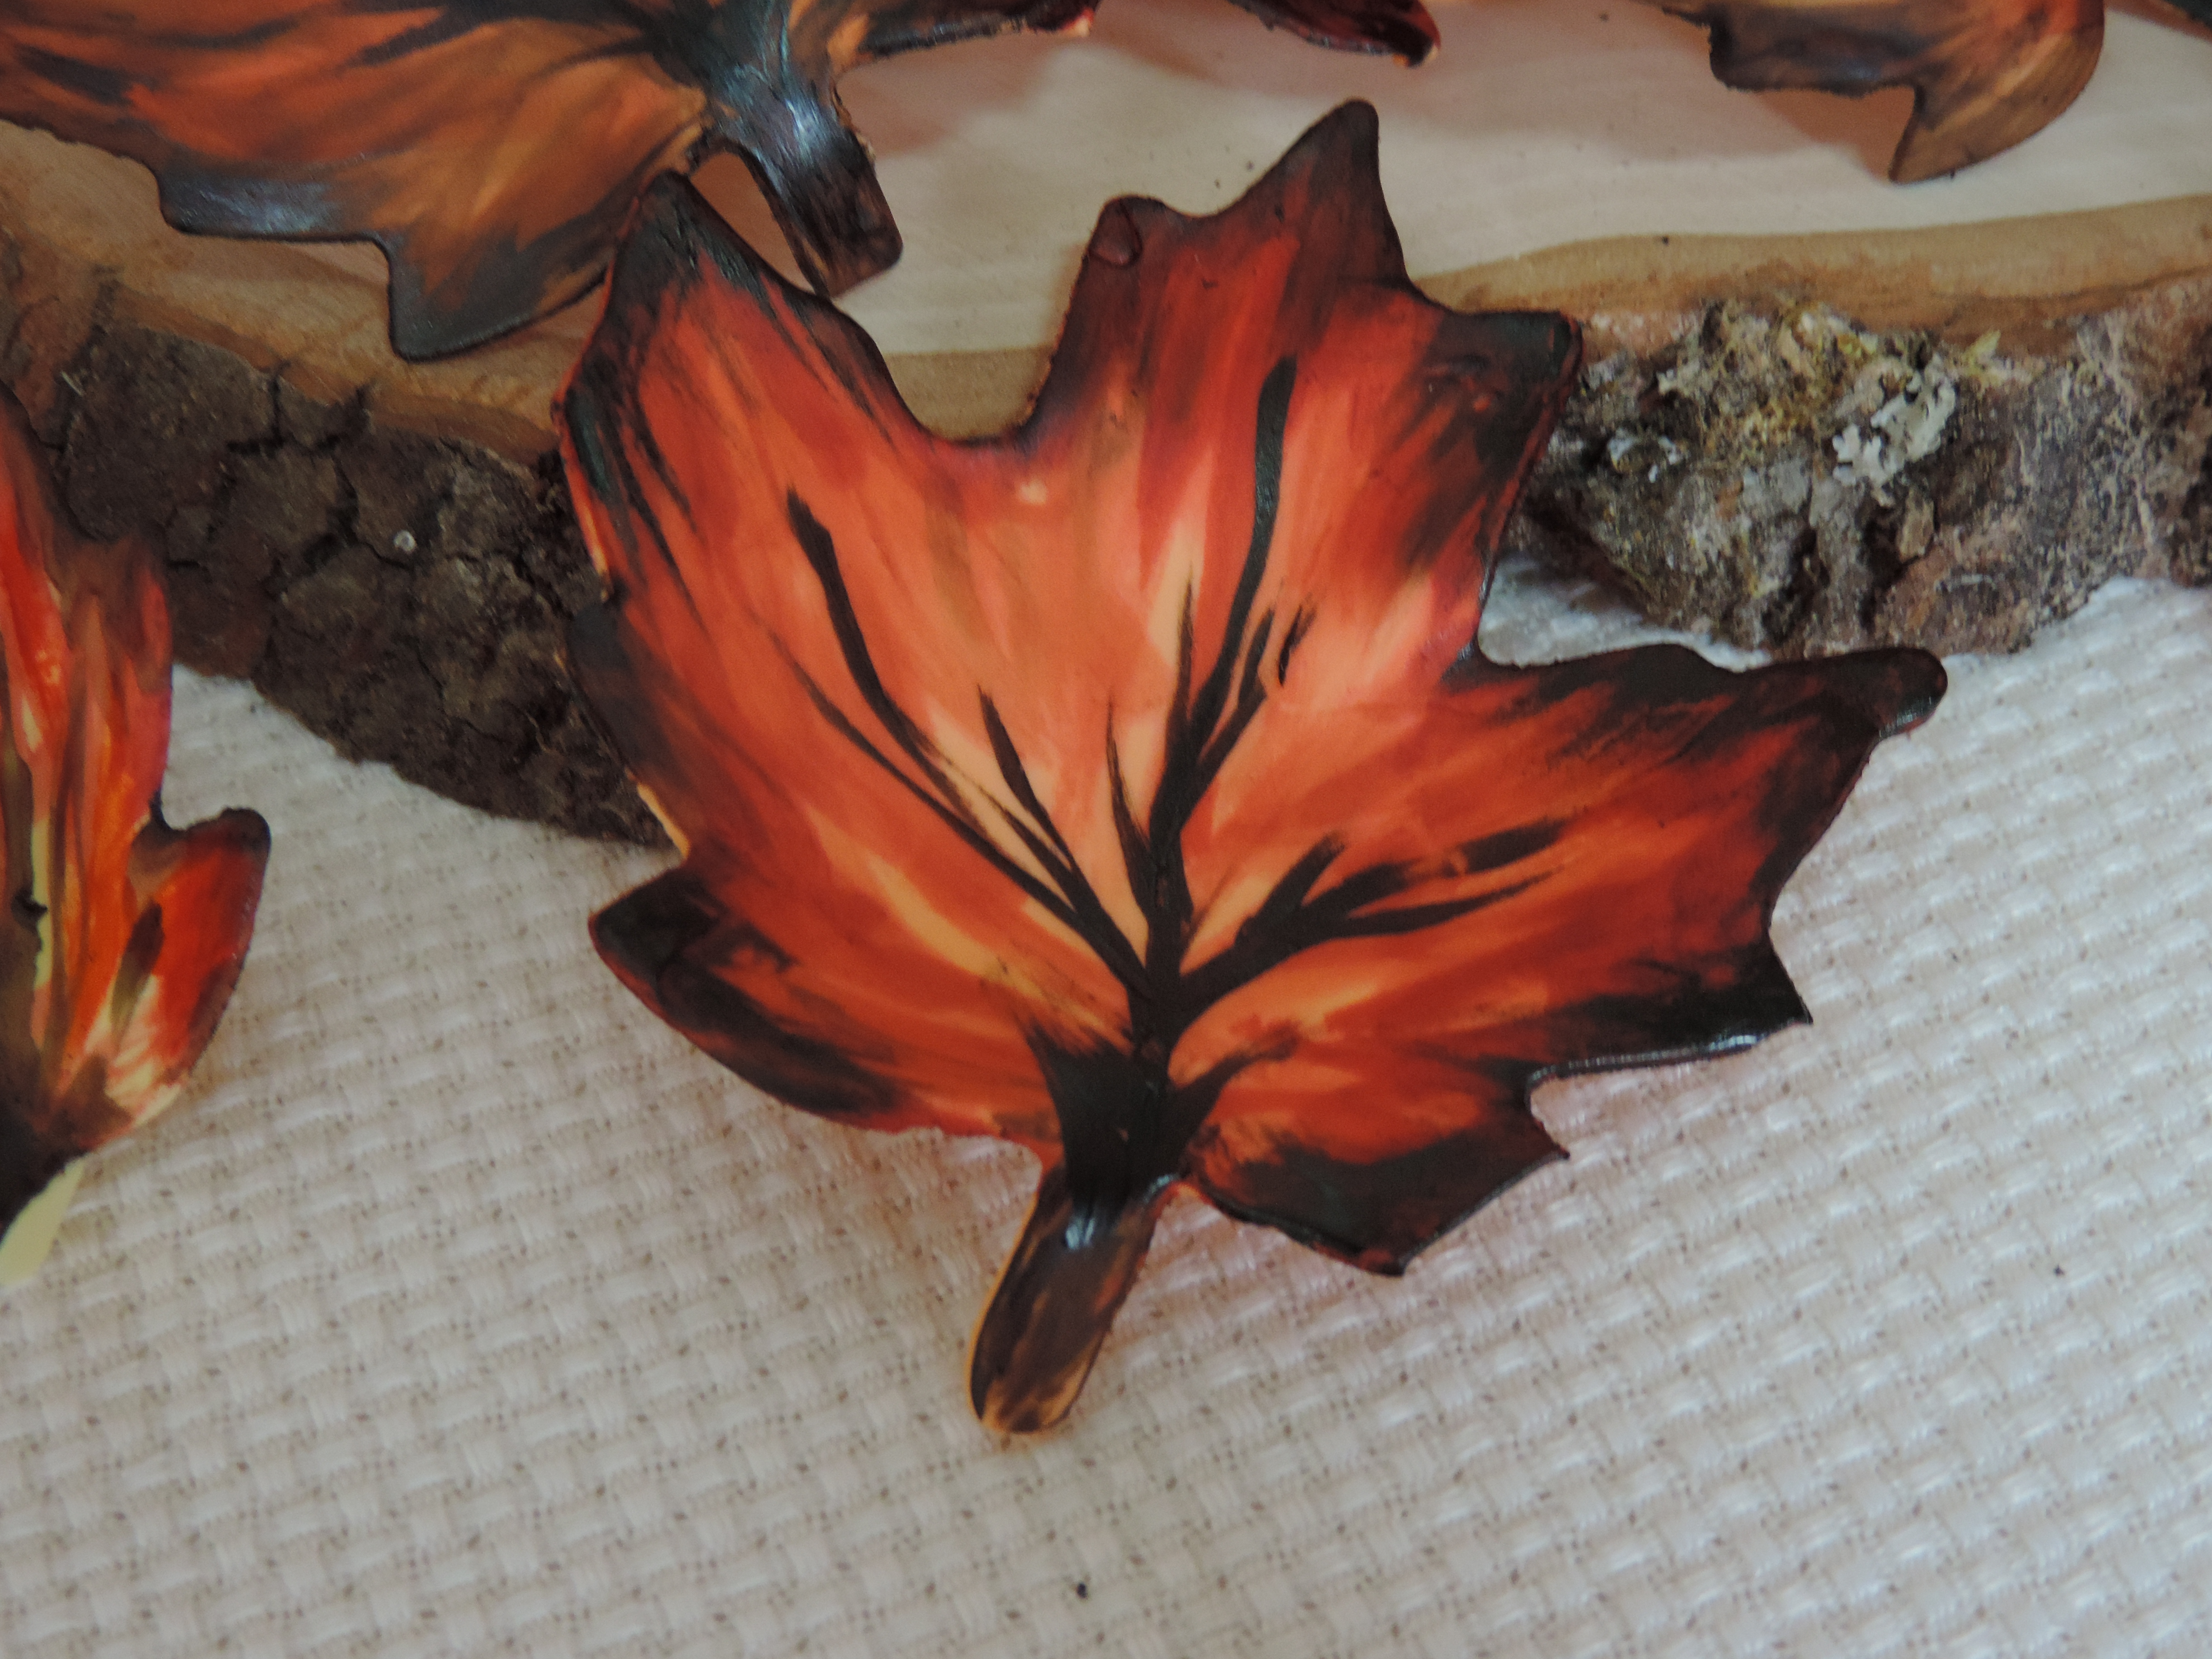
STEP 1: Create the Leaves
1. Color your gum paste/fondant mixture a light yellow or orange. (I did a bit of each.)
2. Roll out very thinly and use a leaf cookie cutter to cut shapes.
3. Drape the leaves over crinkled wax paper so they do not dry flat.
4. Wait for leaves to dry. (best to wait at least a day or two, though I did mine only about three hours later. They were still a little soft but, ever the procrastinator, I was out of time.)
5. Scoop out a bit of brown, red, and orange food coloring and put them in separate parts of a plate. Dump a bit of lemon extract in the center of the plate. (The extract dries really quickly so you’ll need to keep getting more!)
6. Using a paintbrush, paint your leaf! Save the darkest bits for the highlights at the end.
 STEP 2: Make the Cake Look Like a Pumpkin
1. Cook two separate cakes in a bundt pan. When the cake cooks, it will end up with a domed top- you’ll want to slice that part off. (And eat the scraps while it’s warm….believe me, you’ll want to, because as you cook this recipe, your kitchen will be smelling more and more like heaven!)
2. Wait for cake to cool. Use this time to eat all the scraps. And also paint more leaves if you’re feeling ambitious.
3. Place one cake with the cut side facing up, and cover the top with frosting. Place other cake on top, making sure to match the ridges on the sides.
4. Cover the entire thing with frosting.
5. Drape an orange piece of fondant over the cake.
6. Press fondant into the ridges. If you had coated it liberally with buttercream, this is helpful, because you’ll have deeper and more prominent ridges.
7. Paint highlights onto your pumpkin. I used a light orange fondant as a base, because I wanted some light orange highlights on the ridges. If I had used a darker orange, I would have needed to paint a light orange highlight- and food coloring doesn’t cover that way. Imagine taking a dark orange crayon and coloring on white paper. Then, imagine picking up a yellow crayon and trying to make a yellow part on top of that orange. Doesn’t work, right? Food coloring is the same. Your “base” needs to be the lightest color, and you have to paint on the rest. 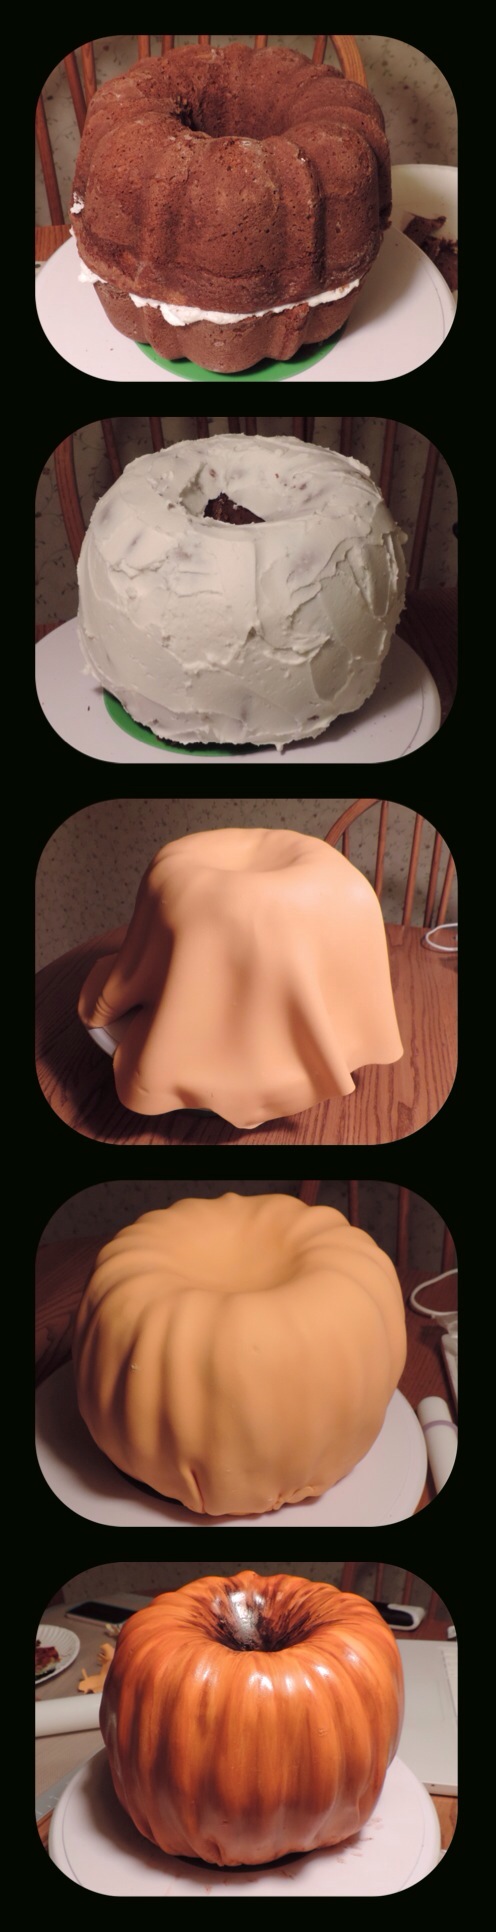 STEP 3: Create the Stem
1. Take a brown lump of fondant and make it look like a stem… I really don’t know what else to say. 🙂
2. Take a toothpick and make little points in the top of the stem, because pumpkin stems really do have that prickly sort of top!
3. Paint with green and brown food coloring.
 STEP 4: Place as Centerpiece!
See how long it takes your family to realize that it’s a cake!
 STEP 5: Cut open and enjoy! 🙂
Happy Thanksgiving, everyone! 

Oh how neat! When I first saw the image in my reader feed, I thought it was a real pumpkin. I only scrolled back up when I realized the post title was something about cake! Fantastic job, and it looks delicious!
LikeLike
Haha, I’m glad you liked it! Took the family a bit to realize it was a cake, too. 🙂
LikeLike
Reblogged this on Pearl St. – Holidays and commented:
This blog is full of great recipes and ideas !
LikeLike
Thanks for reblogging! And thanks for reading! 🙂
LikeLiked by 1 person
Beautifully done!
LikeLike
Thank you! It was a fun one!
LikeLike
Wow this cake looks amazing, love the result!
LikeLike
You did a great job on getting a realistic coloring. AWESOME!
LikeLike